How to Roof with Asphalt Shingles
When you’re building for animals, the roof is what makes a shelter a home. Here’s how I learned to use the book system, the steady rhythm of cutting and laying shingles so the roof sheds water and stays strong.
Cost: 60
Equipment
- Nail gun or hammer
- Utility knife
- Chalk line
Ingredients
- Asphalt shingles 3-tab works great
- Roofing paper or underlayment
- 1 ¼ " galvanized roofing nails
- Black Jack or roofing sealant
Instructions
- Underlayment: Roll roofing paper over the deck, overlapping strips by a few inches. Smooth it flat. This is your dry, even foundation.
- Starter Course: Begin at the bottom edge. Some builders flip the first row of shingles upside-down so the tabs don’t align with the course above. Either way, make sure that first row hangs just over the edge to guide water away.
- The Book System: This is where order matters. You’ll cut shingles in a stair-step pattern so no seams line up.Think of it like flipping through a book: each row shifts over, one page at a time, until you’re back where you started. The result is seams that never stack, which means water never sneaks through.First Course: Lay a full shingle.Second Course: Cut 6" off the left end, then lay.Third Course: Cut 12" off.Fourth Course: Cut 18" off.Fifth Course: Cut 24" off.Sixth Course: Start again with a full shingle directly above the first.
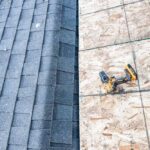
- Nailing: Each shingle gets four nails, just above the tab cutouts. Keep nails straight, not angled. With a nail gun, set the pressure so the nails sit flush with the shingle, not sunk deep.
- Overlap & Trim: Expose about 5" of each shingle. Stagger rows cleanly, trim at edges, and keep lines straight with a chalk snap.
- Seal the Work: Dab Black Jack over exposed nails, ridge caps, and seams. It takes a few extra minutes but buys years of protection.
Notes
Comment below your thoughts or questions!