

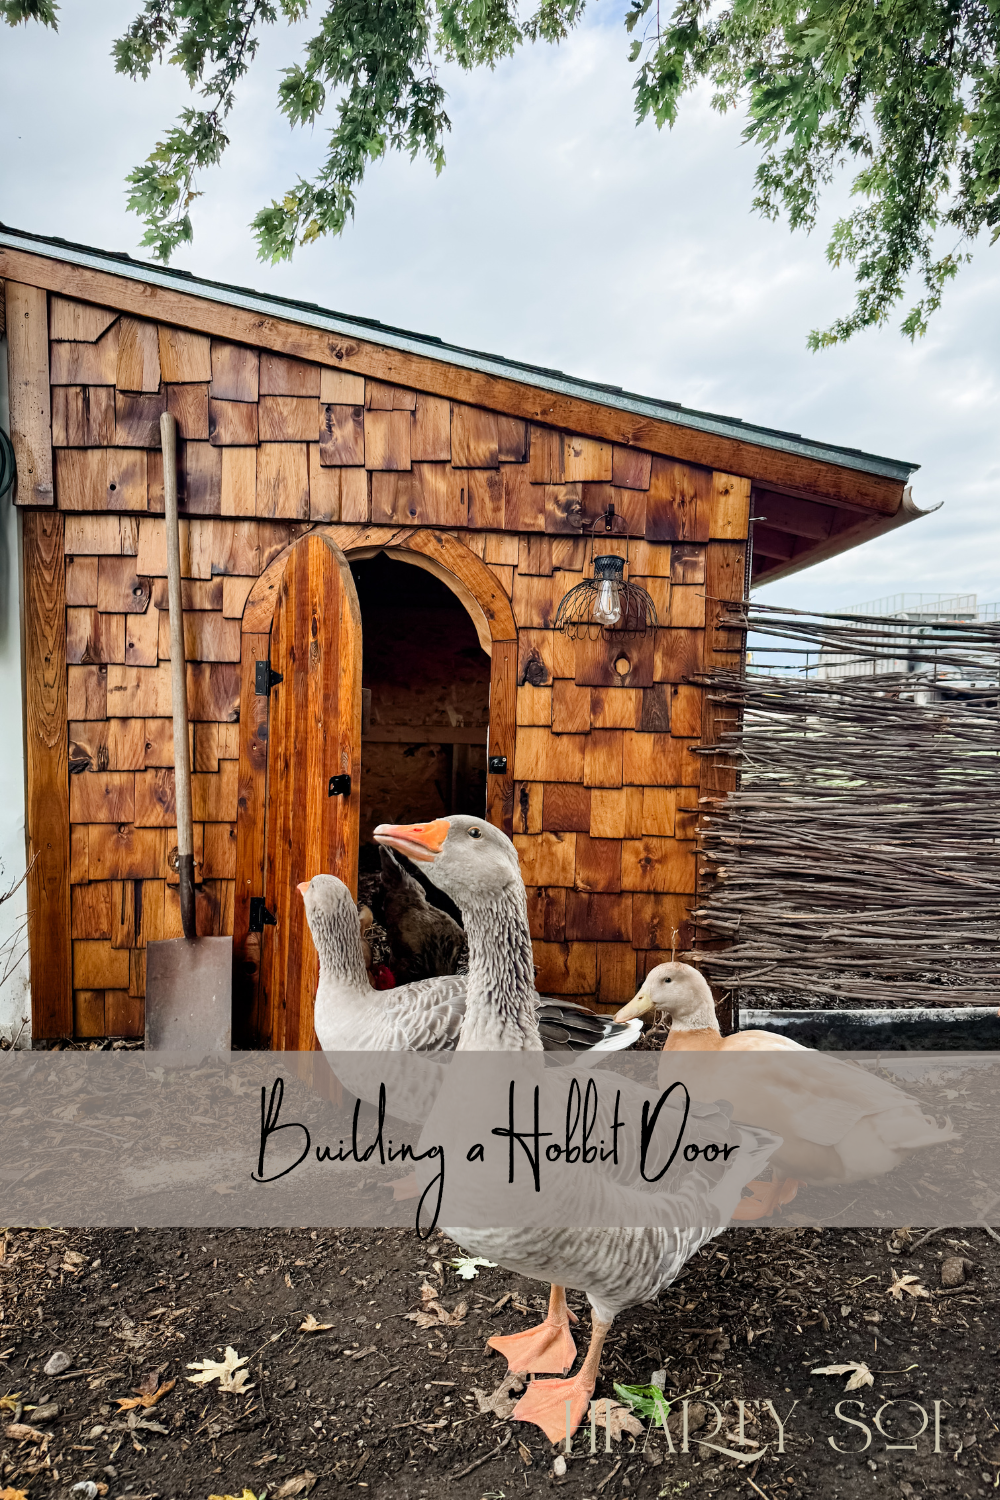
How to Build a Rounded Hobbit Door with Trim
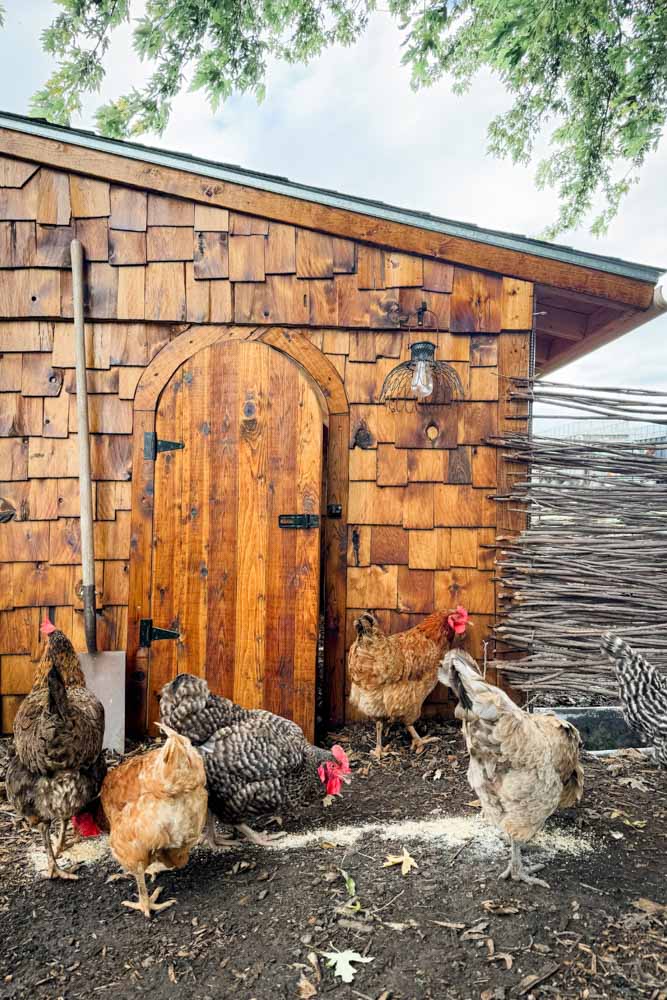
Every good coop or shed deserves a little whimsy. Ours came in the form of a hobbit door and a round window—because why not? A farm is full of chores and straight lines; it’s a gift to break that up with something unexpected. Plus, I needed to add this to my carpentry resume.
A Decorative and Practical Addition
Made popular by the imaginative works of J.R.R Tolkein, hobbit doors are made for small creatures, a decorative entrance to their cozy homes which makes it the perfect decorative addition for our feathered friends.
While our hobbit door isn’t dug into a hillside, it still serves its purpose as a whimsical bit of privacy for our animals. I like how it adds a unique fairy-garden-like look to our backyard and I was ready to take on the challenge of cutting a rounded piece of plywood.
Materials You’ll Need
- A sheet of plywood (for the door base)
- Cedar planks (to face the door and match siding)-optional
- A large compass (or a homemade one with a pencil and string)
- Jigsaw
- Strap hinges
- Decorative iron handle or latch
- Trim boards for the door edge
- 1x2s or similar for door stops
- Exterior wood sealer or finish for weatherproofing


Making Your own Hobbit Door
Step 1: Cutting the Circle
Use your compass to mark a perfect circle on the plywood. I just cut mine out of the existing wall of my new lean-to. If you don’t have a big enough compass, tie a pencil to a piece of string, anchor the other end in the center, and draw it that way.


BEFORE YOU CUT:
It will be super tempting to want to get the jigsaw out and cut this rounded door out. But, let me save you some frustration. This is the best trick! Tack some trim boards up so you can trace out your trim pieces for both the outside and the door itself, while you’ve got your pencil/compass still in place.
I used some left over 1×10 boards and arranged them to cover the full arch first for the outside and then marked them. I didn’t create actual door trim on the face of my door, but if you wanted to, you could just pull the outside door trim down, place door-facing trim on the inner arch and repeat the process. Make sure to clearly label which piece goes where, then follow all the lines carefully with your jigsaw.
NOW that you have everything traced and lined up, you can cut out your door and then your trim pieces. I used a jigsaw for all of it.


Step 2: Building your Hobbit- Round-Top Door
Building the actual door is super simple. Clamp the planks, screw in a support on the top and bottom and add a brace, if needed. I sanded all my pieces down really well so the door can fit easily in and out of the door hole.
Step 3: Adding Trim
Attach the trim pieces to the door’s face and edges of the frame.
Step 4: Building Stops
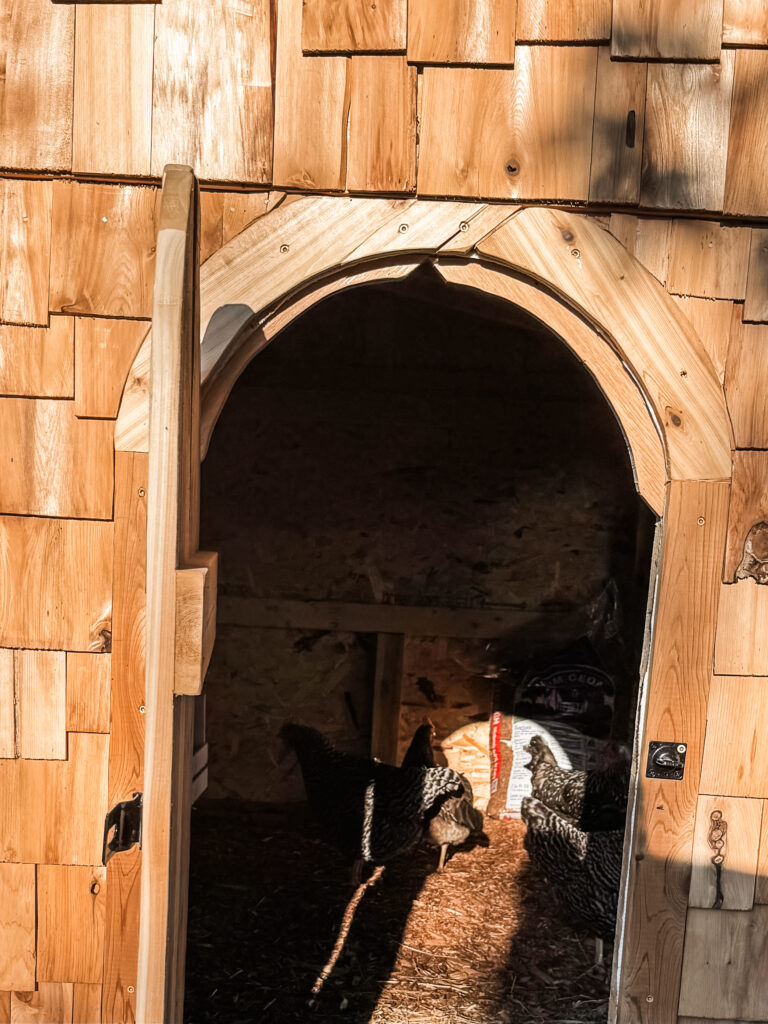
Inside the doorway, attach thin boards (1x2s work well) around the frame. These act as “stops,” giving the round door something to close against and sealing out drafts. Cut the stops to follow the curve of your doorway—several shorter pieces joined together can make the bend.
Step 5: Hinges That Can Handle It
I took a brace piece and temporarily screwed it to either side of the frame, so I could have my hands to mount the hinges onto the framing of your coop, so the weight is supported. Also make sure there is good clearance below so the door can open and close easily.
Step 6: Handle, Latch & Weatherproofing
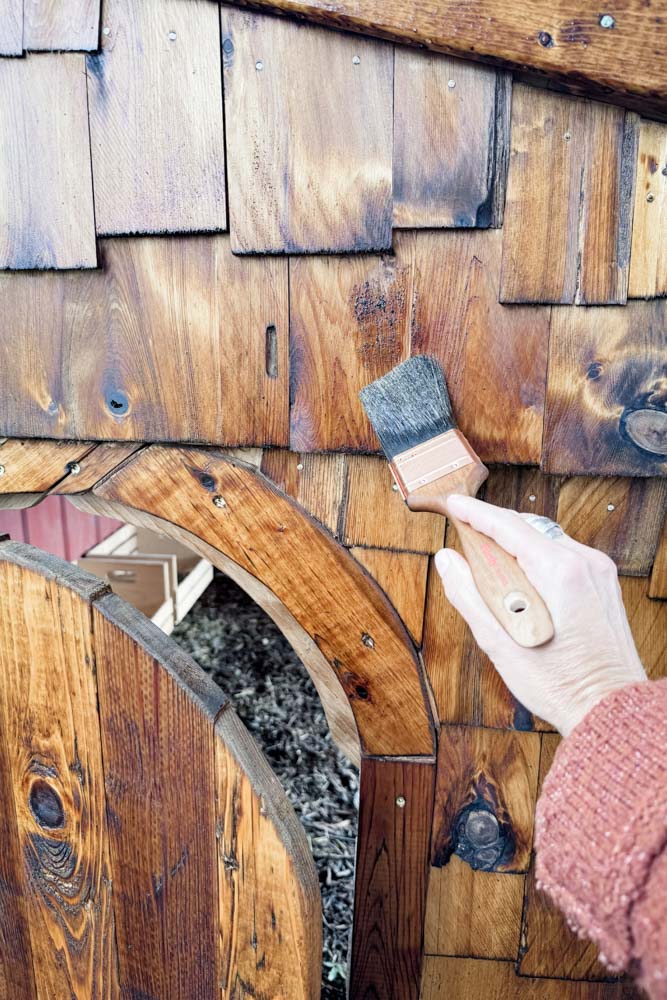
Finish your Hobbit Door with a decorative iron handle or latch. Seal all edges with an exterior finish or oil to keep the cedar from weathering too quickly. This is our new favorite way to seal and protect all of our outdoor wood projects- just like the Vikings did. I may still add a metal piece to the bottom of the doors since it is more prone to rot with dirt/ mud/water.
Instruction Card
How to Build a Rounded Hobbit Door
Equipment
- A large compass or a homemade one with a pencil and string
- Jigsaw
- Exterior wood sealer or finish for weatherproofing
Ingredients
- A sheet of plywood for the door base
- Cedar planks to face the door and match siding-optional
- Strap hinges
- Decorative iron handle or latch
- Trim boasrds for the door edge and round window
- 1 x2s or similar for door stops
Instructions
- Cutting the Circle: once you have everything traced and lined up, you can cut out your door and then your trim pieces. I used a jigsaw for all of it.
- Building your Hobbit- Round-Top Door: Clamp the planks, screw in a support on the top and bottom and add a brace, if needed. I sanded all my pieces down really good so the door can fit easily in and out of the door hole.
- Adding Trim: Attach the trim pieces to the door’s face and edges of the frame.
- Building Stops: Inside the doorway, attach thin boards (1x2s work well) around the frame. These act as “stops,” giving the round door something to close against and sealing out drafts. Cut the stops to follow the curve of your doorway—several shorter pieces joined together can make the bend.
- Attatching the Hinges: I took a brace piece and temporarily screwed it to either side of the frame, so I could have my hands to mount the hinges onto the framing of your coop, so the weight is supported. Also make sure there is good clearance below so the door can open and close easily.
- Handle, Latch & Weatherproofing: Finish your Hobbit Door with a decorative iron handle or latch. Seal all edges with an exterior finish or oil to keep the cedar from weathering too quickly. This is our new favorite way to seal and protect all of our outdoor wood projects- just like the Vikings did.
Notes
Price Breakdown
| Plywood | $27 |
| Cedar planks | $15 per bundle |
| A large compass | $3.97 per compass |
| Jigsaw | $54 |
| Strap hinges | $5.47 per 4 inch strap |
| Decorative iron handle or latch | $15 – $30 per decorative latch |
| Trim boards | $15 – $35 |
| 1x2s or similar for door stops | scrapes work well |
| Exterior wood sealer or finish for weatherproofing | Earth and Flax |


The Joy in the Details
It may take longer than a straight-cut door, but it’s worth it. No one walks through a hobbit door without smiling. And if the animals can’t smile, at least I do. Use #HeartySolBuilds for your next project, I want to see your new builds!
Pin for Later!
More Inspiring Coop Posts
How to Construct a Roof using Asphalt Shingles
Creating a Rustic Willow Fence
Finishing and Preserving our Wood Projects
Other ways we care for our animals
- Chicken Wing Clipping Guide
- How to Care for an Outdoor Rabbit
- The Answer to Efficient Sheep Shearing

Affiliate Disclosure & Content Disclaimer
This post may contain affiliate links from a paid sponsor, Amazon or other program. When you use these links to make a purchase I earn a small commission at no extra cost to you. This allows me to continue creating the content that you love. The content in this article is created for information only and based on my research and/or opinion.
Emily T.


DAILY INSPIRATION ON THE GRAM @hearty.sol
it's hip to be square!
View comments
+ Leave a comment