

How to Harvest + Store Dahlia Tubers: Preserving the Beauty for Future Seasons
As the growing season comes to an end, it’s time to think about harvesting your dahlias, preserving the beauty and vitality of your dahlia tubers for the next year.
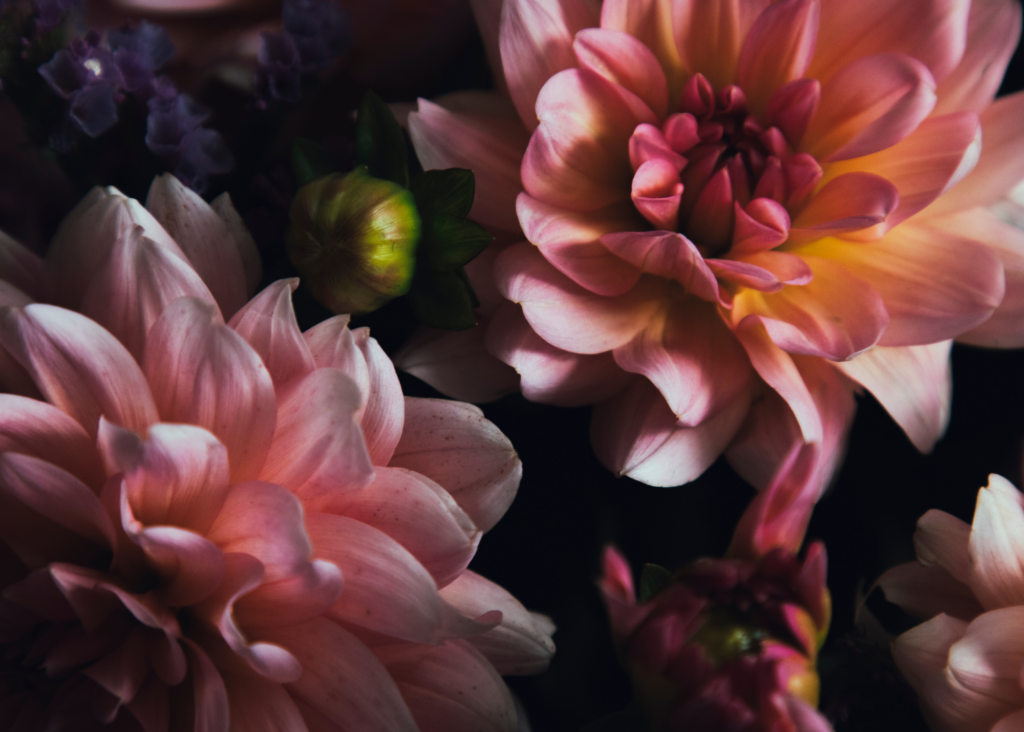
Right now here in Minnesota, we still haven’t seen a hard frost yet. I’ve been busy pulling out all of my other spent flowers and plants from the garden. But the one flower that I will be waiting to remove from the garden in its entirety is the Dahlia! I will cut the flowers and keep them in my refrigerator for arrangements, but once the frost hits, I throw my coat on and scurry back outside to find the brown, frost-kissed plants and get busy.
Time to dig up those tubers
Welcome to winding down the season! Properly storing dahlia tubers during the off-season is crucial to ensure their survival and promote healthy growth in the following season.
Finding this blog as growing season approaches rather than being in the rearview? Or searching for more tips for growing Dahlias? We’ve got blogs for that too – check them out!
How to Grow a Garden of Dahlias
How to cut and process Dahlias for a long-lasting vase life


Pause: What is your Agricultural Zone?
When it’s time to pull your tubers out of the ground depends on the weather you are in and when the frost begins. More scientifically speaking, which agricultural or “plant hardiness” zone you fall in. Here in Minnesota, we are considered 4b, meaning frost begins in late September and early October. This is an average, of course, as, this year, we have still been experiencing 80 degree days at the end of September! That being said, the multicolored map is still a necessary and helpful guide to all your planting projects.
Check out your Zone on the the USDA map here
For a breakdown of what this means for the Midwest check out our blog here

Step-by-step instructions to Harvest Dahlias
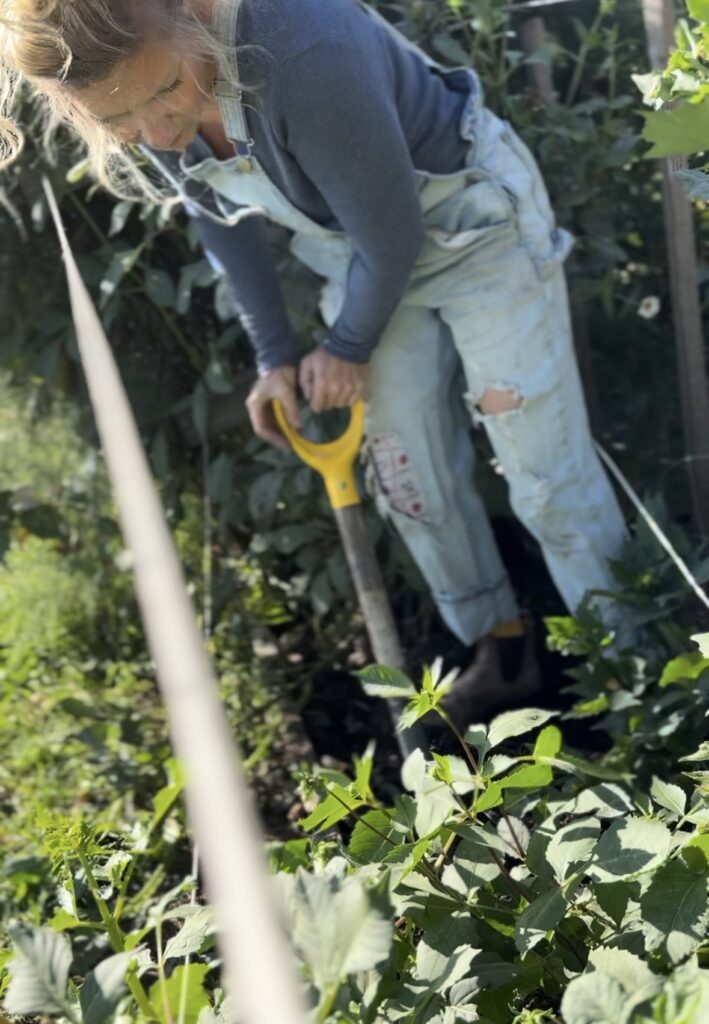
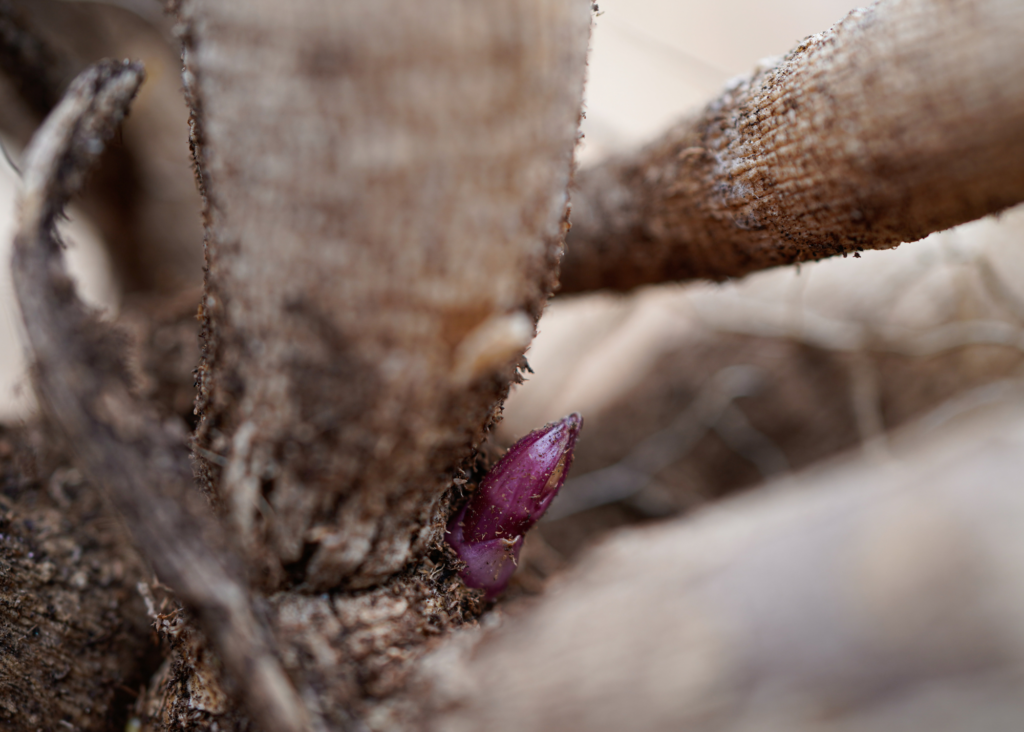
1. Digging up Dahlia Tubers After the first frost or when the foliage turns yellow and dies back, it’s time to dig up the dahlia tubers for storage. Gently lift the tubers from the soil using a garden fork or shovel, taking care not to damage the delicate roots. If using a shovel or a fork, be sure to stay further back than you think the tuber might be, so you avoid stabbing and damaging them. Shake off excess soil, but avoid washing the tubers, as moisture can lead to rot during storage. Cut back the stems to about 6 inches in length, leaving a small portion attached to the tubers for identification.
2. Drying and Curing Allow the dug-up tubers to dry naturally in a well-ventilated area for a few days. Place them on a tray or mesh screen, ensuring good air circulation. The drying process helps the tubers heal and reduces the risk of fungal or bacterial infections. After drying, gently brush off any remaining soil and inspect the tubers for signs of damage or disease. Remove any soft or rotten parts with a clean, sharp knife.
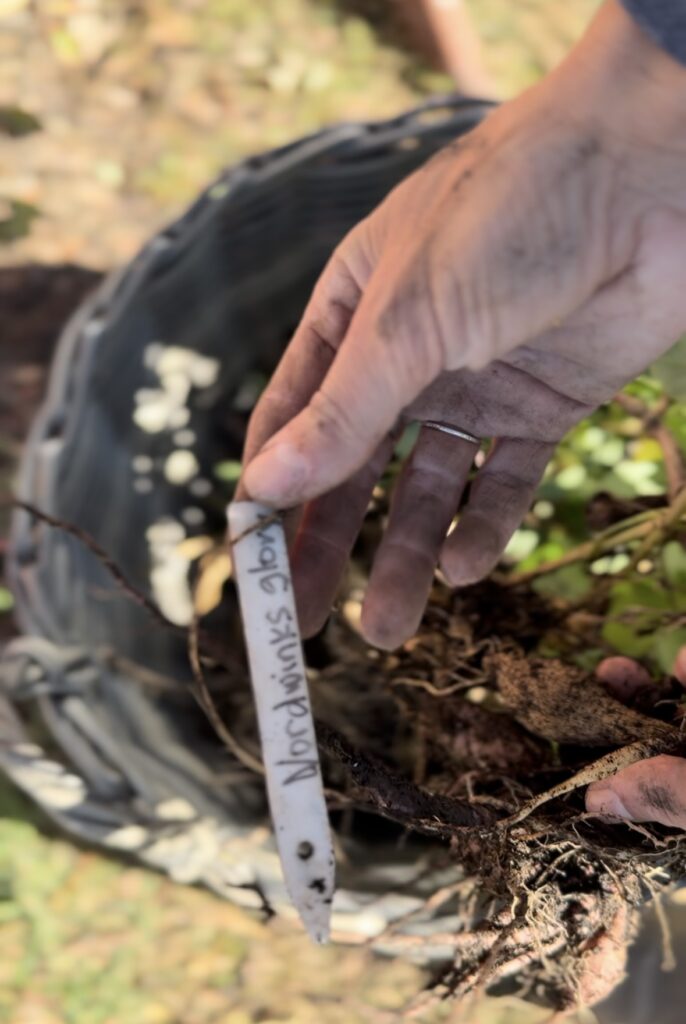
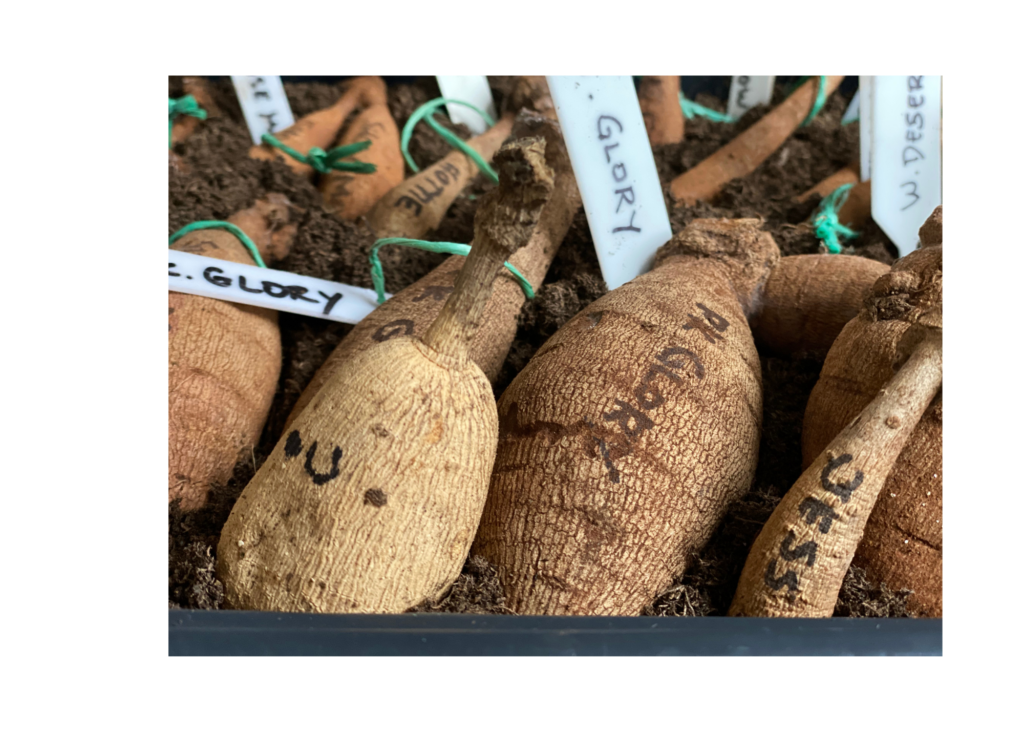
3. Labeling and Identification To avoid confusion during storage and replanting, it’s essential to label each tuber with the variety name. Use a permanent marker to write on the tuber directly, use small tags or labeling tape to indicate the dahlia’s name, color, and any other relevant information. This labeling system will make it easier to organize and plan your garden in the following year, ensuring you can replant the tubers correctly. Personally I like the white labeling tags that have a hole in them. I write the flower name on it with sharpie, then stick it right in the ground with the tuber, when planting. When it’s time to dig it up, I can tie the tag right to the tuber in storage. It saves me lots of time when it comes to identifying my tuber stock.
4. Storage Containers Choose the right storage containers for your dahlia tubers. Ideally, use breathable containers such as paper bags or mesh bags, which allow air circulation and help prevent excess moisture buildup. Alternatively, you can use cardboard boxes lined with newspaper or wood shavings. Avoid using plastic bags or airtight containers, as they can lead to rot or mold development.
5. Bedding Material For added protection, place your dahlia tubers in a suitable bedding material. Vermiculite, dry sand, or wood shavings work well to provide insulation, absorb excess moisture, and prevent tuber desiccation (drying out). I like using the cedar shavings that we use for our chicken coop bedding. Gently nestle the tubers into the bedding material, making sure they are not touching each other. Ensure the tubers are completely covered, leaving only the tops exposed.
6. Storage Conditions Store the tubers in a cool, dry, and dark location to maintain their quality and viability. The ideal storage temperature for dahlias is around 40-50°F (4-10°C). Avoid locations prone to temperature fluctuations, such as garages or basements near heating systems. Check the tubers periodically throughout the storage period to ensure they remain firm and free from signs of decay or disease.
7. Monitoring and Replanting During the storage period, inspect your dahlia tubers every few weeks to identify any signs of rot or disease. If you notice any issues, promptly remove the affected tubers to prevent further contamination. As the next planting season approaches, start preparing for replanting by assessing the health of your stored tubers. Discard any shriveled or damaged tubers and prioritize healthy, plump ones for the upcoming season.
By following these best practices for storing dahlia tubers, you can preserve their beauty and ensure their successful growth for next season.
What equipment should I use to dig out and Harvest Dahlia tubers?
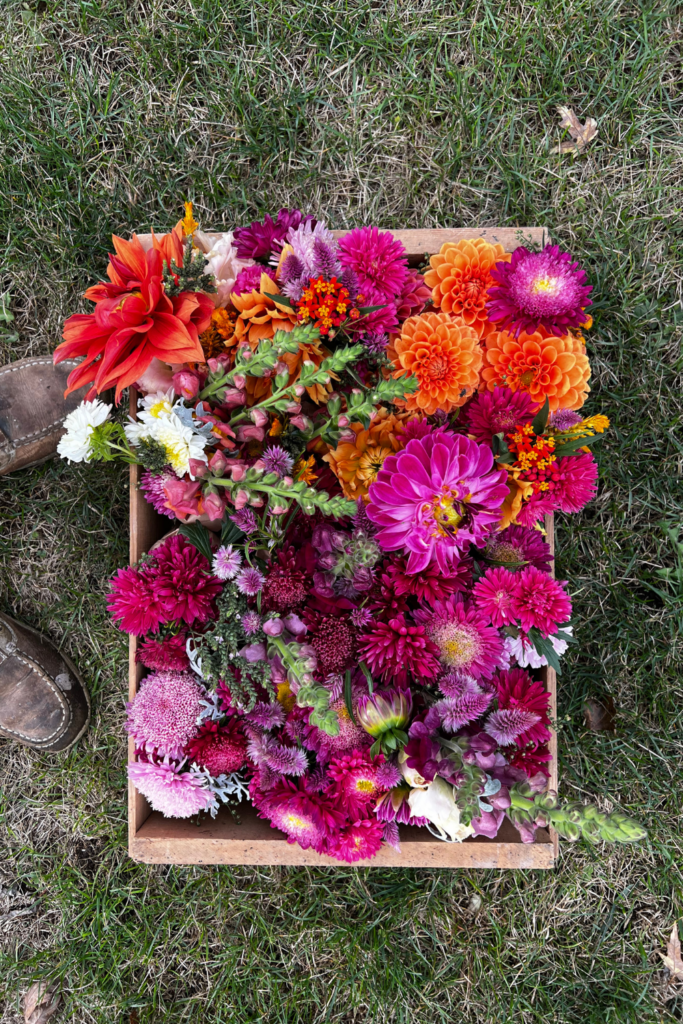
Can I sell my Dahlia Tubers?
Yes, you can definitely sell your dahlia tubers, and it’s a great way to share unique varieties or make extra income! You could make an entire business, just from Dahlias and their tubers! The price for dahlia tubers can vary widely depending on the variety, demand, and your location. Here’s a guide on how much you could sell them for and what to consider:
Factors Affecting Dahlia Tuber Prices
- Variety and Rarity: Popular or rare varieties can fetch higher prices. Some highly sought-after or unusual varieties can sell for $20–$30 or more per tuber, while more common varieties typically range from $5 to $15.
- Quality of the Tuber: Healthy, disease-free tubers with visible eyes (growth points) will sell for more. Customers expect high-quality tubers that are likely to produce strong, vibrant plants.
- Size of the Tuber: Larger, more mature tubers are often valued higher because they tend to produce stronger plants with more blooms.
- Demand in Your Area: Depending on where you’re located, there could be strong local interest in dahlias, especially if you offer unique varieties. You could charge more in regions where dahlia-growing is popular or competitive.
- Selling Venue: Online platforms (like Etsy, eBay, or garden forums) may allow you to charge a higher price due to reaching a wider audience. Local farmers’ markets, plant swaps, or garden clubs might have different pricing expectations.
Pricing Guide
- Common Varieties: $5–$10 per tuber
- Rare or Specialty Varieties: $15–$30+ per tuber
- Bulk Sales: If selling in bulk (5+ tubers of a single variety), you may offer discounts to encourage buyers to purchase more, e.g., 10% off or “buy 4, get 1 free.”
Tips for Selling Dahlia Tubers
- Provide Clear Information: Include variety names, growing instructions, and photos of the blooms when marketing them.
- Ensure Good Packaging: When shipping, pack the tubers carefully to avoid damage or drying out.
- Timing: Sell and ship your tubers in late winter or early spring, as gardeners start looking for new additions to plant for the season.
If you’re offering unique or rare varieties, pricing your dahlia tubers in the higher range can attract serious collectors and dahlia enthusiasts.
How and When to Wake your Dahlia Tubers up in the Spring
I start waking up dahlia tubers about 4 to 6 weeks before our last expected frost date in the spring- for me and my zone 4B, this is early April . This allows them to begin sprouting indoors so that they can be ready for planting once the soil has warmed and there’s no longer a risk of frost.
Here’s my simple process for waking them up:
- Inspect Tubers: Remove the tubers from storage and check for any signs of rot or damage. Discard any unhealthy ones.
- Soak if Necessary: If the tubers appear shriveled or dehydrated, you can soak them in lukewarm water for an hour or two to rehydrate them.
- Potting: Place the tubers in pots or trays with a well-draining, slightly moist potting mix, covering them lightly with soil. Ensure the eye (the small bump where new growth starts) is facing upward.
- Warm Location: Keep them in a warm location (60°F-70°F or 15°C-21°C), and make sure they have indirect light. I stick my trays of tubers in my greenhouse out of the direct sun. Water sparingly until growth appears.
- Plant Outside: Once the frost threat has past, feel free to plant outside.
This early start will give your dahlias a head start, ensuring earlier blooms in the garden!
My Favorite Dahlia Varieties
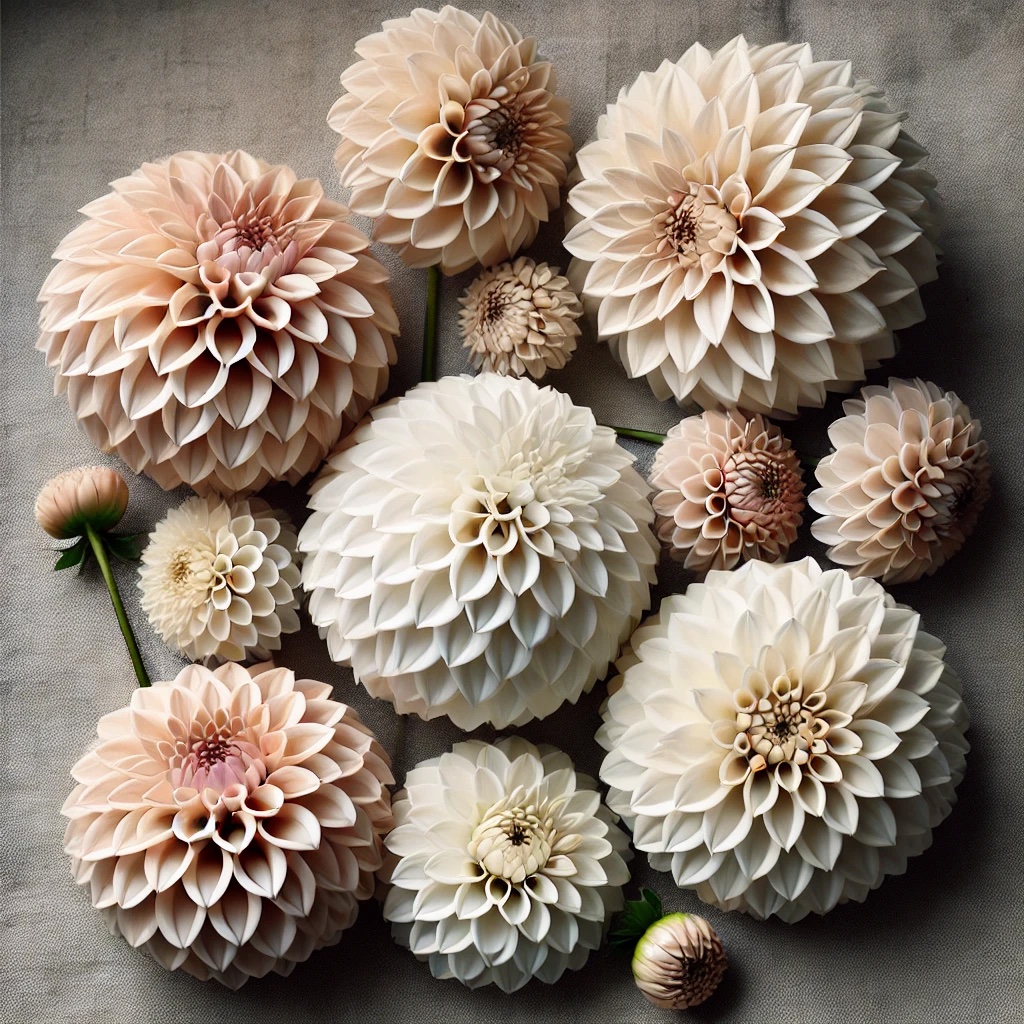
Call me neutral Nancy, go ahead, I don’t care! I love a good neutral blushy tone dahlia that can go with so many of the more vibrant flower colors in my garden. I’ve also come to appreciate the pom-pom varieties as they tend to be less attractive to bugs. They hold their shape nicely and last longer, once cut too.
Here are five neutral-colored pom-pom dahlia varieties that would complement any garden or bouquet:
- Small World
A true white pom-pom dahlia with a perfect globe shape, Small World offers a classic and clean look, blending beautifully with any garden palette. - Boom Boom White
This variety produces larger pom-pom blooms in a soft, creamy white, adding a subtle elegance to your garden beds or flower arrangements. - White Aster
Featuring ivory-white pom-pom flowers, White Aster has a soft, airy quality that looks stunning in both garden borders and bouquets. - Stolze von Berlin
A soft blush and creamy pink pom-pom dahlia, Stolze von Berlin has a delicate neutral tone with a slight blush hue, perfect for those seeking a subtle color palette. - Eveline
This lovely variety boasts white pom-pom blooms with a faint lavender-pink blush, creating an understated yet elegant neutral color.
Here are five blushy dahlia varieties that would thrive in Zone 4b, where the growing season is shorter but dahlias can still bloom beautifully with the right care:
- Cafe au Lait
A favorite among gardeners, this dahlia is known for its large, soft blush blooms that range from creamy ivory to soft pink with a hint of peach. It’s highly popular in floral arrangements for its romantic, dreamy color. These need to be started super early in order to see them bloom before first frost, but worth it! - Sweet Nathalie
With its delicate blush-pink tones and creamy white centers, Sweet Nathalie adds an elegant touch to any garden. Its medium-sized blooms have a perfect ball shape, making it ideal for cutting gardens. - Break Out
This variety produces large, ruffled blooms in soft pastel pinks with hints of cream and blush. It’s a great performer in cooler climates and stands out for its vibrant color transitions as it blooms. - Cornel Brons
Cornel Brons offers a unique blend of blush with subtle bronze undertones, giving it a warm, vintage look. Its smaller, ball-shaped blooms make it a great option for borders and bouquets. - Wizard of Oz
A beautiful pom-pom variety, Wizard of Oz features perfectly round blooms in soft blush tones. Its compact size makes it ideal for smaller gardens, and the flowers are long-lasting, perfect for arrangements.
These varieties will thrive in Zone 4b with some extra care, such as starting indoors and mulching for warmth.

Questions People are asking about Harvesting Dahlia Tubers
You can divide them immediately after harvesting or wait until spring. If dividing right away, make sure each division has at least one eye (growth point) attached. Use clean sharp snips or knife.
If you notice mold or rot, remove the affected tubers immediately to prevent the spread. Ensure your storage medium is dry, and check tubers periodically throughout the winter. Storing them in a place where you can easily check on them, is important.
Not all harvested tubers will be suitable for replanting. Only keep healthy, firm tubers with visible eyes. Discard any soft, shriveled, or rotting tubers.
Pin this for later!

Affiliate Disclosure & Content Disclaimer
This post may contain affiliate links from a paid sponsor, Amazon or other program. When you use these links to make a purchase I earn a small commission at no extra cost to you. This allows me to continue creating the content that you love. The content in this article is created for information only and based on my research and/or opinion.
Emily T.


DAILY INSPIRATION ON THE GRAM @hearty.sol
it's hip to be square!
View comments
+ Leave a comment