

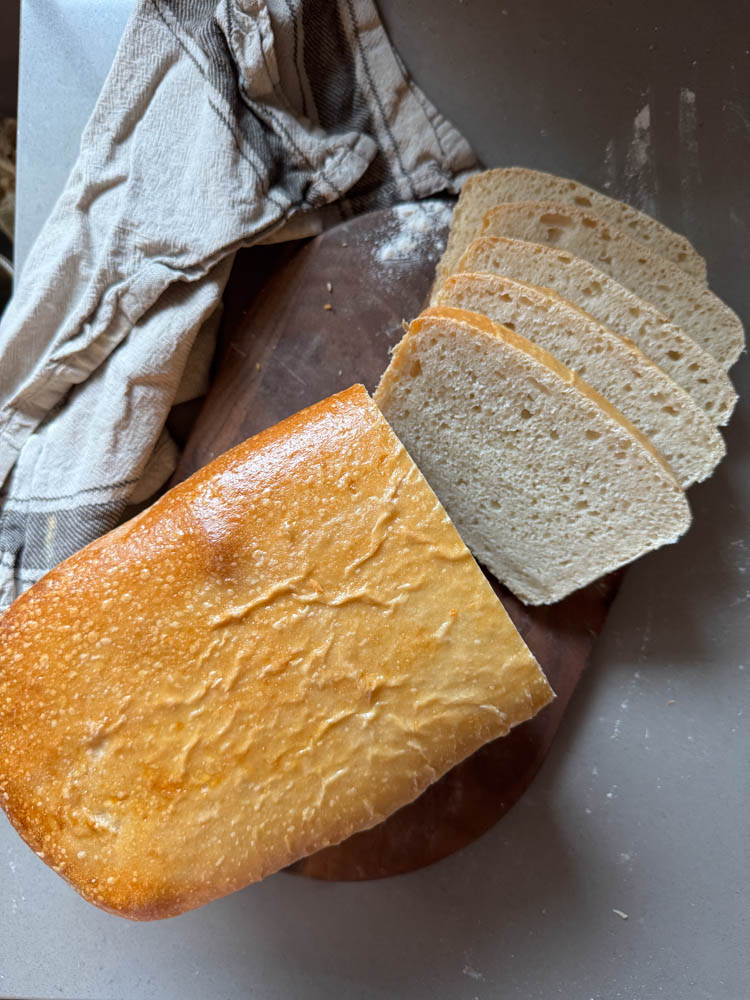
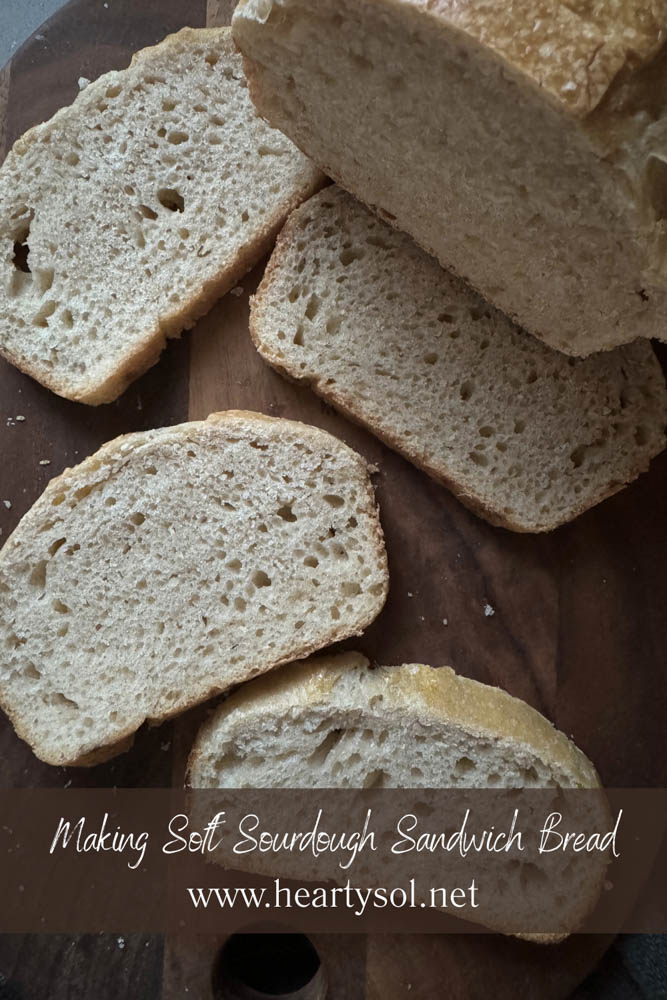
The Best Soft Sourdough Sandwich Bread
Soft, fluffy, and just as tasty as your other homemade sourdough breads – this soft sourdough sandwich bread recipe is one you’ll want to keep on hand!
A Soft Sourdough Recipe
Making Sourdough was never just a fad for our family – it’s a practice that has been long ingrained into our weekly routine because there is nothing more valuable than knowing the ingredients that are going into the mouths of myself, my husband, our kids, and our farm crew.
With this recipe you’ll find a delightfully soft and airy version of classic sourdough bread with the same tangy taste and only 6 ingredients. This isn’t the only bread we keep on hand – check out our Whole Wheat Sourdough Sandwich Bread as well!
But first! The Starter: Allow me to recommend our dry sourdough starter recipe – it’s less maintenance and works perfectly during the summer when you may be out of the house most of the day like we are! You can also find my wet starter recipe here.
How to make Homemade Sourdough Sandwich Bread
This recipe will make 2 loaves. You can also make this recipe with a stand mixer, just watch the texture as you would if you were using your hands.
Ingredients:
1 cup (200 g) active sourdough starter
2 2/3 cup (600g) warm filtered water
1/4 cup (85g) raw honey
8 – 10 cups (1050-1200g) bread flour (might need more or less depending on the humidity levels)
3 tbsp (40g) olive oil
4 tsp (24g) sea salt
Directions:
1. Mix Starter with Warm Water and Honey
Add the active starter to a large bowl and mix warm water and honey until milky
2. Add in Flour, Oil, and Salt
Add bread flour, oil and salt and stir with a dough wisk or mix with your hands until dough is more thick, not formed
3. Mix Dough and Let Stand
Finish mixing the dough by hand until most of the flour has been incorporated. Cover with a damp kitchen towel and let rest for 45-60 minutes
4. Stretch and Fold
Do a series of stretch and folds, like you would with your artisan sourdough bread. Cover with plastic wrap or a damp tea towel and let sit out on the counter overnight for 8-10 hours in room temperature. Do not refrigerate dough.
5. The Next Morning: Cut and Stretch Dough
In the morning, lightly flour your countertop and place dough on there to release air from the dough. Cut dough in half for two loaves. Stretch out your dough in a rectangle (laminate) and roll them up into a log. Cover for 10 minutes to rest.
6. Oil your Pan and Finish Shaping the Dough
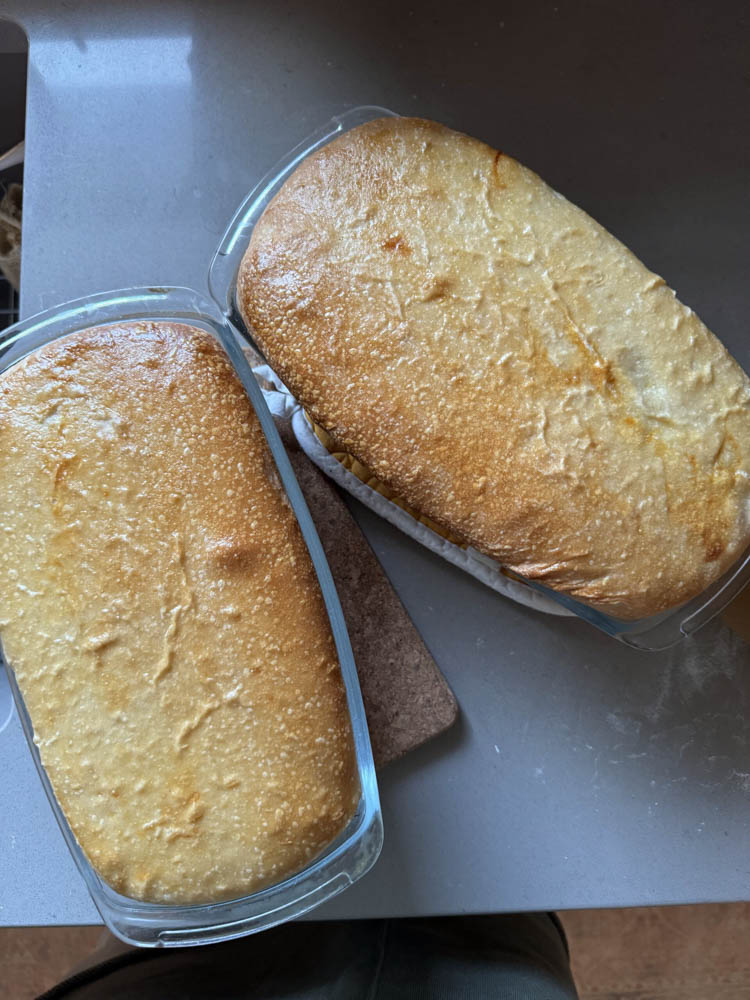
Oil your bread pan with oil or butter. Do a little shaping with your log by gently pulling the dough towards you like you do with your artisan loaves while shaping. Pinch up the sides and stick in your bread pan.
7. Final Rise
Cover and let rise for 2-3 hours until it’s doubled in size.
8. Bake
Preheat oven to 375° F. Bake the loaves for 40 minutes. Brush with butter after you’ve allowed it to cool a bit. Will make 2 loaves, keeps on the counter for 2-3 days if covered or in a bread bag.
FAQ’s about this Sandwich Loaf
What is the difference between regular sourdough and sourdough sandwich bread?
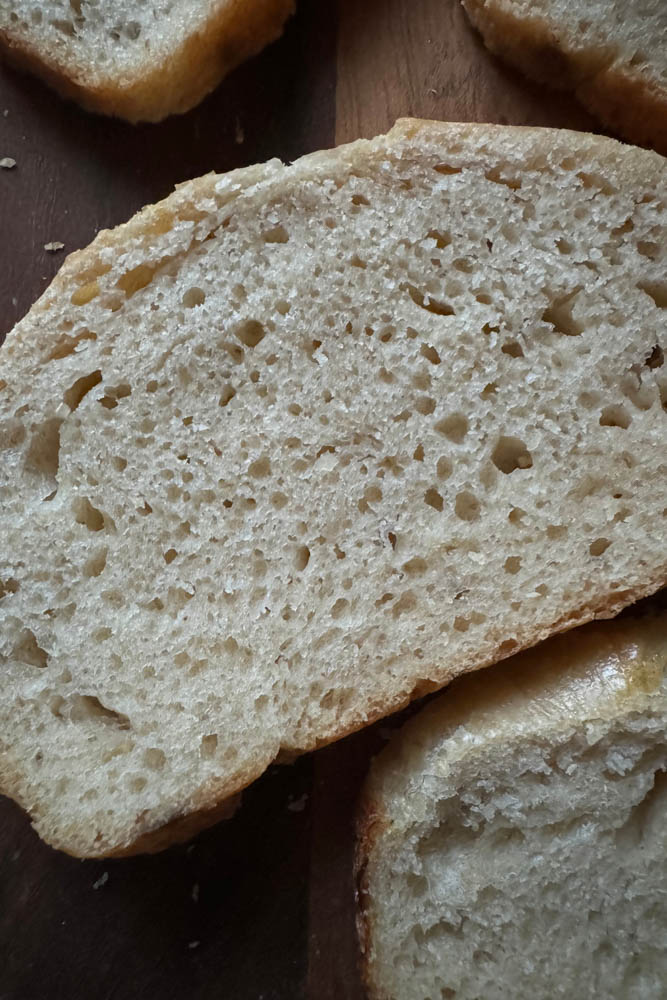
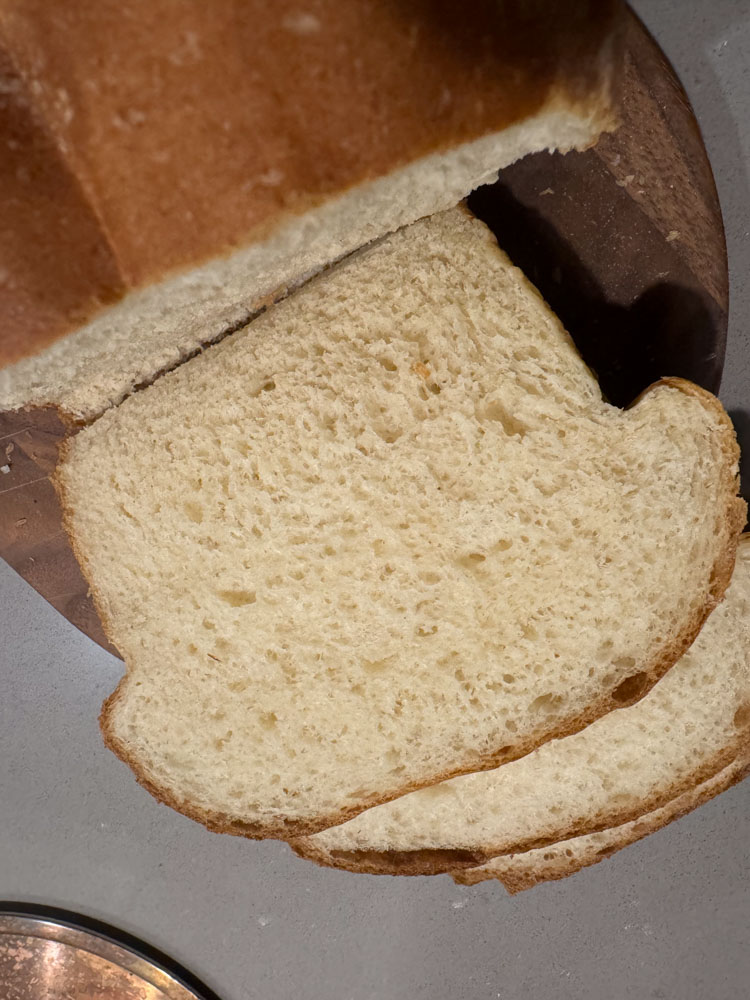
Sandwich bread lacks the dense, chewy quality of regular sourdough and instead brings in the light, fluffy texture you want when biting into a sandwich. The olive oil and honey work together to make this softer texture. You’ll also notice that we use bread flour in this recipe, compared to all-purpose flour in our beginner sourdough loaf. The bread flour has a higher protein content which allows the bread to have more shape while still being light and airy.
Can sourdough sandwich bread be used for toast just as well?
Yes! This recipe works perfectly for toast. My favorite thing to do is to eat it with a spread of our homemade strawberry topping or mash up some of our smoked eggs for an egg salad sandwich.
What’s with the grams? Do I need a kitchen scale to make Sourdough?
I didn’t have a kitchen scale until about 5 years ago, when I found that precision and sourdough go hand in hand. Measuring by weight is the only way to ensure you are getting an accurate ratio which will help you bake a successful loaf. For example, the weight of 3 tbsp of olive oil may depend on how you measure it but 40 grams is always 40 grams. A scale isn’t necessary and don’t let it sway you from trying this recipe but if you are someone who makes sourdough regularly like me, then it’s worth the investment.
Tips
- Make sure your water is warm, not hot – hot water will throw off your starter and kill the yeast
- Adding the flour last allows you to add a bit less or more depending on your starter’s hydration
- I love using a dough whisk especially if you are not using a stand mixer
Baker’s Timeline
Have your loaf ready for lunch tomorrow!
Day 1
6:45pm: Mix the starter with warm water and honey. Then add bread flour, oil, and salt – stir or mix until the dough is thick.
7:00pm: Cover with a damp kitchen towel and let rest for 45-60 minutes
8:00pm: Complete a series of stretch and folds. Cover with plastic wrap or a damp tea towel. Let sit overnight on the counter.
Day 2
7am: Place dough on your lightly floured countertop. Cut dough in half (two loaves). Stretch out each half of the dough into rectangles and roll into a log. Cover for 10 minutes to rest.
7:15am: Oil your bread pan and gently continue to shape your bread by pulling the dough towards you. Pinch the sides and place into the bread pans.
7:20am: Cover and let rise for 2-3 hours until it’s doubled in size
10:20am: Preheat your oven to 375° F. Bake the loaves for 40 minutes.
11am: Brush with butter after you’ve allowed it to cool a bit and enjoy!
Printable Recipe Card
Soft Sourdough Sandwich Bread
Ingredients
- 1 cup (200 g) Active Sourdough starter
- 2 2/3 cups (600 g) Warm Filtered Water
- 1/4 cup (85g) Raw Honey
- 8-10 cups (1050 – 1200g) Bread Flour might need more or less depending on the humidity levels
- 3 tbsp (40g) Olive Oil
- 4 tsp (24g) Sea Salt
Instructions
- Mix Starter with Warm Water and Honey: Add the active starter to a large bowl and mix warm water and honey until milky
- Add in Flour, Oil, and Salt: Add bread flour, oil and salt and stir with a dough wisk or mix with your hands until dough is more thick, not formed
- Mix Dough and Let Stand: Finish mixing the dough by hand until most of the flour has been incorporated. Cover with a damp kitchen towel and let rest for 45-60 minutes
- Stretch and Fold: Do a series of stretch and folds, like you would with your artisan sourdough bread. Cover with plastic wrap or a damp tea towel and let sit out on the counter overnight for 8-10 hours. Do not refrigerate dough.
- The Next Morning: Cut and Stretch Dough: In the morning, lightly flour your countertop and place dough on there to release air from the dough. Cut dough in half for two loaves. Stretch out your dough in a rectangle (laminate) and roll them up into a log. Cover for 10 minutes to rest.
- Oil your Pan and Finish Shaping the Dough: Oil your bread pan with oil or butter. Do a little shaping with your log by gently pulling the dough towards you like you do with your artisan loaves while shaping. Pinch up the sides and stick in your bread pan.
- Final Rise: Cover and let rise for 2-3 hours until it's doubled in size.
- Bake: Preheat oven to 375° F. Bake the loaves for 40 minutes. Brush with butter after you've allowed it to cool a bit. Will make 2 loaves, keeps on the counter for 2-3 days if covered or in a bread bag.
Pin for Later!
More Sourdough Recipes

Affiliate Disclosure & Content Disclaimer
This post may contain affiliate links from a paid sponsor, Amazon or other program. When you use these links to make a purchase I earn a small commission at no extra cost to you. This allows me to continue creating the content that you love. The content in this article is created for information only and based on my research and/or opinion.
Emily T.


DAILY INSPIRATION ON THE GRAM @hearty.sol
it's hip to be square!
View comments
+ Leave a comment