

How We Built an Old-World Stone Trough Fountain (And What I Learned Along the Way)
Join me on my most recent project: creating a timeless outdoor fountain
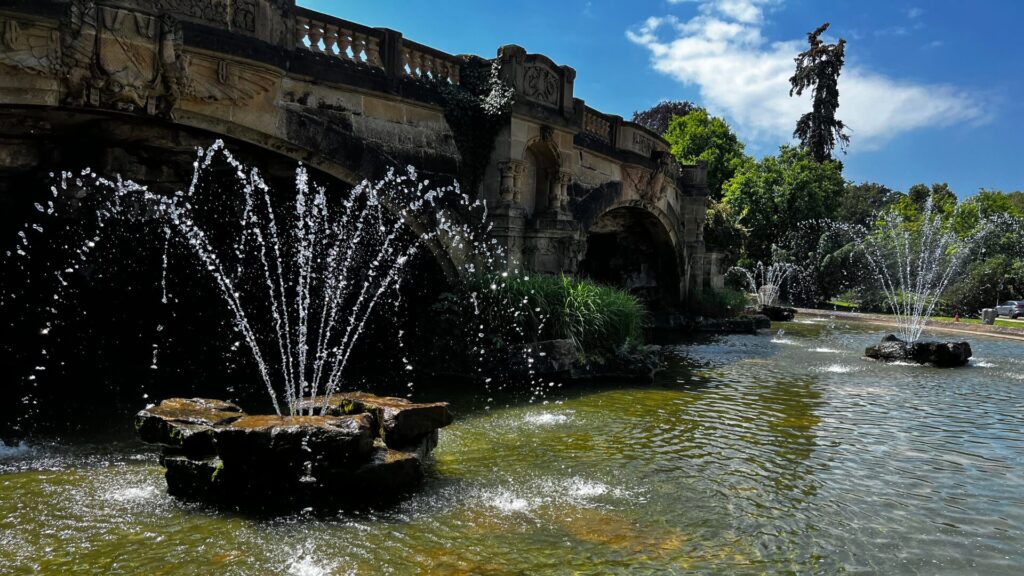
A surprising number of photos in my camera roll are of old watering troughs.
Over the years, I’ve photographed them in France, Spain, and Italy. Some were still being used by livestock. Some held flowers. Others sat quietly in village squares with water trickling through them just as they had for generations.
I loved that they were both beautiful and useful.
When I started planning a fountain for the roses near our front door and a watering trough for our animals, those European stone basins immediately came to mind.
Rather than buying one, I decided to see if I could build one myself.
Actually, I built two.
Because that’s usually how I learn best.
I wanted to experiment with different construction methods, understand what worked, and figure out what I’d do differently if I ever built another one. One became a fountain beside our front door. The other became a watering trough for our sheep, ducks, geese, and dog.
Today I’m sharing exactly how I built them, why I chose the materials I did, and what I learned along the way.
If you’re standing in the concrete aisle wondering which of the dozens of dusty bags to buy—or dreaming of adding a little old-world charm to your own garden—I hope this helps.
- A European-inspired execution
- Materials I used
- Step-by-step instructions (+ answering your questions)
- How I am using the two trough fountains I built
- Adding a water pump to your stone trough
- The versatility of troughs
- Moss and what I’m curious about next
- What I learned making a DIY Stone Trough Fountain
A Little Piece of Europe at Home
One of the things I appreciate most about travel is how it changes the way you see home.
The stone troughs and fountains I admired throughout France, Spain, and Italy weren’t famous attractions.
Most were ordinary parts of everyday life.
They existed because someone needed water for livestock, a village square, or a garden.
Yet decades—or sometimes centuries—later, they had become beautiful simply because they were built well and allowed to age gracefully.
That’s what I hoped to create here.
Not a perfect replica of anything I saw overseas, but the feeling those places inspired.
A useful object. Built by hand. Made from simple materials. Designed to serve a purpose while adding a little beauty to the landscape.
Every time I hear the fountain bubbling beside the roses or see our animals gathered around the watering trough on a warm summer afternoon, I’m reminded that some of the best projects aren’t about recreating something exactly.
They’re about bringing home an idea and making it your own.
The fountain may be finished, but the aging process has only just begun.


Roman clay has been another project inspired by my travels. Learn about this rustic wall application here
Here’s What Materials I Used to Build a Stone Trough Fountain
For both projects, I started with the same basic materials – these are the materials I’ve found to be best when building my fountains.
- Lumber for the frame
- Cement board
- Chicken wire
- Type S mortar mix
- Screws
- Water
- Mixing tub or wheelbarrow
For the fountain version, I also used:
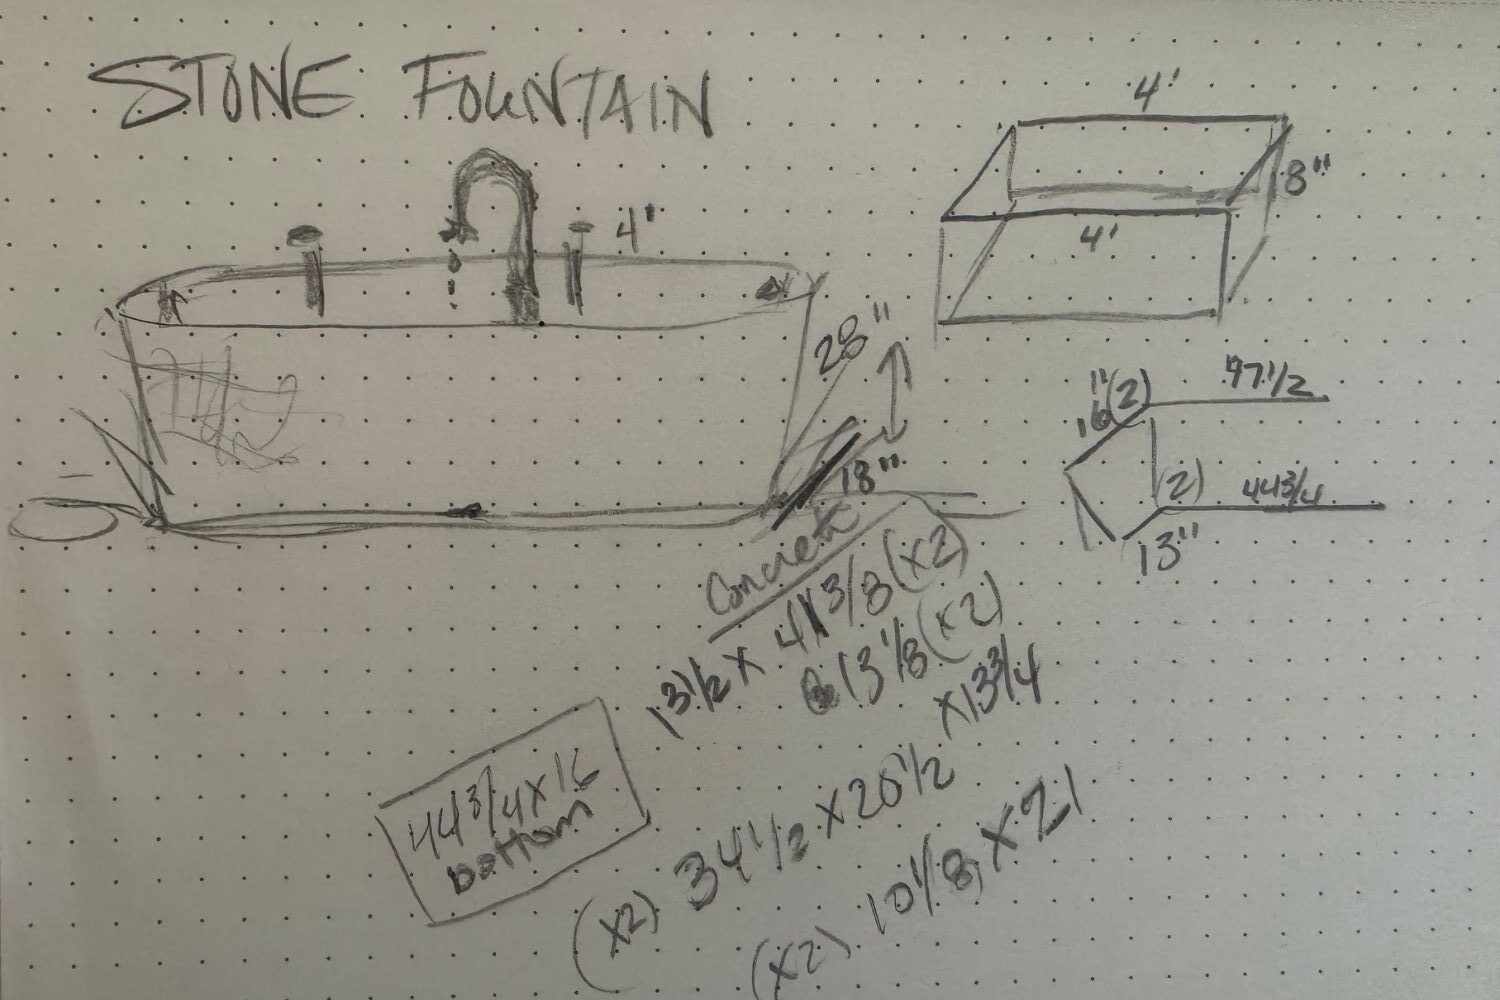
What are the dimensions of this fountain?
I built this stone fountain from a handcrafted wooden frame. I’ve seen these fountains created from gardening pots and styrofoam. For me, the wood scraps and chicken wire were materials I already had on hand, so this route made the most sense.
The exact dimensions aren’t nearly as important as the overall shape. I was trying to mimic the proportions of the old troughs I’d photographed throughout Europe rather than follow a strict set of measurements. Here’s what I came up with:
Steps to building your own Stone Trough Fountain
How long did this project take? Each trough took about two days to finish
Step 1: Build the Frame
I started by building a simple wooden box.
Nothing fancy. I just knew I needed it to be lower than certain things like our water hydrant, and fit within specific areas so I measured a bit to get the general idea of how large I wanted to build my framing.
This frame simply provides the structure and shape of the trough.
Once the frame was built, I attached cement board to all sides. Think of this stage as creating the skeleton of the project.
At this point it doesn’t look like much, but that changes quickly.


This is how the pond liner looks when draped over the frame
Step 2: Wrap It in Chicken Wire
Next, I wrapped the entire structure in chicken wire.
The chicken wire gives the mortar something to grab onto and helps reinforce the finished piece.
Take your time securing it tightly around the frame. I used a staple gun and hammered in a few larger gauge ones toward the top to really secure things. Any loose sections will make the mortar more difficult to apply later.


Step 3: Apply the First Coat of Mortar
The first coat is often called a scratch coat.
Its purpose isn’t to look beautiful. It’s simply there to cover the wire and create a rough surface for additional coats to bond to.
I mixed the mortar until it resembled thick peanut butter and worked it firmly into the chicken wire.
Don’t worry about texture or appearance yet.
Just focus on getting good coverage.
Allow the first coat to cure before adding more layers.
Why I Chose Type S Mortar
If you’ve ever wandered through the masonry aisle at a home improvement store, you’ve probably noticed what feels like a hundred different bags.
Concrete mix.
Mortar mix.
Mason mix.
Type N, Type S, Type M.
At first glance, they all look nearly identical.
After quite a bit of research, I settled on Type S mortar.
Type S mortar is a blend of:
– Portland cement
– Lime
– Sand
It’s designed for projects that need greater strength and durability, particularly in outdoor conditions.
Compared to other mixes, Type S offers stronger bonding, better durability, greater resistance to moisture, and better performance through freeze-thaw cycles. Since these troughs would be exposed to Minnesota weather year-round, that mattered.
Type N mortar is commonly used for:
– Brick walls
– Veneers
– General above-ground masonry
It’s easier to work with but not quite as strong.
Type S is typically used for:
– Retaining walls
– Foundations
– Exterior masonry
– Projects exposed to moisture
For a fountain or watering trough, Type S is generally the better choice.
Traditional concrete contains gravel aggregate. That gravel makes it difficult to sculpt and shape.
I wasn’t trying to pour a sidewalk.
I wanted something that looked like carved stone.
Mortar has a much finer texture, which makes it easier to build up layers, create texture, soften corners, and achieve that old-world appearance.
I used about four bags of mortar mix for each trough
I didn’t add anything to change or enhance the color. What you see is how the mortar mix dried based on how I layered it. This decision also makes it safe for animals to drink out of.
Step 4: Build Up Additional Layers
Once the scratch coat cured, I started applying additional layers of mortar.
This is where the project starts becoming fun.
I intentionally avoided making everything smooth and perfect.
The troughs I admired throughout Europe weren’t perfectly symmetrical. Their edges were softened by time. Their surfaces were uneven and weathered.
I tried to recreate some of that character by adding texture, imperfections, and subtle variations throughout the surface.
Sometimes perfection is actually what makes a project look less believable.


The Two Versions I Built
This is where my experiment began.
Version One: Hidden Pond Liner
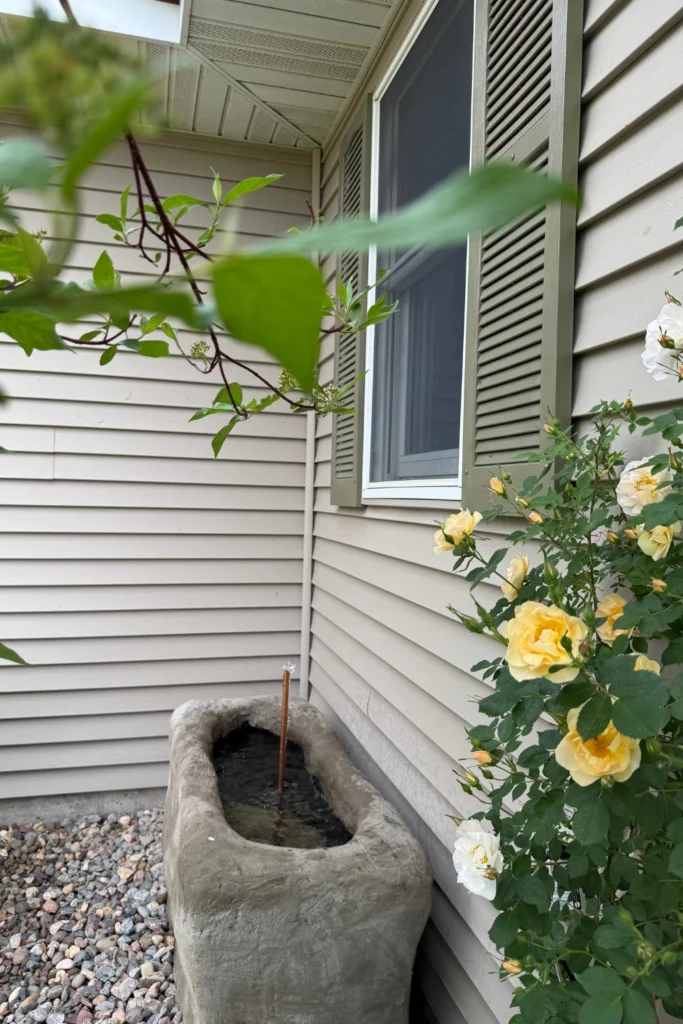
The first trough was designed to become a fountain.
After building the mortar shell, I installed a pond liner inside.
The liner is completely hidden once everything is finished.
I also added:
- A drain opening in the bottom for cleaning
- A hole in the back for the fountain cord
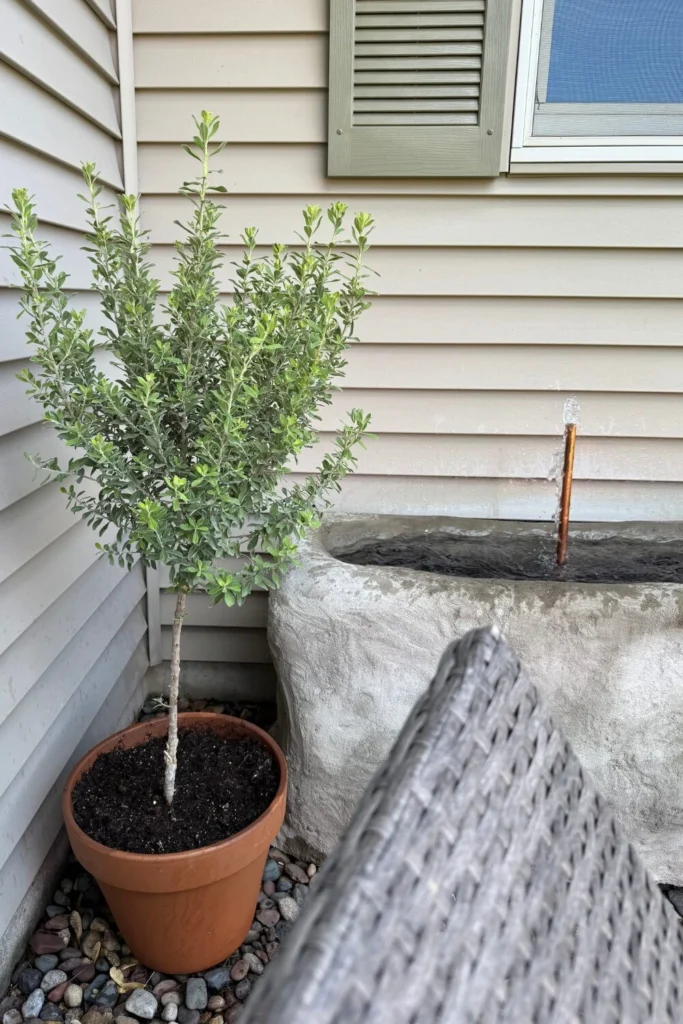
- A ½-inch copper pipe that serves as the fountain spout
This version worked beautifully.
It held water almost immediately and required very little troubleshooting.
Version Two: All Mortar
The second trough was built primarily as a watering trough for our animals.
The construction was nearly identical except for one important difference.
There was no pond liner.
Instead, I attempted to make the entire trough waterproof using only Type S mortar.
It worked eventually.
But it leaked significantly more.
I found myself applying additional coats and spending far more time trying to eliminate tiny leaks.
The experience taught me something simple:
Water finds everything.
Every tiny crack, every pinhole, and every weak spot.
If water wants to escape, it usually will.
How to Add a Fountain Pump to a Stone Trough Fountain
For the fountain version, I installed a small submersible pump connected to a ½-inch copper pipe.
The water gently circulates through the copper pipe and back into the basin.
It now sits beside our roses near the front door and has quickly become one of my favorite features in the garden.
The sound of moving water instantly makes the space feel established and welcoming.
As though the fountain has been there much longer than it actually has.
Yep – the pump (linked above) is made to be fully submersible.
No, we have ours on an outside outlet, that is connected to a switch inside the house. This way we can control when the water is flowing.
For aesthetic reasons, I chose to place mine in the center.


The Functionality of Troughs
Troughs are practical – holding water and food for cattle, they offer a convenience wrapped in galvanized steel or plastic. By creating a trough with mortar my aim was to elevate the piece while still keeping it functional.
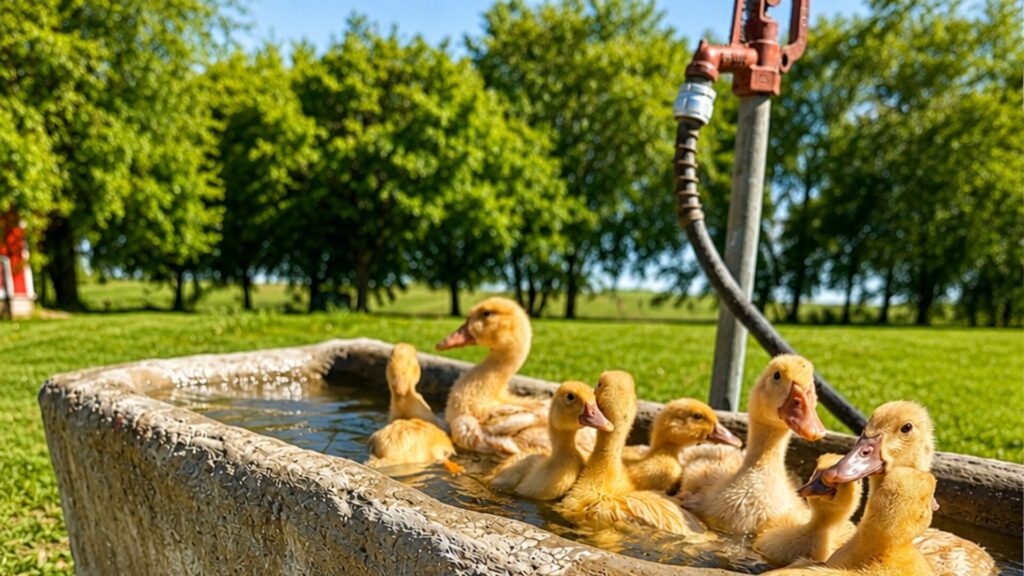
The second trough serves this practical purpose – our sheep, ducks, geese, and dog all use it regularly.
One of my favorite things about the old troughs I photographed in Europe was that they weren’t simply decorative.
They were useful.
I love that ours are becoming useful too.
The animals certainly don’t care how much time I spent shaping mortar, but they appreciate fresh water all the same.
At our house, troughs have become raised beds and cold plunge tubs. A good reminder that practicality goes hand in hand with creativity.
Timeless and functional: the two pillars of my at-home projects!
Now I’m Experimenting With Moss
What features can you use to enhance your diy fountain you may ask?
If you’ve followed many of my projects, you already know I have a hard time stopping once something is technically finished.
The troughs may be complete, but now I’m experimenting with ways to make them look as though they’ve been here for much longer.
One of the things I loved most about the fountains and watering troughs I saw throughout France, Spain, and Italy wasn’t their shape.
It was their age.
Many were softened with moss. Tiny patches of green settled into cracks and crevices. Time had left its mark.
Of course, these troughs are brand new.
So naturally, I’ve started experimenting.
My latest project involves using my blender to combine moss with plain yogurt and painting the mixture onto portions of the trough.
The theory is that the yogurt helps the moss cling to the surface while providing the moisture it needs to establish itself.
Will it work?
I’m not entirely sure yet. I hope you stay tuned 😉
Like most projects around here, it falls into the category of “let’s see what happens.”
Some gardeners swear by the technique. Others say success depends on shade, moisture, and patience.
Either way, I’m willing to give it a try.
I’m not trying to create something that looks brand new.
I’m trying to create something that looks like it belongs.

My blundstones have continued to show up for me project after project!
Lessons I learned from building my own Stone Fountain
If I were building another decorative fountain tomorrow, I would absolutely use a pond liner again.
The liner creates a reliable waterproof barrier while allowing the mortar to serve as the decorative exterior.
If you’re building a fountain, I highly recommend incorporating one from the beginning.
It will save you a tremendous amount of time and frustration.
The all-mortar version can work, but expect more trial and error.
Of course, some of the best lessons come from trial and error.
That’s why I built two.
I’m excited to have these two custom stone fountains that paint a picture of European style while working for our space here in Minnesota. I anticipate I’ll have much to share about how I clean and maintain them!
I’m curious to hear what projects you are working on this summer!
Pin for Later!


Affiliate Disclosure & Content Disclaimer
This post may contain affiliate links from a paid sponsor, Amazon or other program. When you use these links to make a purchase I earn a small commission at no extra cost to you. This allows me to continue creating the content that you love. The content in this article is created for information only and based on my research and/or opinion.
Emily T.


DAILY INSPIRATION ON THE GRAM @hearty.sol
it's hip to be square!
View comments
+ Leave a comment