

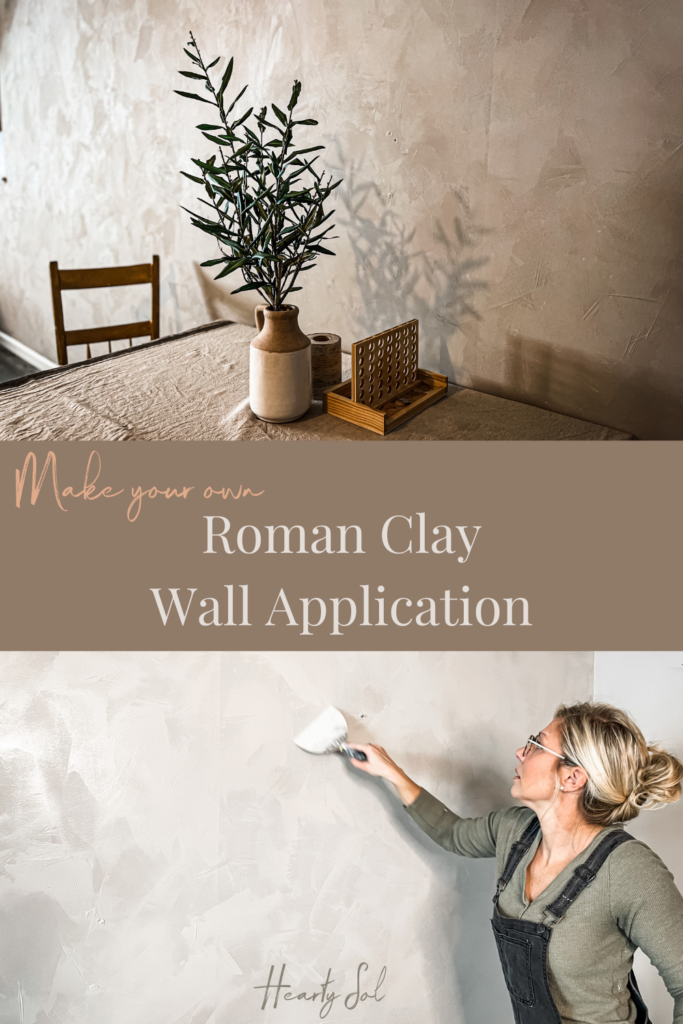
How to Make your Own Roman Clay Wall Application
A culturally inspired, uniquely rustic addition
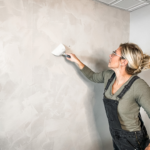
I have no idea what I’m doing… I just know the look I’m going for
I seem to be starting more and more projects with this mindset recently
Sometimes the inspiration itch gets to me when the seasons change or after a week of travel, and sometimes… the basement floods
A few Christmases back, a good portion of our holiday season was spent ripping up our sewer-soaked carpet, and the light at the end of the tunnel was getting to re-evaluate our downstairs space.
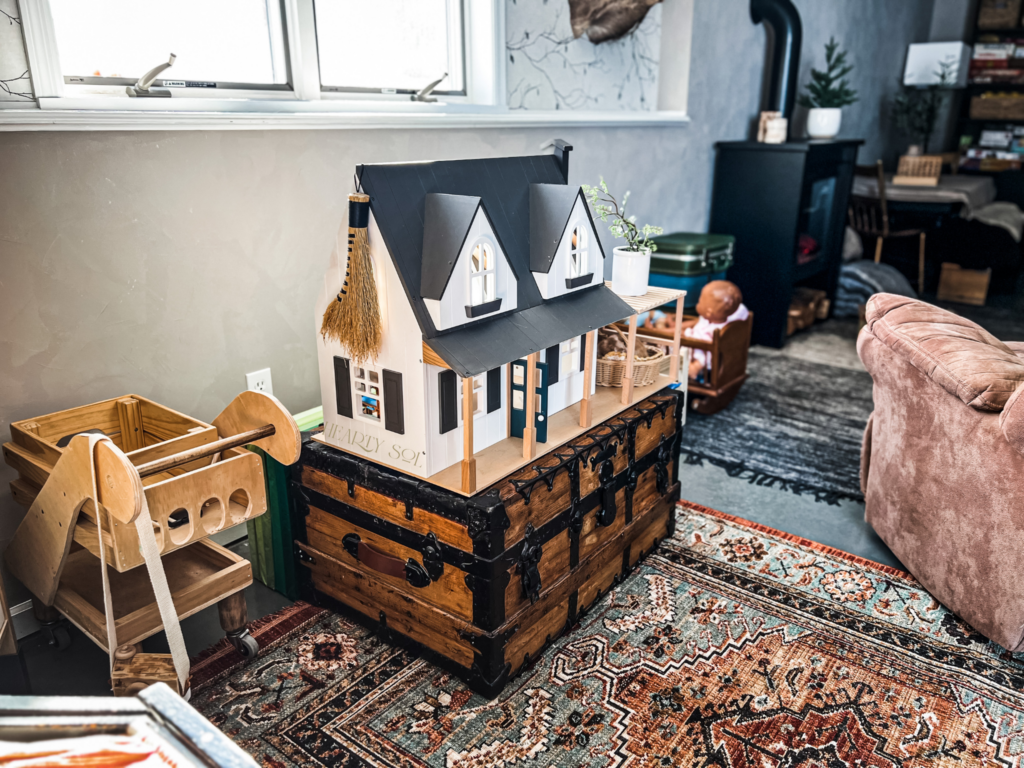
At the time, our youngest was six, which meant we were already weaning out of the playroom/toyland our basement had become. Once we got the carpet up, the floors cleaned, then stained and sealed, we decided to turn this wild, rumpus room into a cozy space for play, cuddles by the fire, guests to stay, and my sewing machine (oh, and the treadmill that my husband swears we’ll use one day :)).
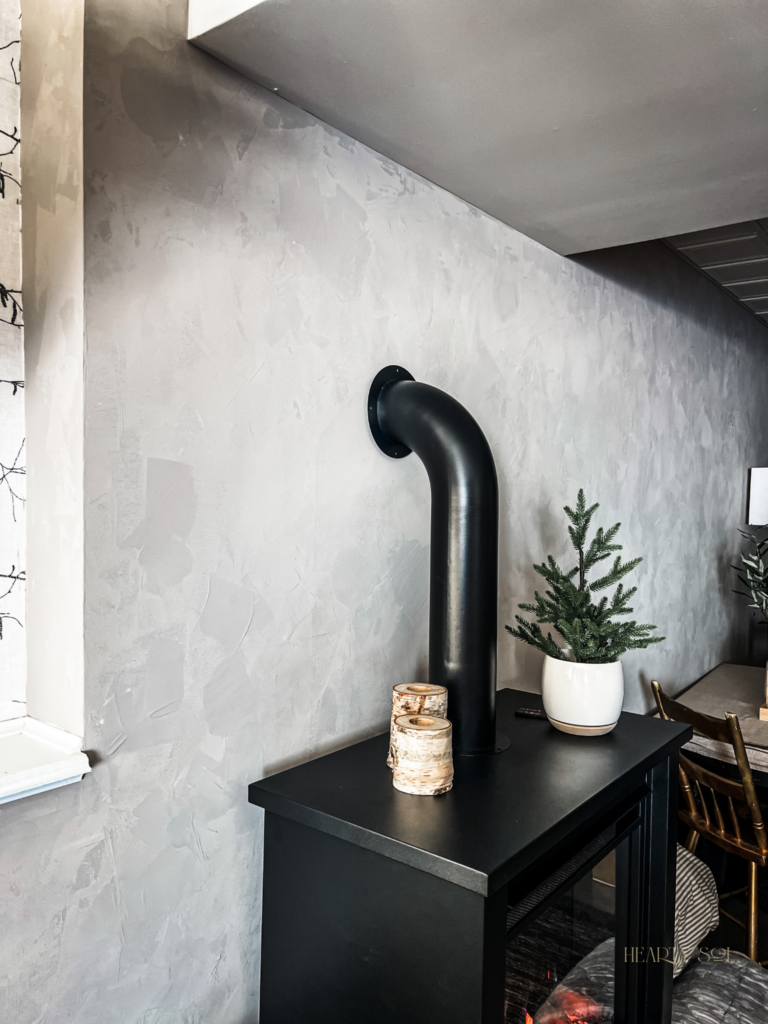
What started as an unplanned disaster turned into a warm, multifunctional living space where we can host gatherings, overnight guests, and slumber parties, and serve as a nice hangout spot for the teenage years ahead of us. My favorite transformation? The Roman Clay Wall application that makes this space beautifully rustic.
- Roman Clay Cultural Inspiration
- How to know if Roman Clay is right for your space
- My DIY Roman Clay Wall Application Recipe + Materials + Steps
- Youtube Tutorial
- FAQ’s
- Maintaining and caring for your walls
- I’m still having problems with the application. Can you help?
- My newest Roman Clay project
- Shop this Post
- Printable Instruction Card
How I became inspired by Roman Clay
Once I finally got to the creative part of the basement remodel, I caught my second wind. After my many travels abroad, I wanted to re-create the rustic textures inspired by places that I had adored. When it came to the process of making and applying the Roman Clay, it was one part experiment and one part experience!
Part travel and part college days
During college, I had the opportunity to study abroad, travel, and live in many different interesting places in Europe, including Spain, Italy, Portugal, France, and Scotland (which all had an influence on this project). I was also involved in set and backdrop design. Using styrofoam, wood, paint, and any other inexpensive and lightweight material, we were challenged to depict different textures, looks, and cultures. Testing different wall applications, like Roman Clay, was a part of my education.
After living in Barcelona, seeing homes in Italy, and traveling to Scotland, dreams of Roman Clay danced in my head. The unique display of Roman Clay was a design element that really stuck with me and my experience in creating backdrops and sets only furthered my desire to have this look in my own home. I seriously couldn’t get over how great the rustic-textured, matted appearance looked. It seemed to add such a cozy and romantic feeling to any space it touched – a truly great addition to any home! I like to call these inspirations that I bring home from my travels my best souvenirs, as they inspire how I decorate my home.
How will I know if Roman Clay is right for my space?
I suggest starting with a small space. Because it is quite a process, you’ll want to make sure that you enjoy the warmth and rustic textures before going through mixing up the paint and the compound together.
Starting in a closet, a small wall, or even just working on a small panel board is a good idea to not only practice on, but to get a sense if you like the application before applying it to an entire space or room.
What wall surfaces should Roman Clay be applied to? Smooth or textured?
Our walls were smooth to begin with, but if you have a swirled or orange peel texture, it can be done. I would either make your compound thicker or go over your textured walls with a smooth layer of drywall compound and paint first.
My DIY Roman Clay Wall Application Recipe
Materials you will need to make Roman Clay
- 2 old buckets (works best if one is a square bucket) or a flat painting tray. I like the buckets with measuring lines on them so I can get a more accurate guide like this one.
- Drill Mixer
- Drywall compound mix (wet or dry) This is what I used: Easy Sand 90
- Paint color of choice: satin/eggshell finish is best (I used Sherwin Williams 7023 Requisite Gray)
- Putty Knife (aka Metal or plastic scraper)
What does the 90 mean? “Easy Sand 90” refers to the dry time – I like to choose the longest dry time so I can play around with it.


Steps for Making your own Roman Clay
Add 1 part Drywall Joint Compound to 2 parts Paint. Mix well with a drill paint mixer and apply to wall or surface with a scraper or palette knife.
- Prepare Drywall Compound
- Mix a few cups of drywall mix and water together with a drill mixer. Think of this as making batter – blend well and make sure there are no lumps (otherwise you will have dry powdery residue on your wall).
- You can also purchase pre-mixed buckets of drywall mix
2. Mix in your choice of paint
- In the paint bucket add 1 part of drywall mixture to the 2 parts of paint.
- Mix with drill mixer along the way (I eyeballed this at the start – just make sure to start small and mix well as you go).
- *Important: Add drywall compound to the paint, not the other way around.
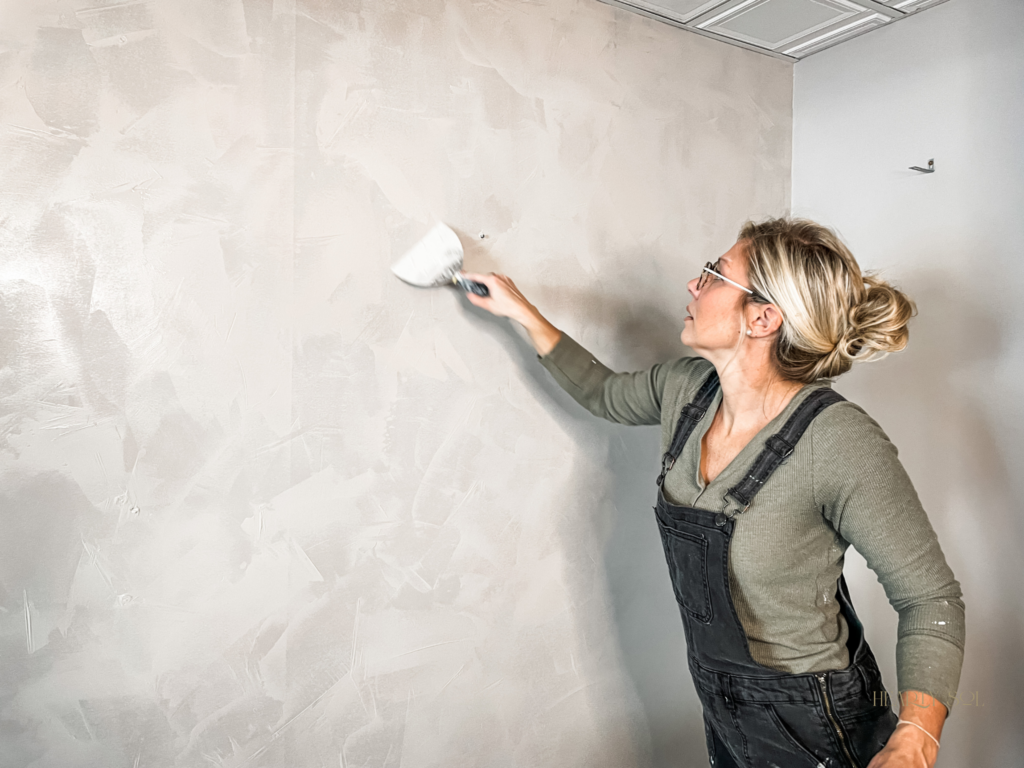
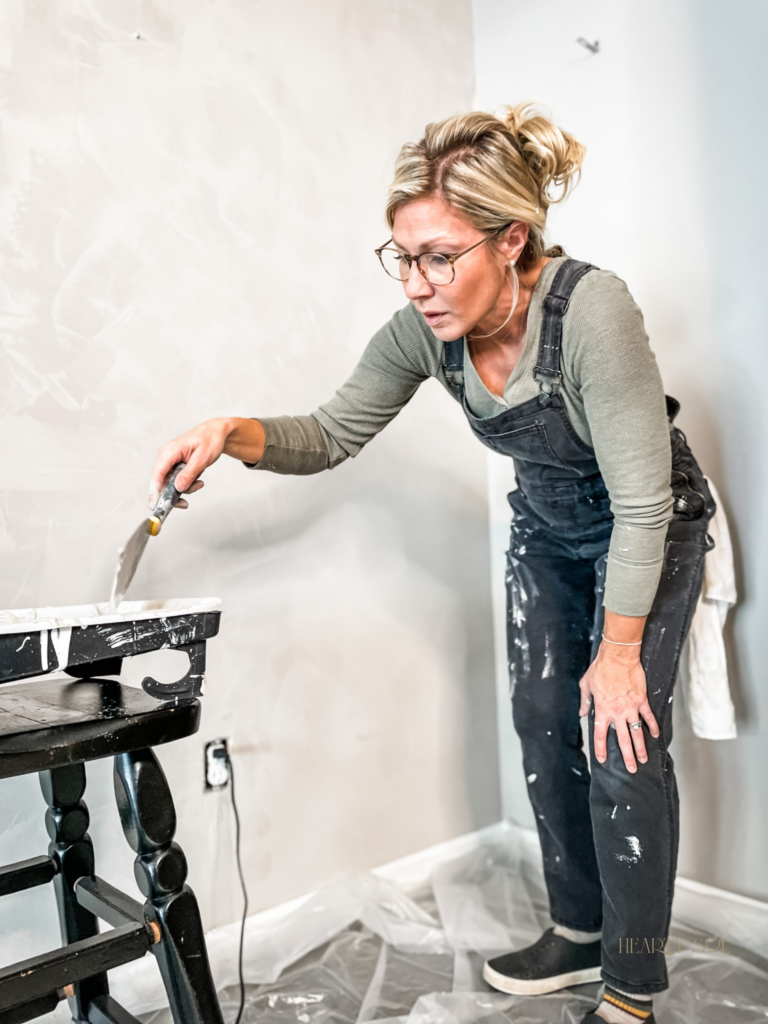
3. Apply Mixture
- Take your putty knife/scraper and apply the mixture in a cross-hatch, crazy 8, or S pattern.
- There is no perfect “Roman Clay technique” just do this until you have covered your entire surface. The idea with the first coat is to completely cover your surface. Our previous wall paint had a glossy finish, so I could tell where I had missed spots or where it didn’t cover as well.
4. Continue applying coats
- Apply a second and possibly third coat (I did 3, but 2 would probably have been sufficient)
- Check out my FAQ section below for dry times
5. Important things to keep in mind
- If you are a fan of very smooth surfaces, you can sand between coats. I chose not to in order to preserve the texture
- Keep in mind the thickness of this Roman Clay will cover less area than if you are just covering the wall with paint.
- You can apply sealer as a “top coat” after you have finished the Roman Clay. However, since ours is in our basement I didn’t see a need (the sealer is more applicable if the Roman Clay is in a living room or bathroom).


Helpful Tips
- Always make more than you think you will need! If you run out and need to make more, it can result in color inconsistencies. To play it safe, making more upfront is the way to go.
- Be prepared – there will be a mess! I’m usually one who can get away with painting in good clothes … not this project. Make sure to cover the floor area you are working on and have a wet rag on hand! Have more drop clothes than you think you need!
- The drywall mix in your paint may harden quickly. Make sure to apply the Roman Clay quickly or in smaller areas.
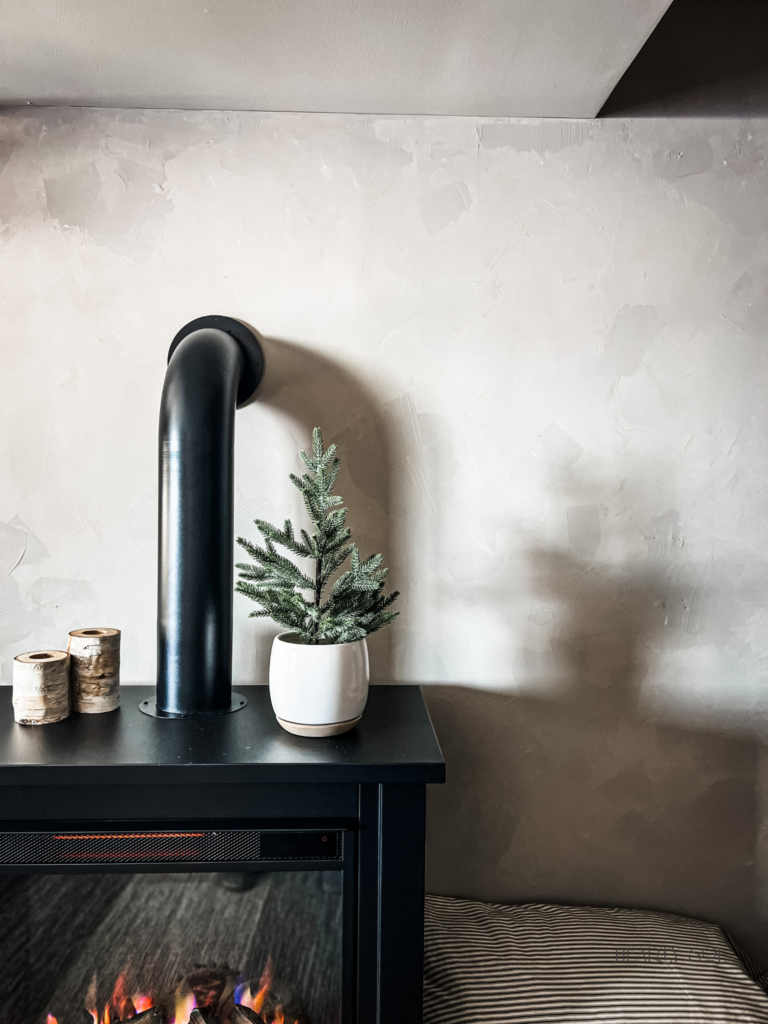
- Appearance note: In the final product, the Roman Clay will lighten in color and take on a chalky/ cloudy look after it dries.
- This is a noisy process: You may find the wall scraping noises calming or you might choose to blast music instead 🙂
YouTube Tutorial: How to make and apply your own Roman Clay
This Post May Contain Affiliate Links. Please Read Our Disclosure Policy.
Answering your questions about Roman Clay Wall Application
Because the space I was covering was large, I chose a 90-minute dry-time drywall compound. This gave me enough time to apply the first layer before it hardened completely – this first coat took about an hour to apply and an hour to dry (the Roman Clay dries in a lighter color so you will know it’s dry when there are no more dark spots). For the second coat, I covered any spots that I felt needed more texture or coverage. In the third and final coat, I went over specific spots that I felt needed a little something extra. The total process with making, applying, and drying took me about 1.5 days.
*The dry times will always depend on how thick you apply
*Remember that if you make more Roman Clay or mix your buckets you run the risk of the colors not perfectly being matched. I was ok with this because I wanted to go for more texture and depth. In order to avoid this, however, just make more than you think you will need!
The difference is in the application! Roman clay is usually applied with a putty knife, whereas lime wash is applied by a brush. Because of this, Roman Clay ends up with the look of natural clay or stone. Lime wash on the other hand, gives a more suede/velvet appearance.
Joint compound consists mainly of gypsum and limestone, but it also has other materials such as clay, mica, perlite, and starch.
The most basic answer is a putty knife. Other names for this are drywall knife, plastic putty knife, plastic spatula, and joint knife. All of these serve the same purpose and can be found at your local hardware store, Home Depot, or Amazon!
There are companies who make Roman Clay and I did a fair amount of research there. The thing was, that you had to chose from a small color palette. I’m not a box-me-in kinda gal, so this is when I started experimenting on my own, so I could decide which color I wanted!
When selecting a paint color, consider your space. Do you have lots of natural light or not? We selected a moody paint, but something that wasn’t too dark for our basement, since it doesn’t get a ton of natural light.
Also know that your application of the roman clay will lighten as it dries on the wall.
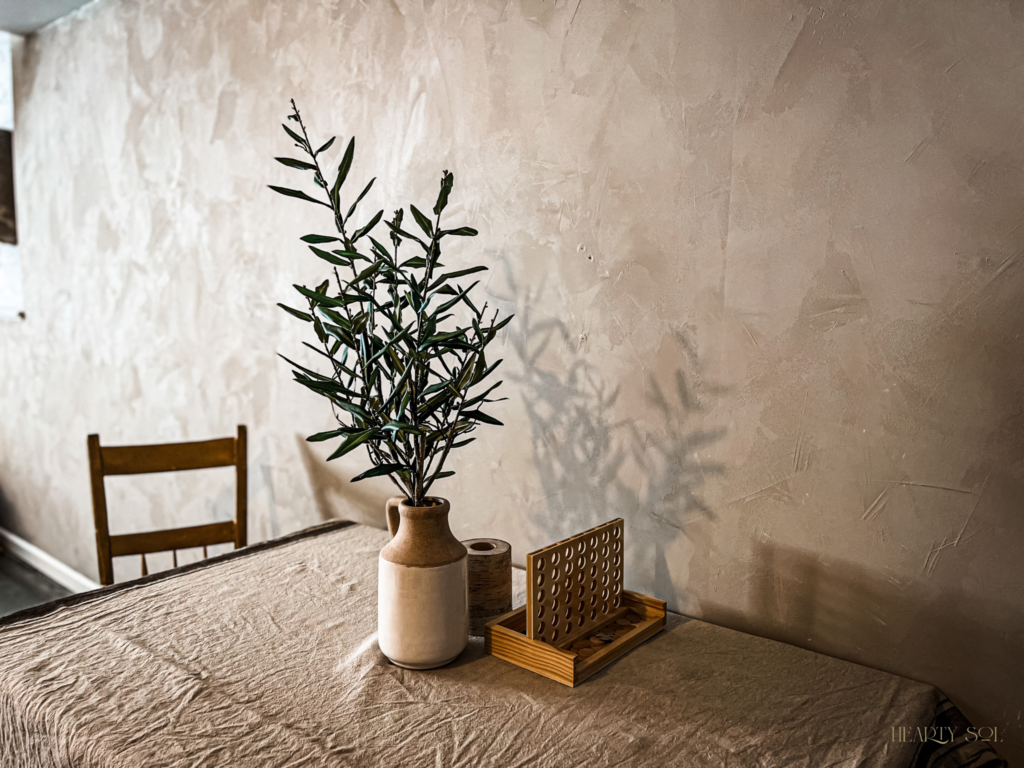
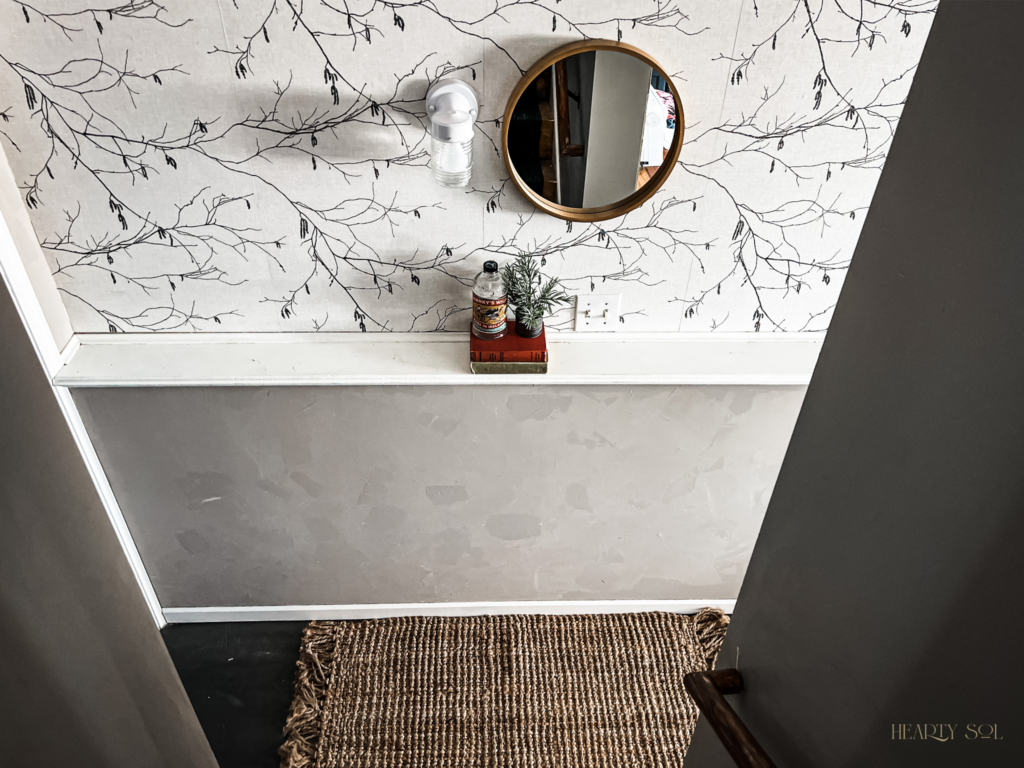
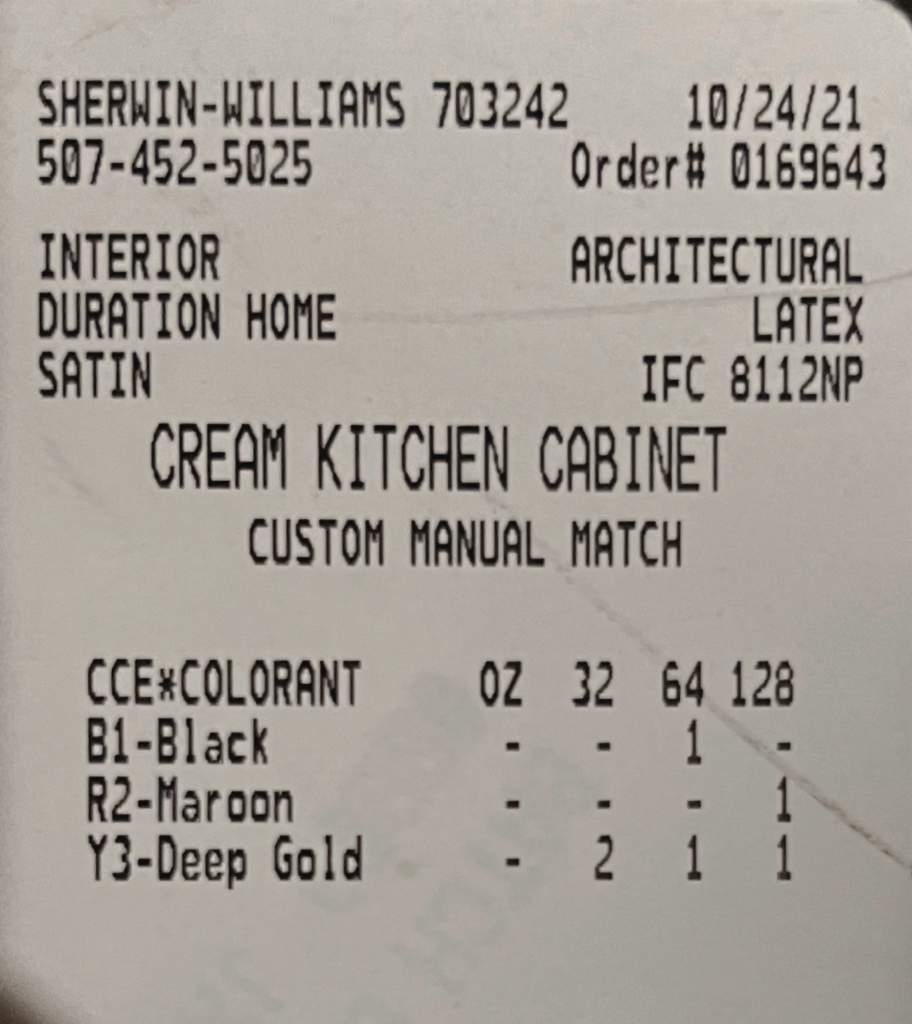
In our bathroom, we used a custom color that I love. We call it Creamy White. I loved how our sample space (our downstairs bathroom) turned out with the roman clay combination with this creamy white paint!
Our main room is a color from Sherwin-Williams called 7023 Requisite Gray. I selected it carefully as this would be in our basement- a space with little natural light, so I didn’t want something too dark. I wanted moody, rustic, and soft, but not too dark. If I were doing a room or wall with more natural light, I would probably select something darker, as adding the drywall compound will lighten the color, once dry.
Maintaining Your Roman Clay Walls
Should I use a sealer on my Roman Clay wall?
Yes—at least the way I’m doing it.
Because I’m working with joint compound and paint, the cost stays really low. It’s one of the least expensive finishes we’ve done.
Limewash, on the other hand, can still be affordable—but it usually requires more product, more coats, and sometimes a specialty primer underneath.
Even when done yourself, it tends to cost more per square foot.
Not drastically more—but enough to notice on a full room.
When I Would Not Seal It
This is where I tend to land most of the time.
- Bedrooms
- Living rooms
- Ceilings
- Lower-traffic walls
In these spaces, I like leaving it as-is.
It feels more natural. Less coated. And honestly, that’s part of the appeal.
When Sealing Starts to Make Sense
There are a few places where a sealant is worth considering:
- Hallways or high-traffic areas
- Kids’ spaces where hands are constantly on the walls
- Kitchens (especially near prep areas)
- Anywhere you might need to wipe it down more often
A sealant helps with:
- Light cleaning
- Reducing water marks
- Adding a bit of durability
Is Roman Clay easy to seal?
Yes—a protective seal is simple, just not something to rush.
You’re not covering the wall, you’re lightly protecting it. A soft roller or brush and a thin, even coat is usually all it takes.
Start light. Let it dry. Add another coat only if you need it.
Which Sealer Works the Best for Roman Clay Walls?
A dead-flat, matte sealer is the best fit—it protects the wall without taking away that soft, natural look like a clear matte water-based polycrylic is a practical and easy-to-find.
How to Care for Roman Clay Walls
Roman clay is beautiful—but it’s not quite the same as painted drywall.
It’s a little softer. A little more natural. And it asks to be treated that way.
Not high maintenance—just… intentional.
Everyday Care (what we actually do)
For the most part, we leave it alone.
If something needs cleaning:
- Use a barely damp cloth
- Or a little warm water with mild soap if needed
No scrubbing. No harsh cleaners.
It behaves a lot like a very matte paint—gentle is better.
I’m still having problems with the application. Can you help?
I’m having issues getting a textured/layered look
If you are using a powdered drywall compound, I recommend adding more dry powder to the mix to thicken it up
I’m not seeing any varying tones
To achieve more varied tones, you can add more paint. Remember, if you have to make more drywall compound, it will most likely come out a slightly different shade, so this could help too. The varying tone happens with layering, though – the more layers and textures, the more tones.
I feel like my streaks don’t look natural
That’s the beauty of the thin, overlapping coats – you get to play around, sand down if you’d like, and enjoy the imperfect look. If you feel like you may be holding your putty knife wrong, I like to hold it and press down with my pointer and middle finger.
My Newest Roman Clay Project
I have been wanting to extend the love from the basement to the main floor for a while now and I was especially inspired after our trip to Italy this summer – my new renovations (coming soon!) were the perfect time to add this rustic touch upstairs.
What I love most about Roman Clay is the chance to let go and be creative – swiping on the wall and having faith that it will end up just as unique and meaningful as it needs to. I enlisted some help from the kids this time – it was still a process, but it took our wall from smooth grey to something completely its own.


How to decorate with Roman Clay walls
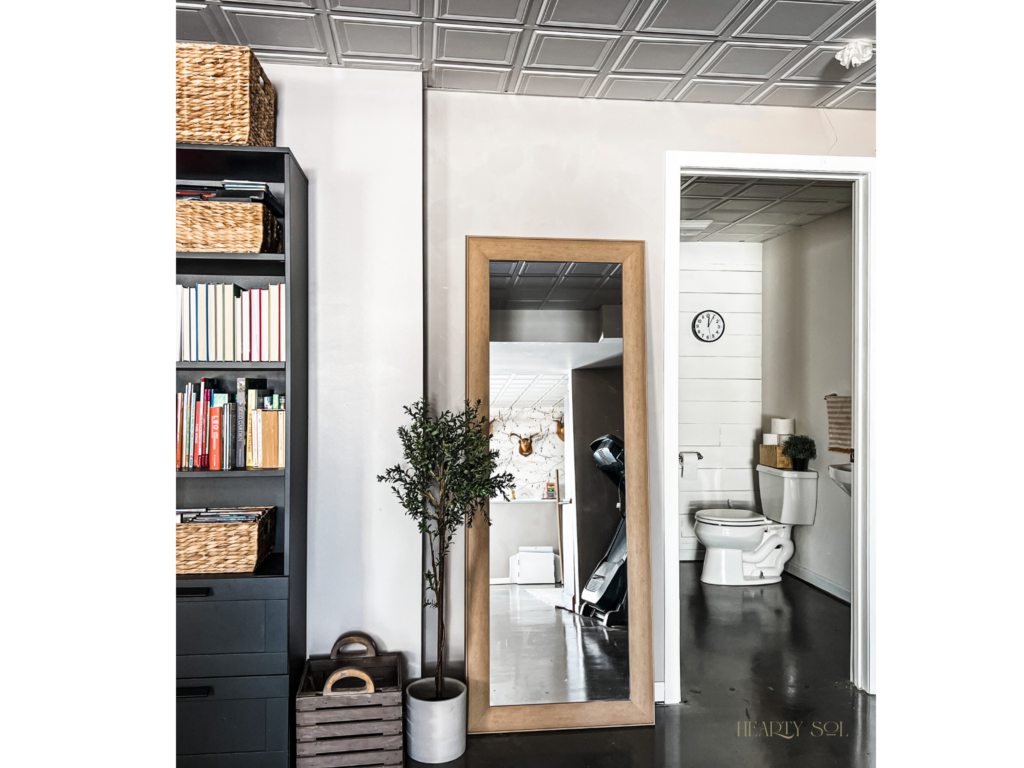
In the end, we are so excited about how this wall application turned out and how the finished product came together. It added a ton more life, warmth, and purpose to this space. Now we have a whole other living space that we can be proud of. We’re excited to host, invite guests into and hang out in our new space!
Prior to this, it was just a big playroom with my sewing table in it and built-in murphy bed. I’ve been getting many questions about where did you get those plants, rugs, decor, fireplace, television etc. So I put together all of the links here and here.
Let me know if there are any specific pieces of decor you have questions about!
Printable Instruction Card
Roman Clay Wall Application
Equipment
- 2 Old buckets or 1 flat painting tray (works best if one is a square bucket)
- Drill mixer
- Drywall compound (wet or dry)
- Paint color of choice
- Putty Knife (aka metal or plastic scraper)
Instructions
Prepare Drywall Compound
- Mix a few cups of drywall mix and water together with a drill mixer. Think of this as making batter – blend well and make sure there are no lumps (otherwise you will have dry powdery residue on your wall).
- You can also purchase pre-mixed buckets of drywall mix
Mix in your choice of paint
- In the paint bucket add 1 part of drywall mixture to the 2 parts of paint.
- Mix with drill mixer along the way (I eyeballed this at the start – just make sure to start small and mix well as you go).
- *Important: Add drywall compound to the paint, not the other way around.
Apply Mixture
- Take your putty knife/scraper and apply the mixture in a cross-hatch, crazy 8, or S pattern.
- There is no perfect “Roman Clay technique” just do this until you have covered your entire surface. The idea with the first coat is to completely cover your surface. Our previous wall paint had a glossy finish, so I could tell where I had missed spots or where it didn’t cover as well.
Continue applying coats
- Apply a second and possibly third coat (I did 3, but 2 would probably have been sufficient)
Important things to keep in mind
- If you are a fan of very smooth surfaces, you can sand between coats. I chose not to in order to preserve the texture
- Keep in mind the thickness of this Roman Clay will cover less area than if you are just covering the wall with paint.
- You can apply sealer as a “top coat” after you have finished the Roman Clay. However, since ours is in our basement I didn’t see a need (the sealer is more applicable if the Roman Clay is in a living room or bathroom).
Notes
Other Simple Wall Applications to try:
- How to Wallpaper | Drop-Match
- How to Use Peel and Stick Wallpaper
- How to Pickle your Shiplap
- DIY Bathroom Accent Wall
Pin this for later!
Closing Thoughts
Now we have a whole other living space that we can be proud of. We’re excited to host, invite guests into, and hang out in our new space. With care and attention, a wall application can completely transform a room. I love what Roman Clay has done for our home, and I’m excited to see your results!
Recent Posts You’ll Love
- Our Hidden Household Pantry: The Hardest-Working Room in Our Home
- A Year in the Life of Our Garlic Patch: From One Clove to A Year’s Worth of Flavor
- Fresh Summer Salad made with Lemon, Orzo, and Arugula
- What We Keep in the Car During Summertime
- Teaching Kids the Art of Talking to People

Affiliate Disclosure & Content Disclaimer
This post may contain affiliate links from a paid sponsor, Amazon or other program. When you use these links to make a purchase I earn a small commission at no extra cost to you. This allows me to continue creating the content that you love. The content in this article is created for information only and based on my research and/or opinion.
Emily T.
Leave a Reply


DAILY INSPIRATION ON THE GRAM @hearty.sol
it's hip to be square!
I love this so much! Curious, did you start with smooth or textured walls?
I have orange peel textured walls and am curious if this technique would require skimming first, or if I can skip that process all together?!
Our walls were smooth to start with.
I absolutely love what you’ve done here! Curious, did you start with smooth or textured walls? I’m wondering if I can accomplish this same look with my orange peel textured walls without having to do an entire skimming process first.
Or if I can somehow kill two birds with one stone?
Looking forward to hearing back, and again, such a wonderful post!
Hi Rachelle, I would think it would work just fine. You might just have to add one or more layers and mix your compound a bit thicker. This would make for a really nice cover up.
I love this look and I’m trying to replicate it but I’m having an issue getting the textured look. I mixed the ratio of paint and drywall compound that you used but when I applied, it just looked like solid paint, no varying tones from the drywall compound. I’m using a high quality Behr Dynasty paint/primer in one so maybe that is the issue?? I tried upping the ratio all the way up to 2/3 drywall compound and 1/3 paint and still had little varying tone effect like you show. Any thoughts?
Hey Adam,
Are you using a pre-mixed compound or the powder that you mix with water? If the powder variety, I might try adding more dry powder to the mix to thicken it up.
I am having the same issue as Adam, where I’m not seeing they varying tones. I used a premixed compound. Any recommendations?
You could add more paint, if you want to see a different color. The varying tone happens with layering. The more layers, and textures, the more tones. Make sense?
How do you recommend to use as a sealer for this? I just finished this technique on my range hood and I love it, but am wondering what sealer I should use?
Hey Abbie! I would use a water-based paint sealer in this instance.
I read that roman clay mixture help with moisture and are anti microbial, due to combination of lime and marble. Is the drywall joint compound also made with lime and marble ?
Joint compound is consists mainly of gypsum and limestone, but it also has other materials such as clay, mica, perlite, and starch.
Is the drywall joint compound also made with lime and marble ?
Will this application work on a decorative stovetop hood vent that is made out of wood and primed (from Heritage Hoods)? My contractor is concerned that it won’t adhere well because it’s not going onto drywall. Same question for a brick fireplace!
This is such a fantastic guide! I love the idea of using Roman clay for a unique wall treatment. Your step-by-step instructions make it seem so achievable. Can’t wait to try this in my own home! Thanks for sharing!
What a fantastic guide! I’ve always been curious about Roman clay wall applications, and your step-by-step instructions made it so approachable. Can’t wait to try this out in my living room! Thank you for sharing!
This DIY guide on making Roman clay wall applications is fantastic! I’ve always wanted to try this but never knew where to start. The step-by-step instructions are super helpful, and I love the idea of personalizing my space with such a unique finish. Can’t wait to give it a shot!
Excited for you to try it!
This is such a fantastic guide! I’ve always wanted to try Roman clay for my home. Your step-by-step instructions make it seem so achievable. Can’t wait to get started and add that beautiful texture to my walls! Thanks for sharing!