

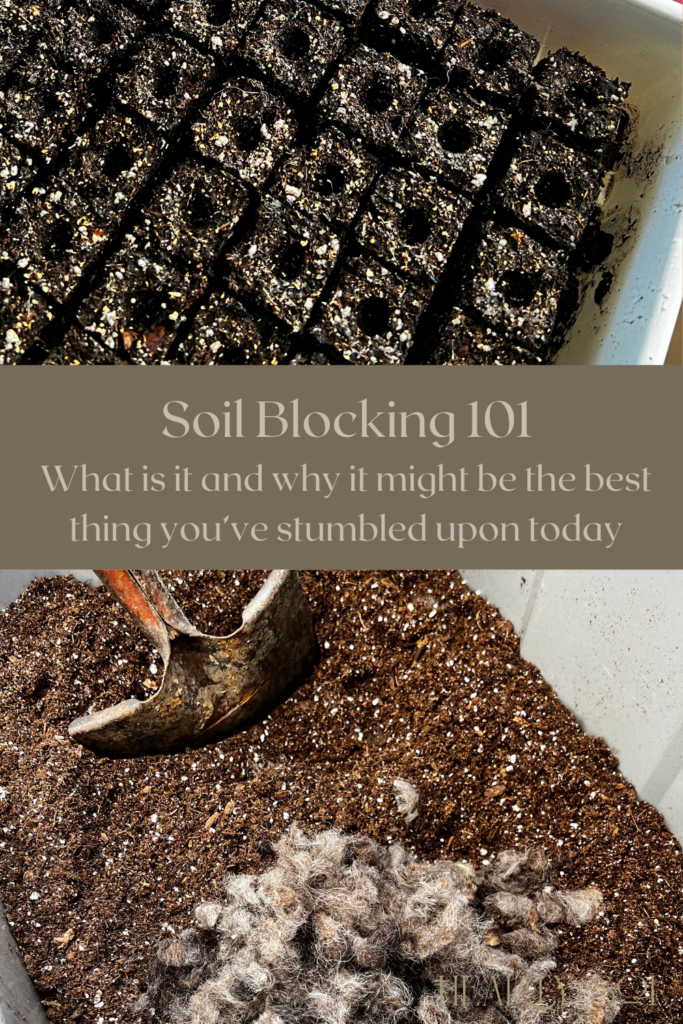
The Ultimate Guide to Soil Blocking: A Sustainable Seed Starting Method
A sustainable seed-starting method that eliminates the need for plastic pots, reduces transplant shock, and promotes stronger root development.
Hop on this Sustainable Gardening practice!
There’s nothing more sustainable than using the soil itself to create an optimal environment for seedlings to grow!
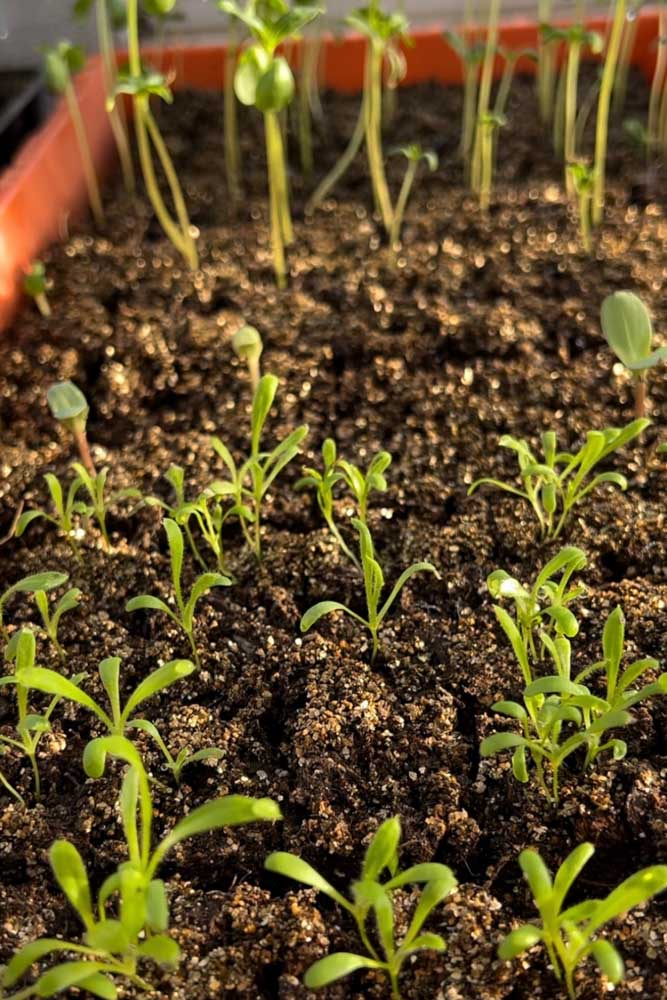
I love soil blocking for a few reasons. I can fit so many more seedling starts in our little greenhouse and the roots and plants do so much better than being root bound in plastic trays. These soil blocks are not only healthier in the greenhouse, but also are so much livelier and ready to spread their roots once they get transplanted into the garden. All of that is reason enough to switch over!
Let’s walk through the soil-blocking process, and I’ll explain why it’s better than traditional seed-starting methods, plus answer some common questions.
Why Soil Blocking is Better than Traditional Seed Starting:
- Environmentally Friendly: Soil blocks eliminate the need for plastic pots, reducing plastic waste.
- Healthier Seedlings: The square shape of the soil block allows more room for roots to grow. This prevents the roots from circling and binding to each other. This system also promotes air pruning and encourages healthier root systems.
- Cost-Effective: Once you have the soil block maker, you can make your own soil blocks using minimal ingredients, saving money in the long run.
- Space-Saving: Soil blocks can be made smaller than traditional pots, allowing you to start more seedlings in the same space.
How to Soil Block:
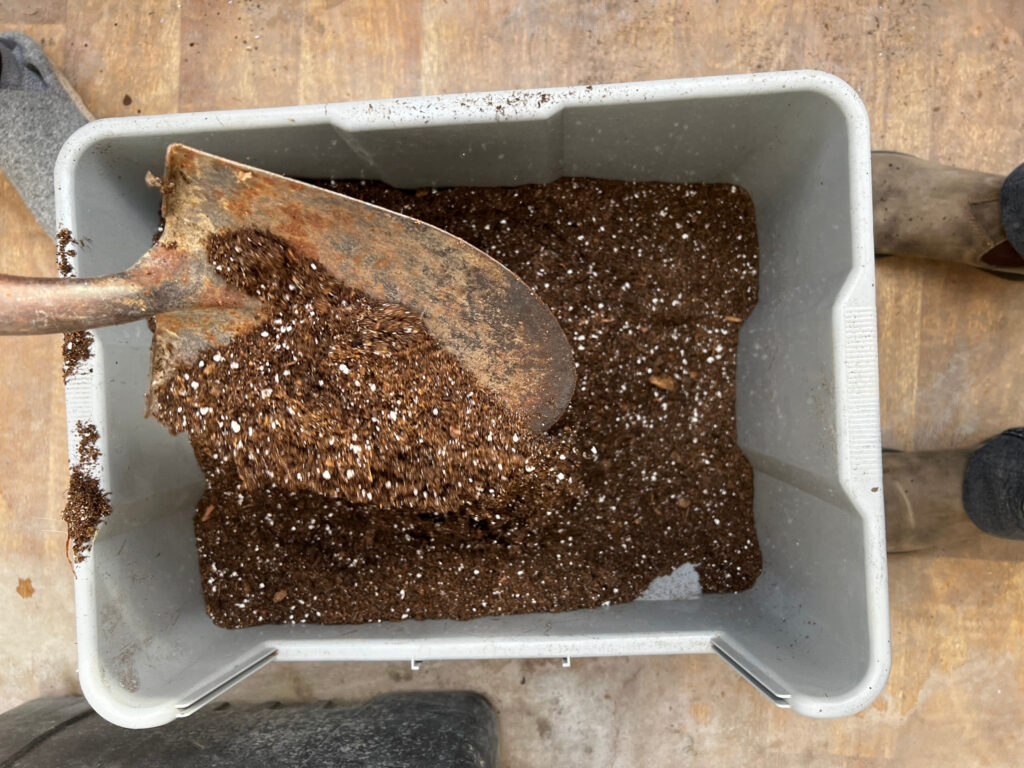
- Prepare the Soil Block Mix: After testing out countless soil mixes, I have found the most simple and effective recipe for consistent results. Follow our recipe here and create your mix using just peat free soil/compost, finely shredded wool or coconut coir, and cinnamon.
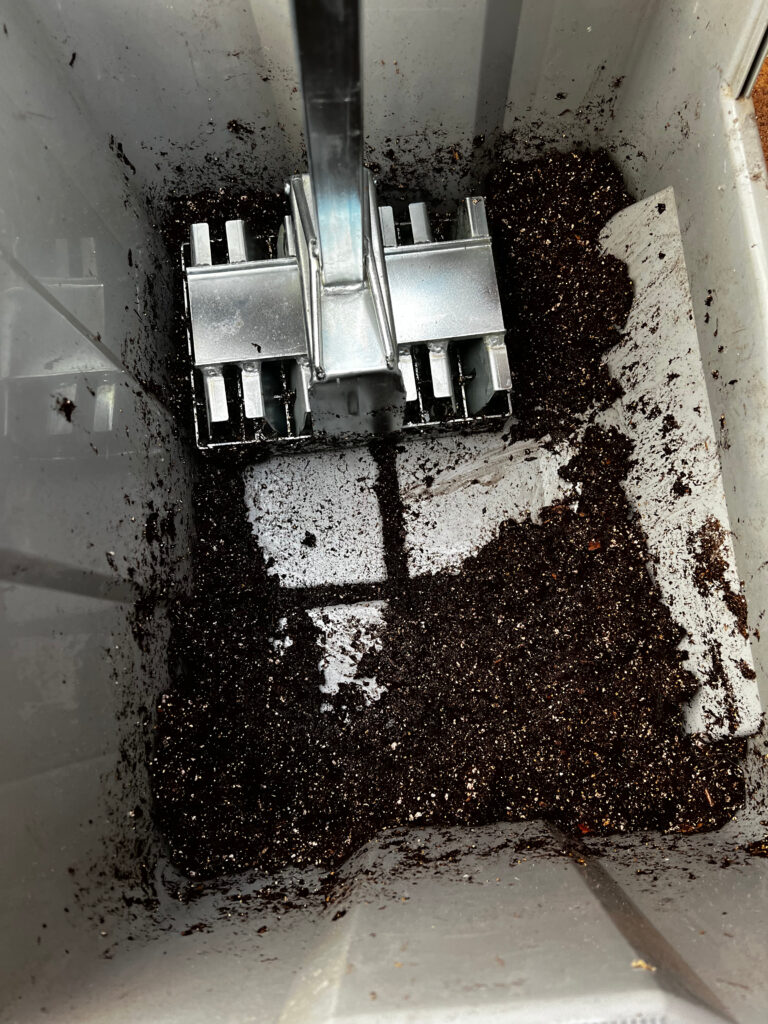
- Moisten the Mix: Add water to the mix until it holds together when squeezed but is not overly wet.
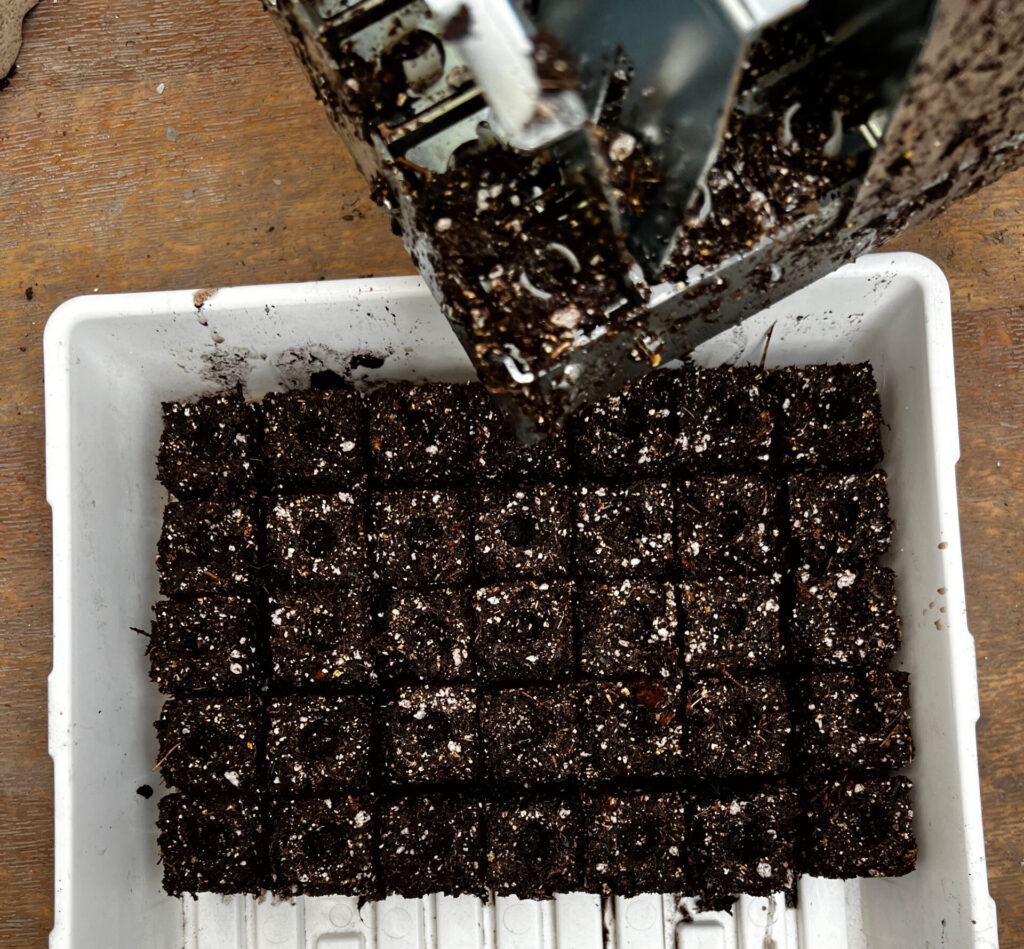
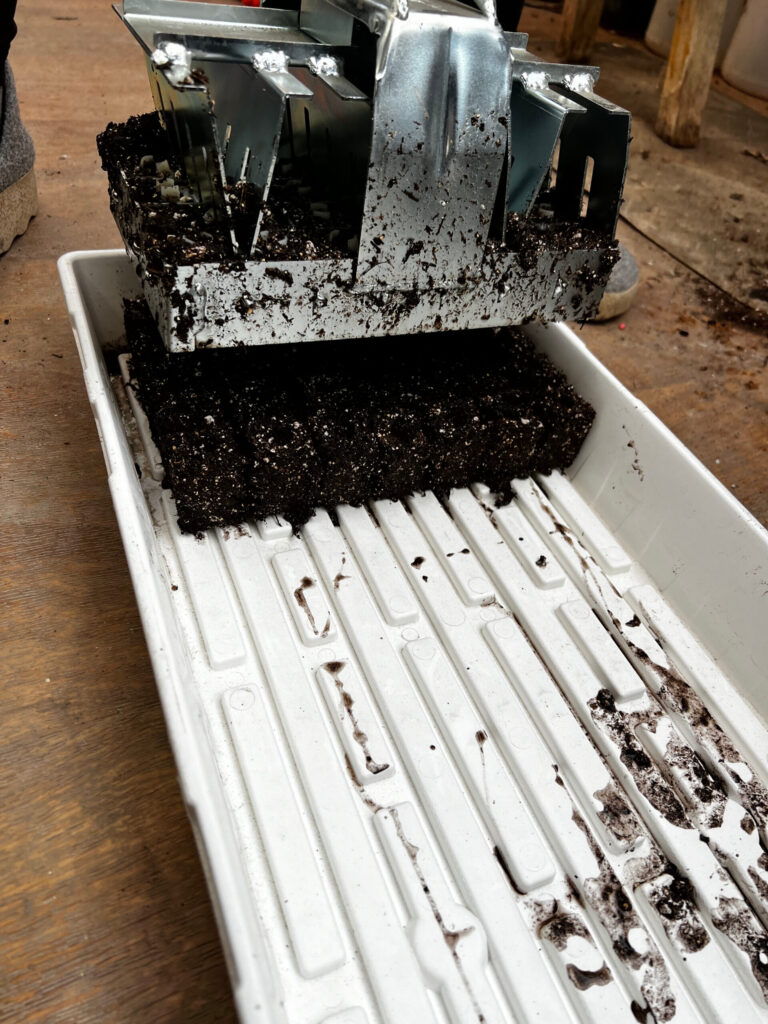
- Fill the Soil Block Maker: Head over to my blog post here for a more detailed look into what tools we use. Press the soil block maker (this is the one I started with – the handle is easier on your hands after doing several in a row and this is the one we’ve been working with for a couple of weeks now) into the mix, then tap it gently to release the soil blocks.
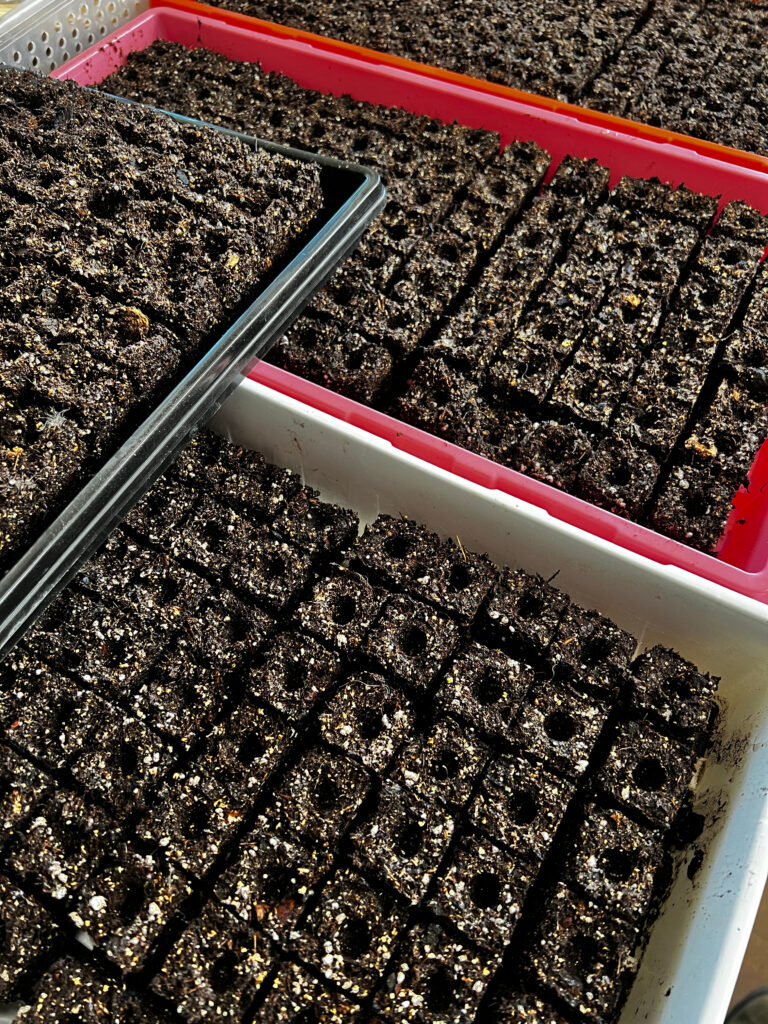
- Plant Seeds: Make a small indentation in each soil block and plant your seeds according to the packet instructions.
- Water and Maintain: Keep the soil blocks moist but not waterlogged, and provide adequate light and warmth for seed germination. At the beginning I recommend watering the bottom of the tray, that way the blocks can absorb the water gently without disrupting the seeds.
How to Keep Soil Blocks from Drying Out:
- Monitor Moisture Levels: Check the soil blocks regularly to ensure they are moist but not waterlogged. Soil blocks can dry out quickly, especially in warm or dry conditions. I like to water all the trays in the morning, then drain off any access water.
- Watering: Water the soil blocks gently and evenly to avoid disrupting the seedlings. Use a spray bottle or a watering can with a fine rose attachment to water the blocks.
- Covering: Humidity is important for maintaining your soil blocks, our greenhouse does a good job of this for us. You can cover the soil blocks with a clear plastic humidity dome, plastic wrap, or burlap – all can help retain moisture. Remove the cover once the seedlings start to emerge to prevent excessive moisture buildup.
- Misting: If you notice the soil blocks drying out, mist them lightly with water to increase humidity around the seedlings. Avoid over-misting, as this can lead to fungal growth.
- Mulching: Mulching around the base of the seedlings can help retain moisture in the soil blocks. Use a thin layer of vermiculite.
- Positioning: Place the soil blocks in a location with adequate humidity and avoid placing them in direct sunlight or near heat sources, as this can cause them to dry out quickly.
Our rationale behind our greenhouse watering practices can be found here: Guide to Correctly Watering Greenhouse Plants
Questions People are asking about Soil Blocking
While a soil block maker makes the process easier, you can also make soil blocks by hand. Simply form the mix into blocks using your hands and a little pressure. Think of making tight little mud cubes. You can use any gardening tools to assist you in this process, I have my 12 favorite gardening tools I recommend this gardening season!
It’s best to use a soil mix specifically designed for soil blocking, as it needs to hold together well when formed into blocks but still be loose enough for root growth. We have the perfect mix recipe!
When the seedlings are ready to transplant, simply place the entire soil block into the planting hole. The roots will grow through the block into the surrounding soil.
No, soil blocks are not reusable. However, you can compost them once the seedlings are transplanted.
Yes, you can absolutely follow this process in your shed or basement shelves. You will need to re-create a greenhouse environment to maintain moisture levels, lighting, and temperature. All the tools you will need can be found here.
Soil-Blocking Tips and Tricks
- Seed Starting Mix: Use a high-quality, well-draining seed starting mix for soil blocking. Avoid using garden soil, as it may contain pests, diseases, and weed seeds.
- Temperature: Soil blocks should be kept at the appropriate temperature for seed germination. Most seeds germinate best at temperatures between 65-75°F (18-24°C).
- Transplanting: When transplanting soil blocks, handle them gently to avoid damaging the fragile roots. Plant the entire soil block into the ground, as the roots will grow through the block.
- Fertilization: While soil blocks contain nutrients from the seed starting mix, seedlings may benefit from a diluted liquid fertilizer once they have a few true leaves.
- Air Pruning: Soil blocks promote air pruning, which encourages the development of a dense, fibrous root system. This can lead to healthier, more resilient plants.
- Storage: Store unused soil block mix in a sealed container in a cool, dry place. Avoid storing it outdoors or in areas where it may become damp.
- Experimentation: Soil blocking can be a bit of an art, so don’t be afraid to experiment with different mixes, techniques, and seed varieties to find what works best for you.
Soil blocking is a sustainable, cost-effective, and space-saving seed-starting method that produces healthier seedlings. By following these steps and tips, you’ll be well on your way to a successful seed- starting experience. Happy planting!
Pin this for later!
Other Gardening Posts:
How to Make Your Own Seed-Tape
How to Quickly Install Drip Irrigation for Your Raised Beds

Affiliate Disclosure & Content Disclaimer
This post may contain affiliate links from a paid sponsor, Amazon or other program. When you use these links to make a purchase I earn a small commission at no extra cost to you. This allows me to continue creating the content that you love. The content in this article is created for information only and based on my research and/or opinion.
Emily T.


DAILY INSPIRATION ON THE GRAM @hearty.sol
it's hip to be square!
View comments
+ Leave a comment