

Hello, I’m Emily. I’m so glad you’re here! Join me and my family as we find beauty in our everyday life on the farm, hearty recipes, and a handmade home. Find more about me and our story here.
Cheers!

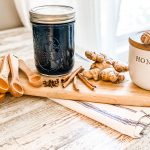
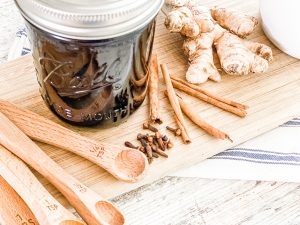
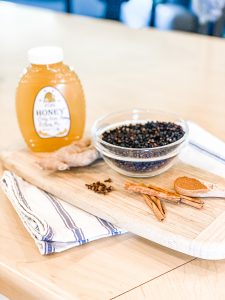
This is a great recipe for homemade Elderberry syrup! This amazing antioxidant-rich syrup is used to help treat colds and flu and can help boost your immune system to prevent illness. I like to add herbs and spices to the syrup to add even more medicinal benefits.
Before jumping into making the classic elderberry syrup recipe below, there are a few common questions I’d like to address:
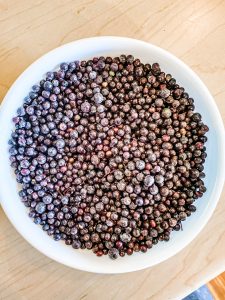
You can use fresh or dried elderberries for making syrup. I often use dried in the winter months and fresh during the elderberry season (usually the end of August, here in Minnesota) and store year-round. If using fresh berries, use twice the amount of dried berries your recipe recommends.
(This post may contain affiliate links which means I make a small commission at no extra cost to you.)
As we covered above, syrups that are shelf-stable, meaning that they are able to sit out at room temperature for a long period of time without spoiling, require more sugar, alcohol, or a combination of the two. You’re going to have to add something to discourage the development of bacteria and mold. To make this syrup more family-friendly, my recipe uses less sugar and no alcohol and is intended to be kept in the refrigerator. However, if you want a more shelf-stable syrup, you can add 1/4 cup of lemon juice and can a pint for 25 min in a hot water bath.
Honey acts as a natural preservative as well as a sweetener (and has other healthful properties besides), so it’s my preferred choice for my herbal syrups, but it is not recommended for children less than one-year-old. This is because of a rare condition called infantile botulism—sounds scary, and you don’t want it! So if you’re planning to share your syrup with a very little one, you would need to substitute either agave nectar or maple syrup for the honey, and again, keep it in the refrigerator.
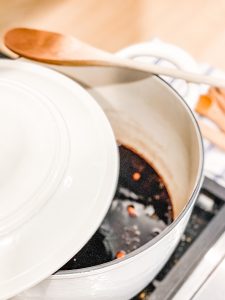
When preparing your syrup, be sure to use a ceramic, glass, or other non-reactive pan that won’t off-gas. Pans with synthetic nonstick coatings release some nasty stuff when heated, so avoid them when making syrup.
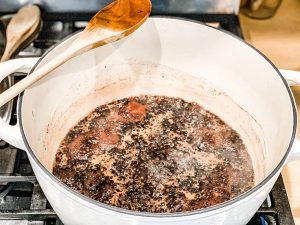
Remember that you’re finished herbal product is only as good as the ingredients you start with, and that includes water. The water you include should be filtered water, depending upon where you live and what you have access to.
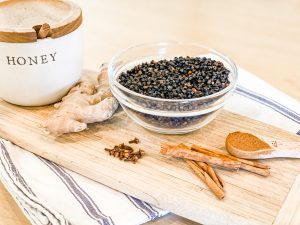
I think one of the things that beginners often struggle with when they’re just learning how to make herbal products for their home is being too rigid in how they do things. There’s not just one way to make spaghetti sauce—every chef has their own recipe, each with its own little tweaks of this or that—and the same principle applies here. So be creative with your syrups! You can add vanilla (I love a slice of vanilla bean in mine), cardamom tastes really good . . . just give yourself permission to play with the flavor. All those improvisations add extra goodness anyway!
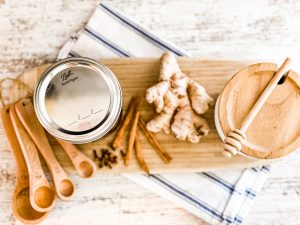
Makes about 3 cups of syrup
Active Time: 1 hour
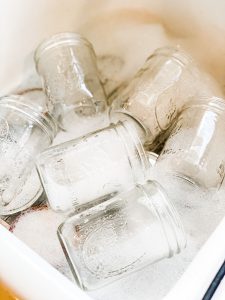
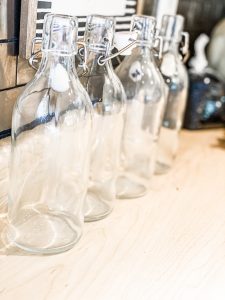
This recipe is easy to multiply if you’d like to make a big batch to store, freeze or give as gifts (glass bottles- I love these!). My family enjoys a teaspoon for adults and 1/2 tsp. for the kids right out of the fridge, just about every day during the sniffle season.
Use 1 tablespoon of elderberry syrup every 2 hours at the first sign of a cold. Reduce the serving size to 1 teaspoon for children under 12. Children under 2 can be given 1/2 teaspoon safely. Elderberry antioxidants enter the bloodstream rapidly and are excreted within 2 hours of eating, so it is safe to take elderberries often. Read more about the amazing little elderberry here.
Here are just some of the benefits of elderberries. To see their full benefits check out the elderberry here.
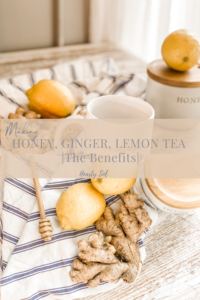
Other lovely drinks with using ginger.

Hello, I’m Emily. I’m so glad you’re here! Join me and my family as we find beauty in our everyday life on the farm, hearty recipes, and a handmade home. Find more about me and our story here.
Cheers!
Affiliate Disclosure & Content Disclaimer
This post may contain affiliate links from a paid sponsor, Amazon or other program. When you use these links to make a purchase I earn a small commission at no extra cost to you. This allows me to continue creating the content that you love. The content in this article is created for information only and based on my research and/or opinion.
Emily T.
DAILY INSPIRATION ON THE GRAM @hearty.sol
it's hip to be square!


Have you ever used maple syrup in this recipe?
I have not, but I don’t know why not.
Thank you so much for this recipe!
I was wondering if you have found a use for the pulp afterwards? I was thinking of using it to dehydrate and use as a powder (with the cloves removed) but not sure how much of the nutrients remain in whats left or how effective it would be.
You sure could give it a try!