

How to Make a Waldorf Doll | the Body + Pattern
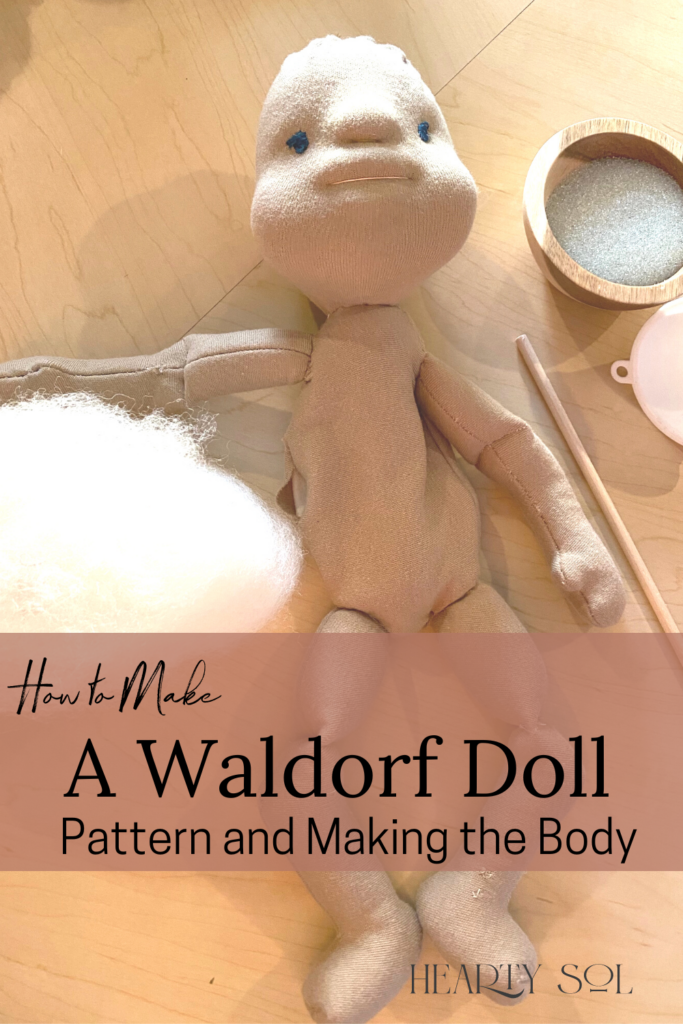
In this tutorial, We will be finishing up our Waldorf doll body by making and stuffing the body and adding the head.
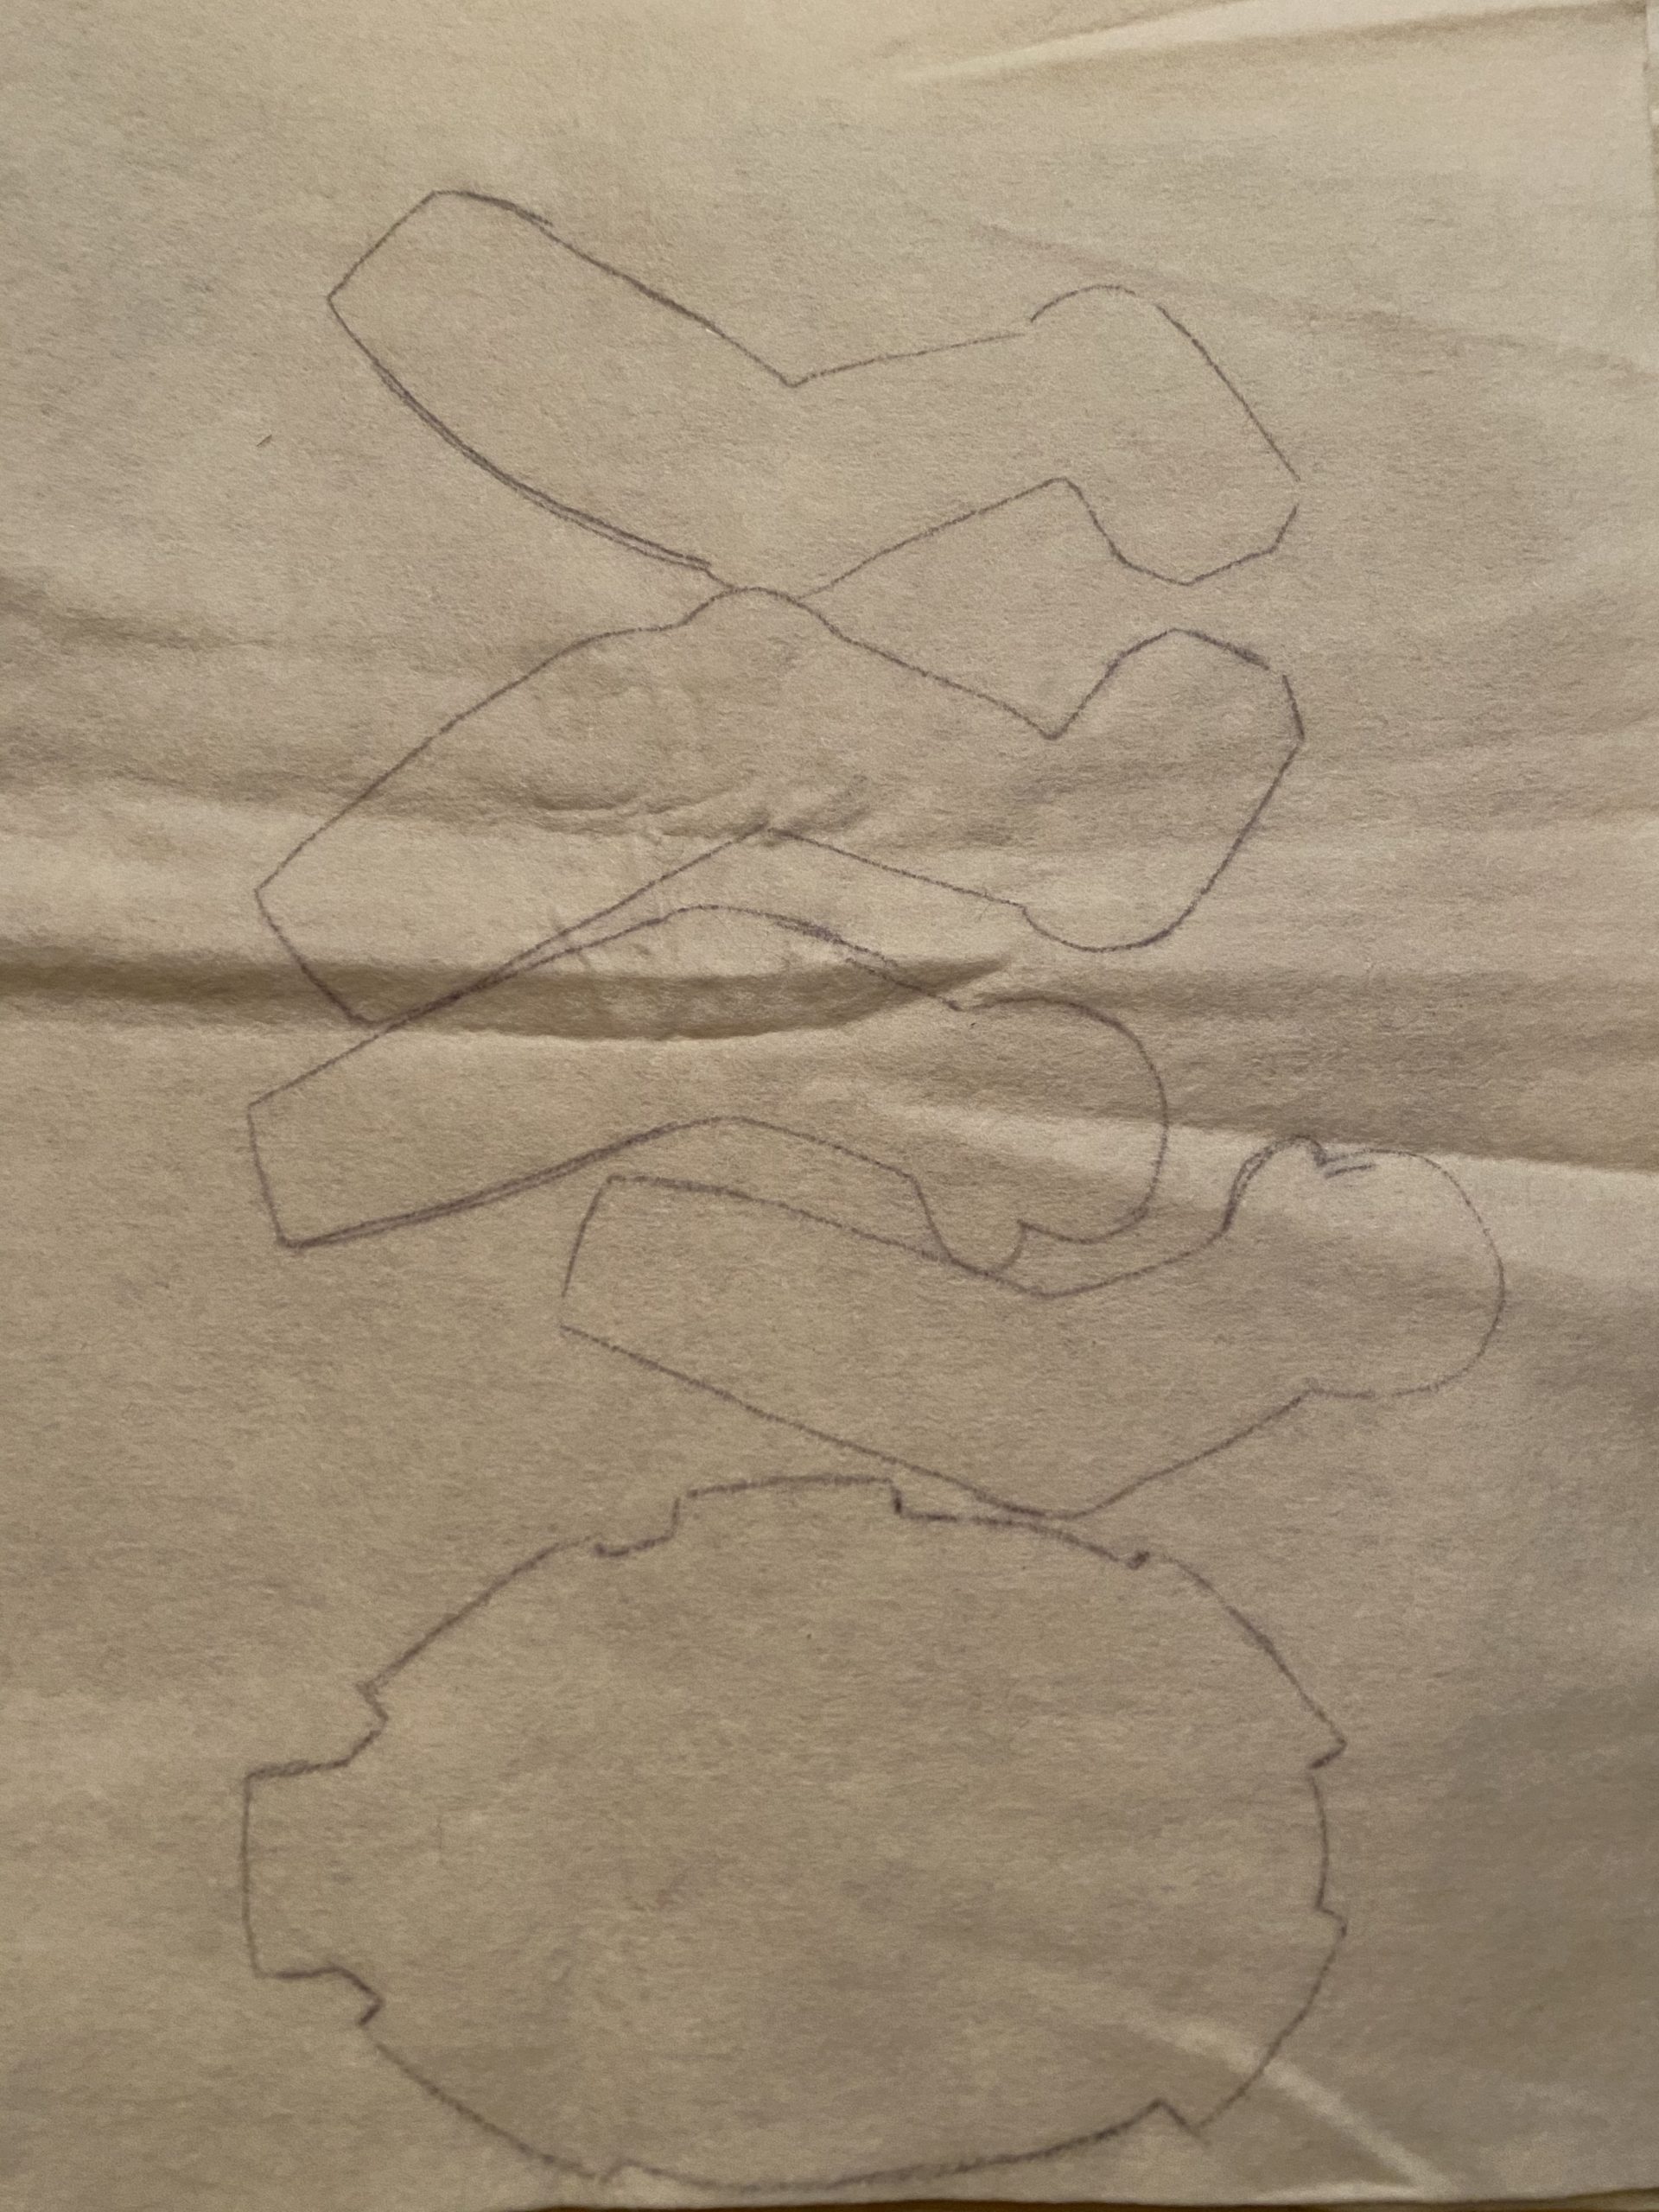
Firstly you will need Waldorf Doll body pattern used for this tutorial, then cut out the pattern pieces.
This post may contain affiliate links which means I make a small commission at no extra cost to you.
In case you are just landing here and missed the first 3 phases of making this Waldorf doll, here are the tutorials for making the head, face, embroidering the mouth and eyes and creating hair or a wig.
MAKING THE HEAD TUTORIAL | PHASE 1
FACE DETAIL VIDEO TUTORIAL| PHASE 2
WIG/ HAIR VIDEO TUTORIAL| PHASE 3
Triple stitch
By now you are an expert at this ladder stitch. This means your doll will be so well put together and will hold up to all the love it will receive when you gift it to that special someone. All of the limbs that we are attaching in this step should be triple stitched using a ladder stitch.


Sewing the body’s limbs and belly
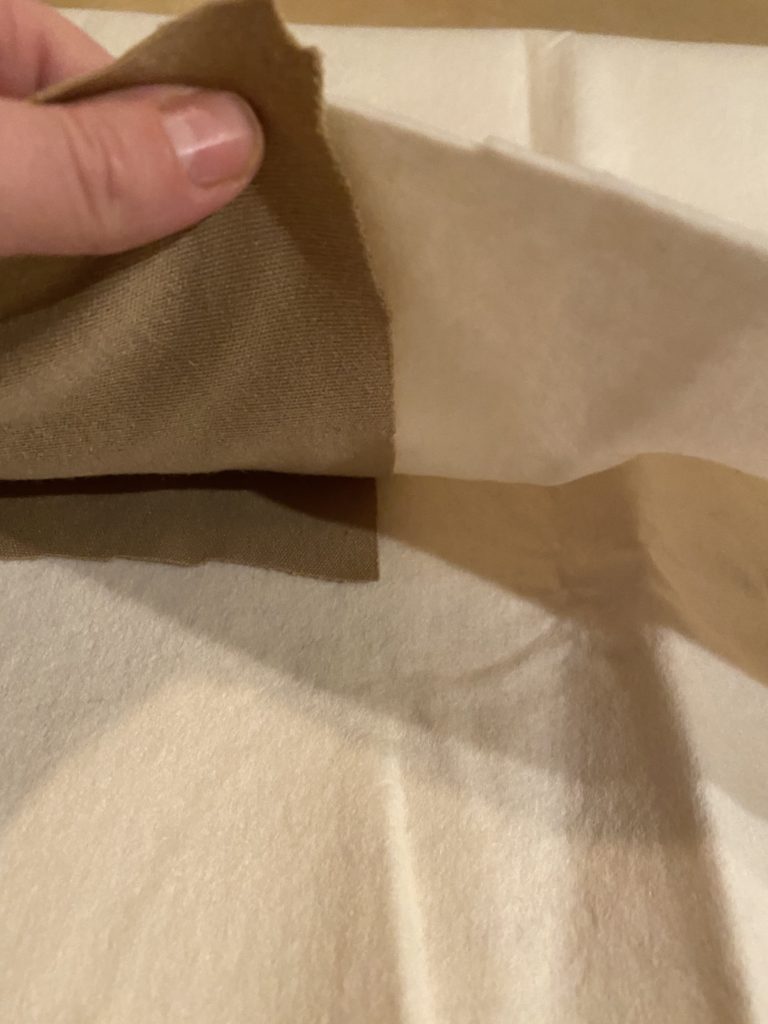
Fabric sandwiching
Before we cut out the pieces from the fabric, here is what I recommend. We will be placing the doll’s skin fabric together according to the correct stretch of the fabric. Let’s pretend that this doll skin fabric is the burger. Then on the outside of the burger, we will place the lining fabric- we’ll pretend this is the bun.
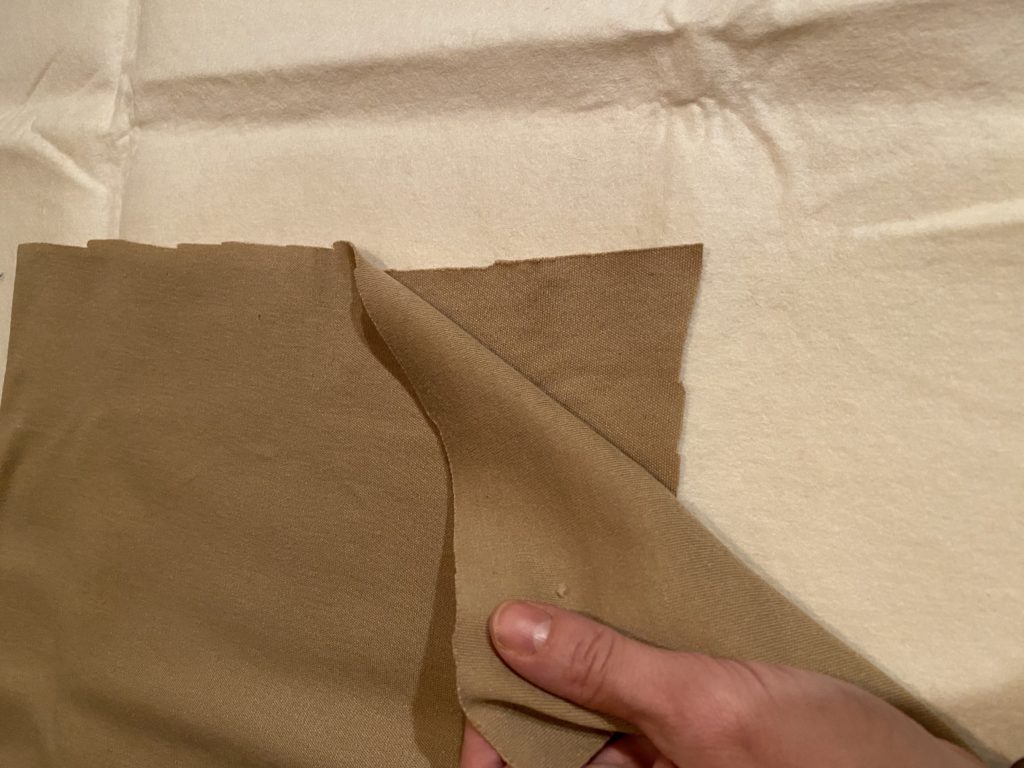
Laying the lining, doll skin fabric, doll skin fabric, the lining will make for efficient sewing and making turning these pieces much easier, later on.
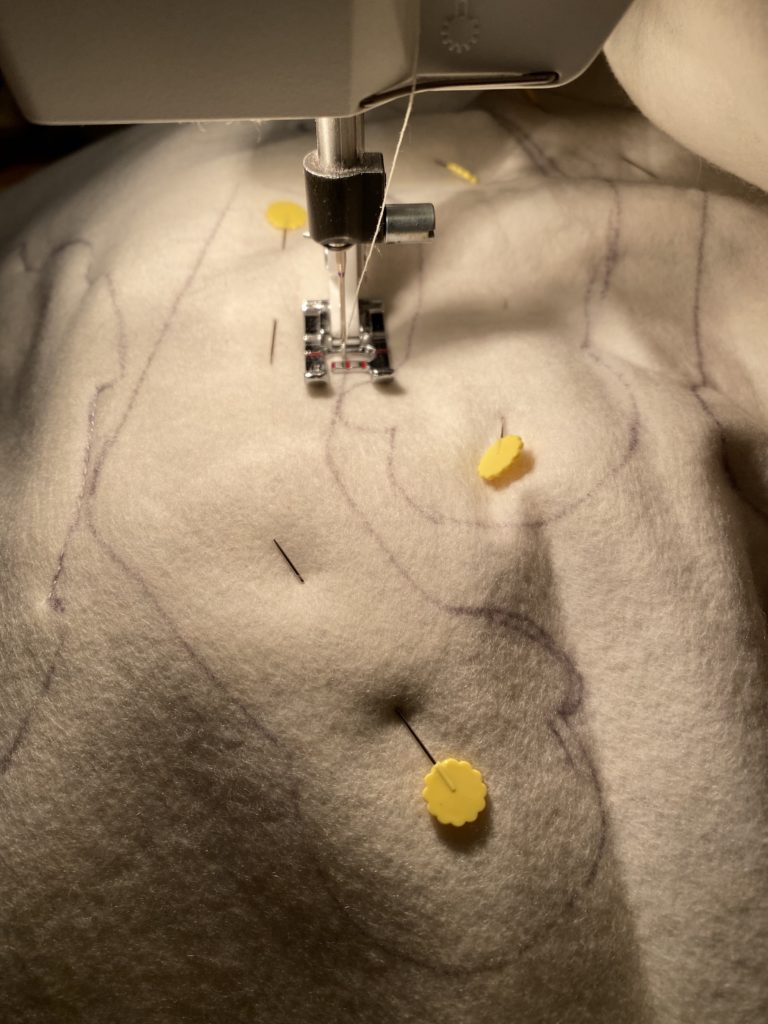
Trace your pattern pieces on top of your fabric sandwich.
Pin in place.
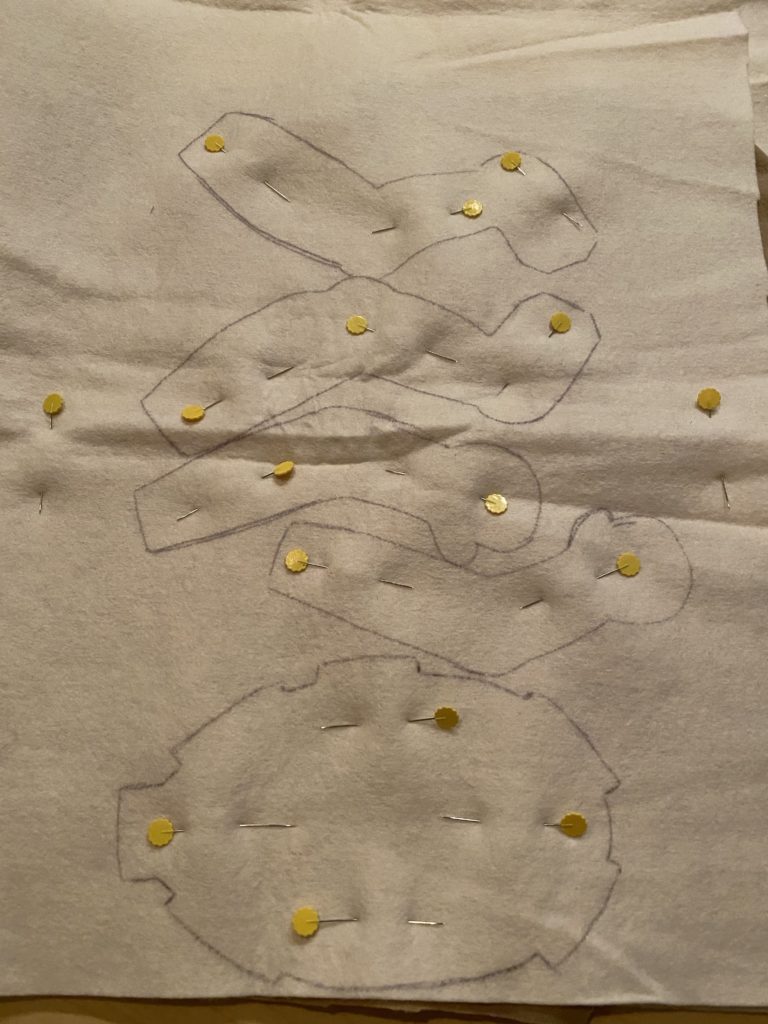
Triple stitch – sew on top of sandwiched pattern pieces. Make a note about the areas on your pieces that are to be left open and not sewn on. I made sure to sew a few back-stitches when I came close to these areas to make these areas extra secure.
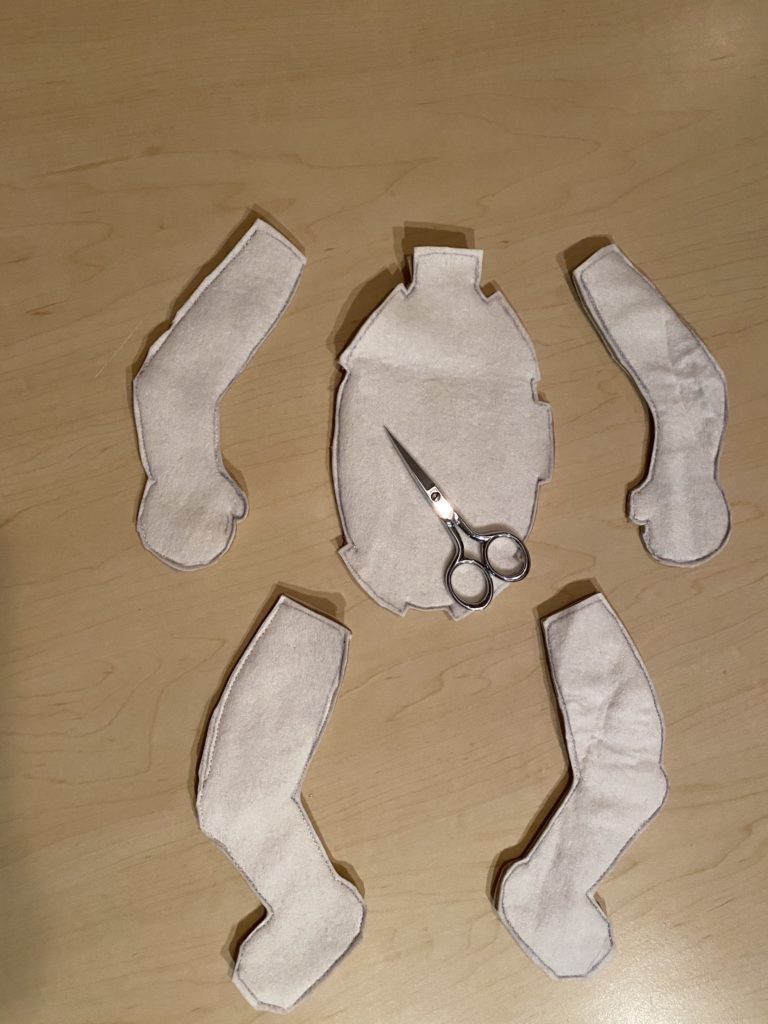
Cut out pattern pieces. Carefully snipping any corners.
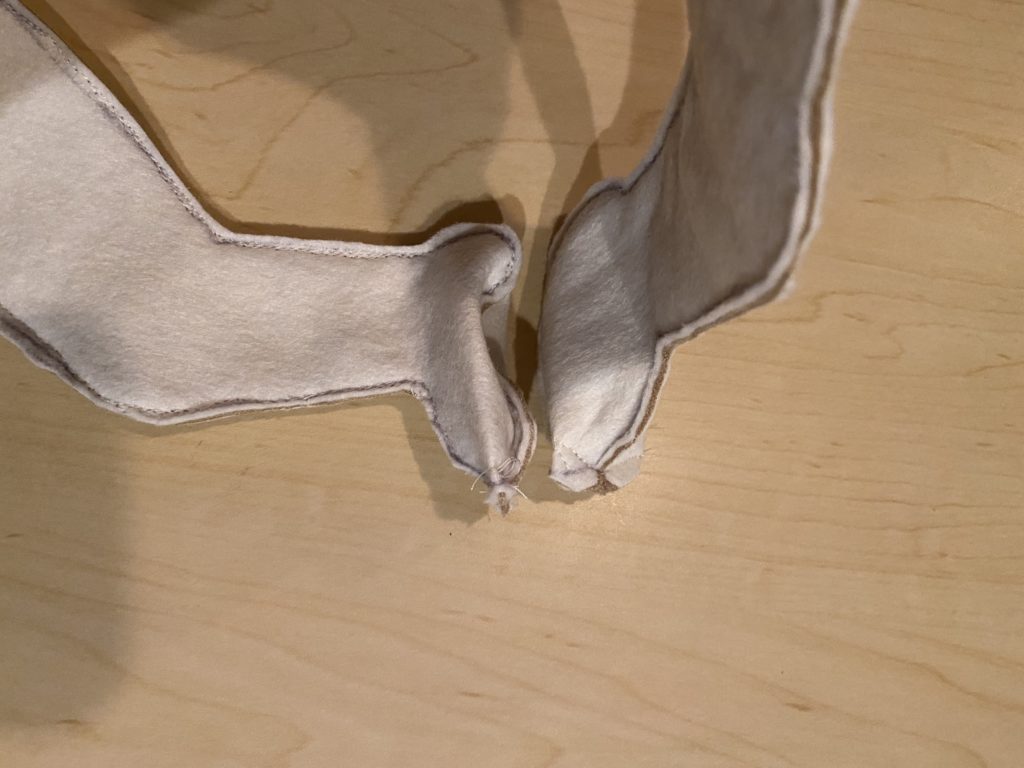
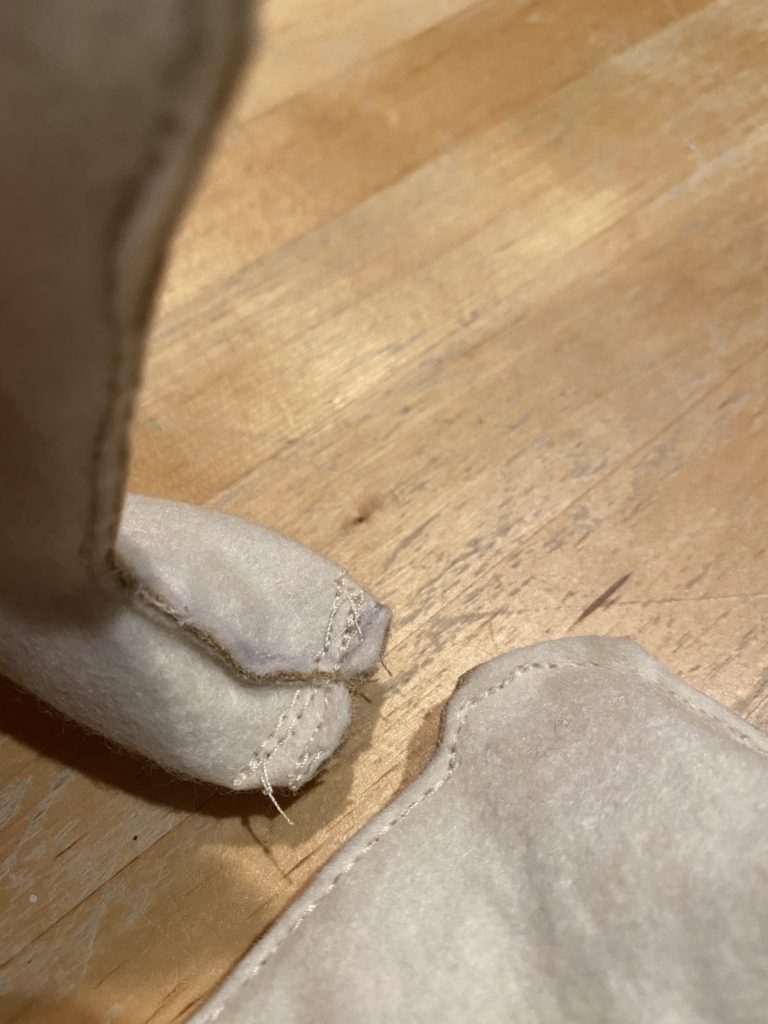
Triple stitch the toe as you see in the photo. Make 2 lines of stitching for extra strength.
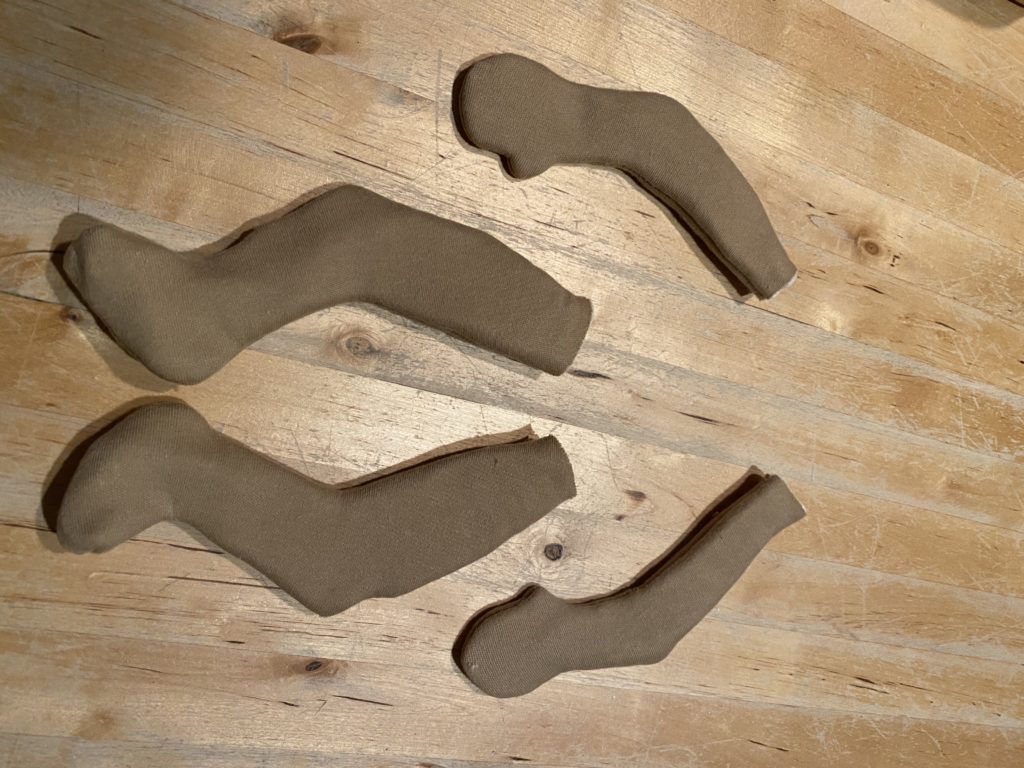
Turning the limbs
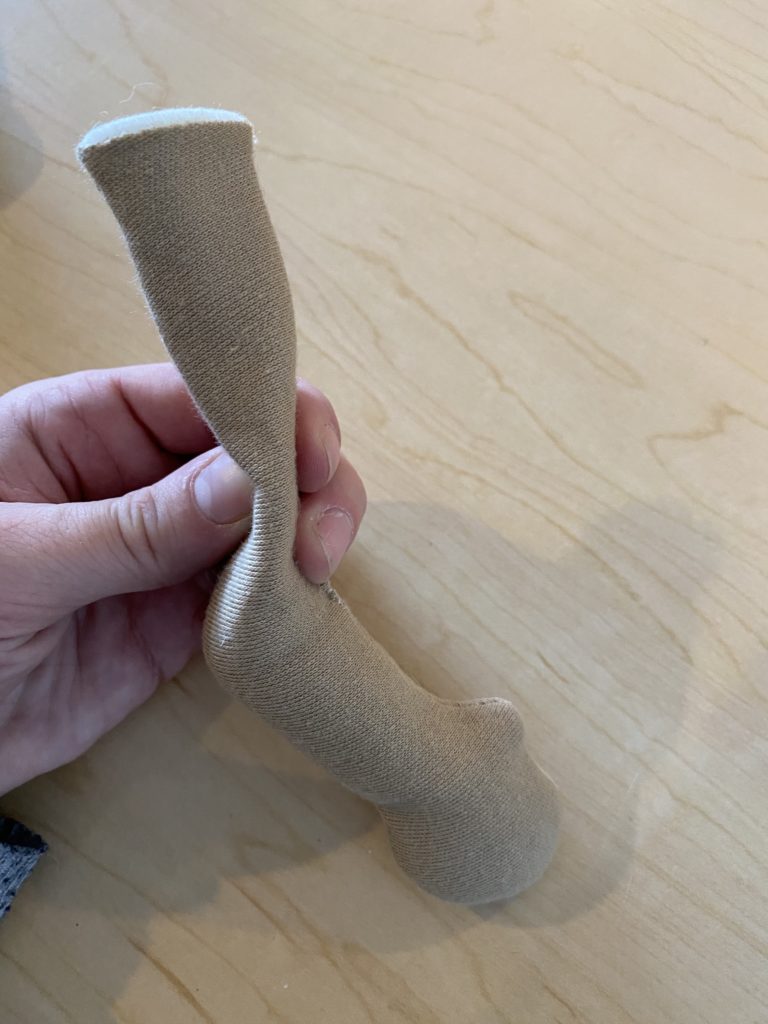
Turn you limbs and body right-side out. Carefully push out all seams using a rounded chopstick or hemostat. We want to avoid pushing or poking through the seams.

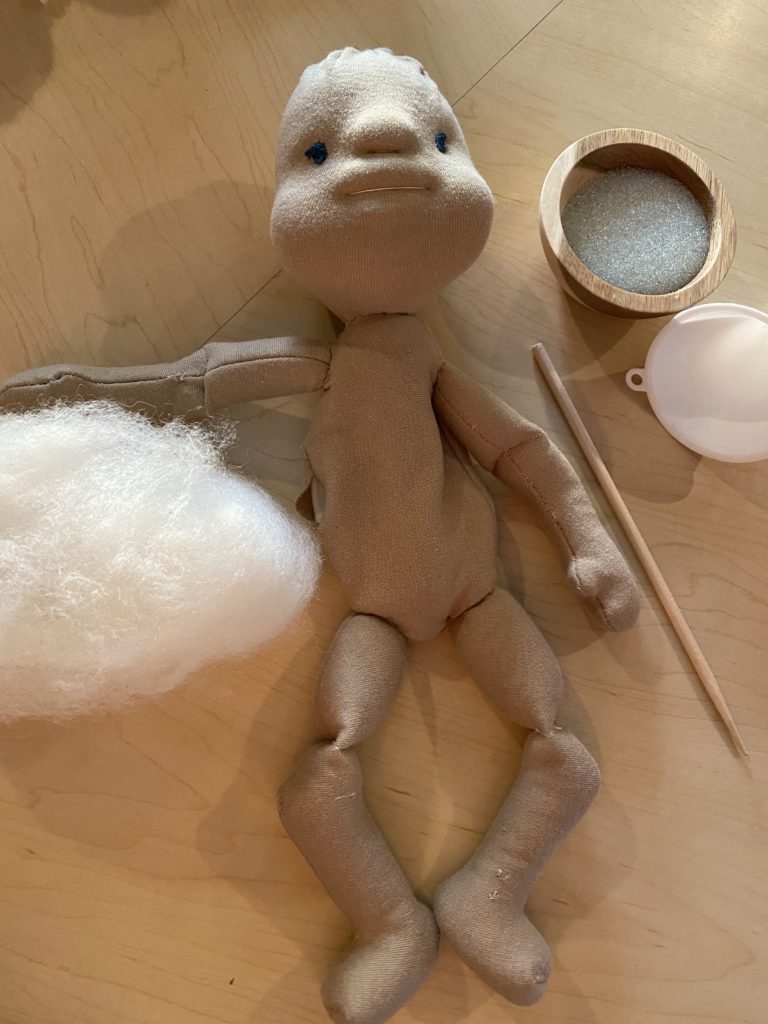
Stuffing
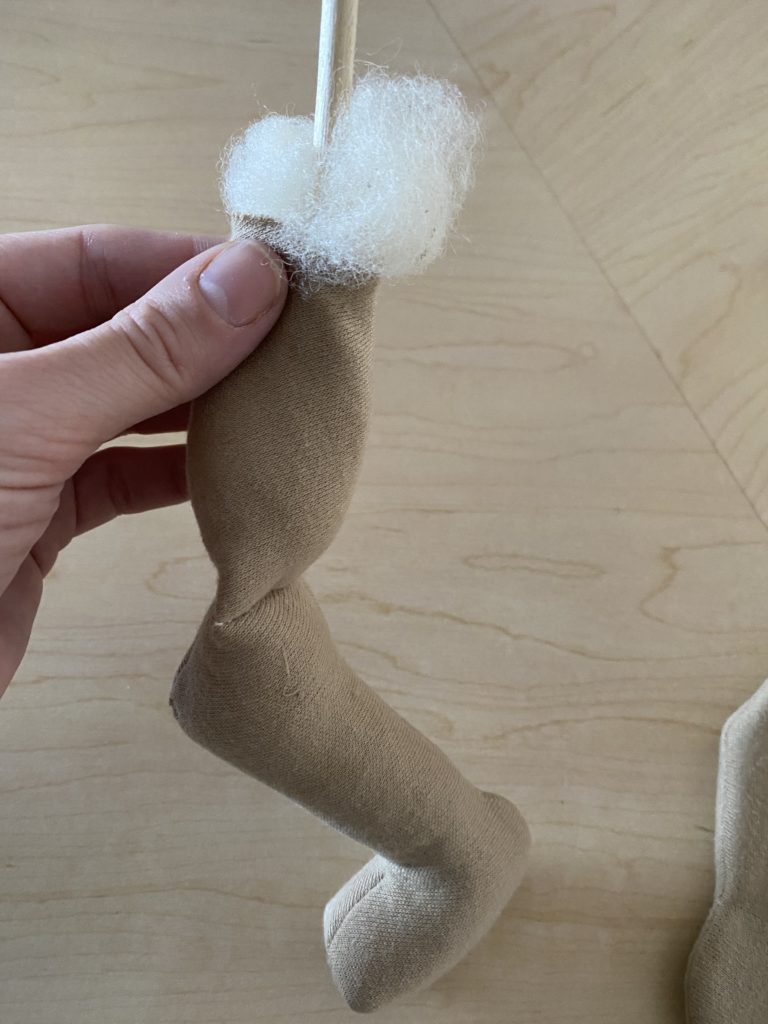
The stuffing for your doll can consist of many things. I choose to use wool and beaded glass (for weight). Using glass really emulates a real baby’s weight. I really didn’t think it would matter, but it is so different from using plastic pellets.
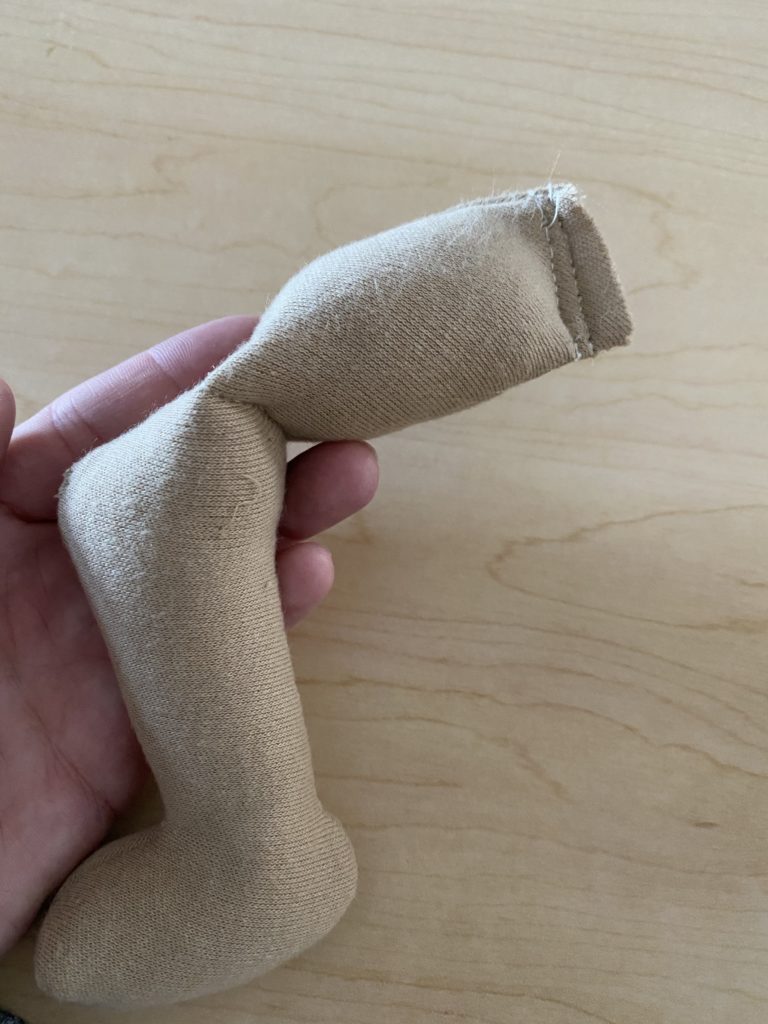
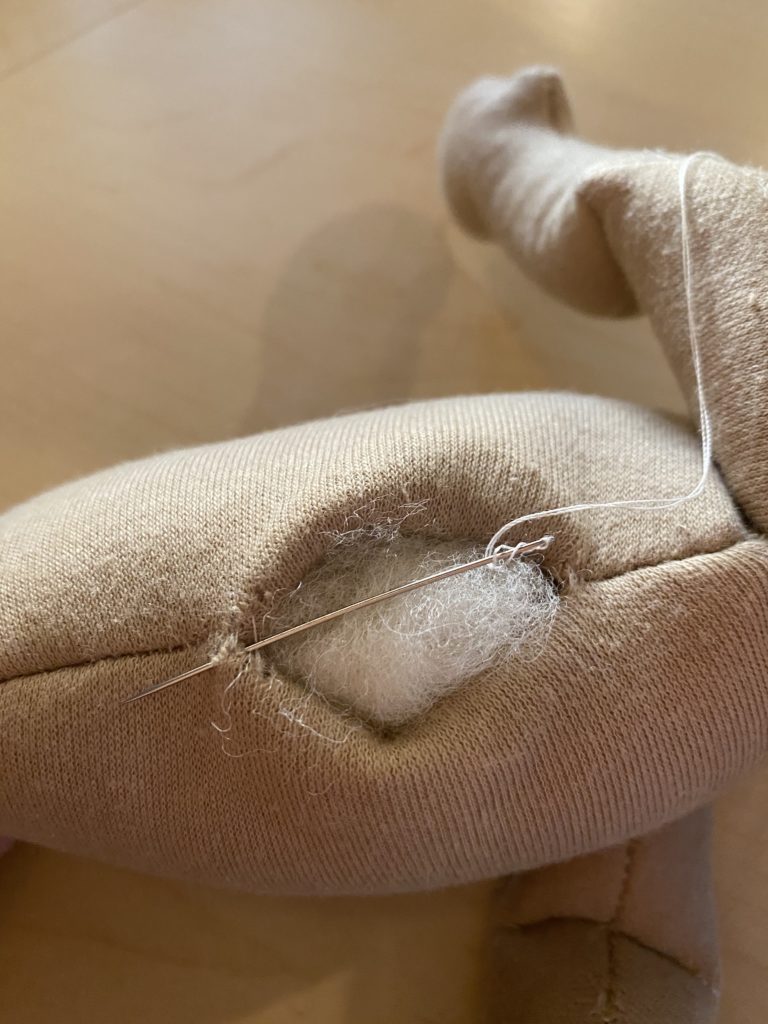
We will start by adding the glass to the lower part of the leg. Fill to just below the knee and then stuff a bit of wool in to cap it off and make sure the glass won’t be moving between parts.
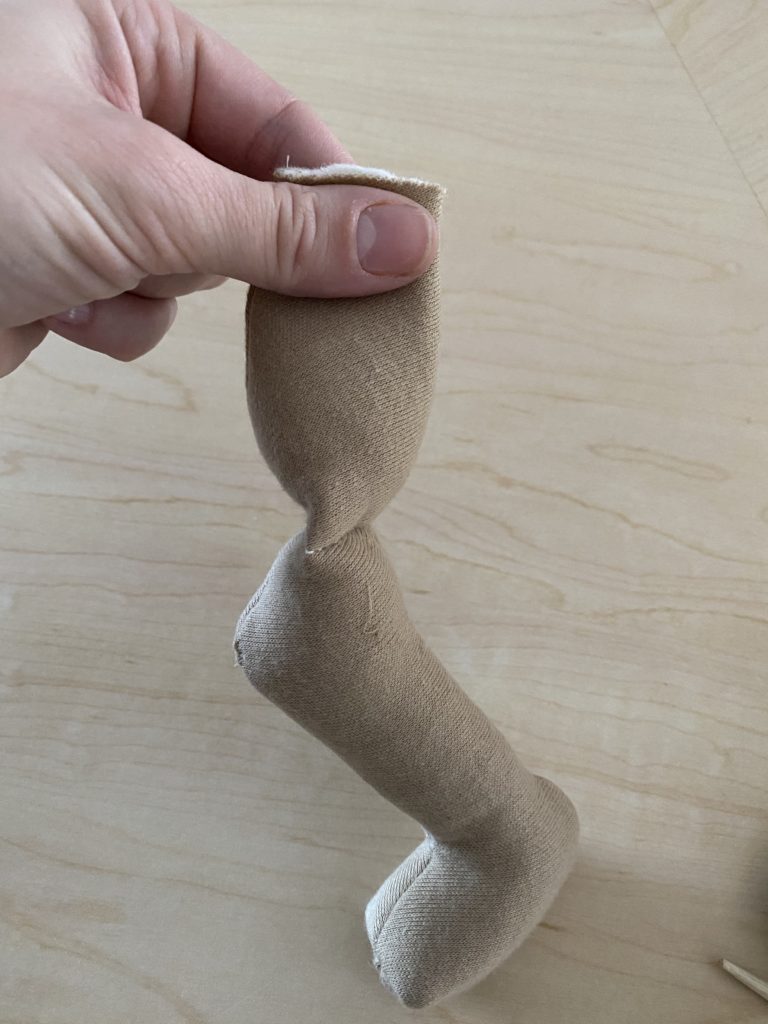
In an arch-like pattern, sew a triple stitch right behind the knee cap.
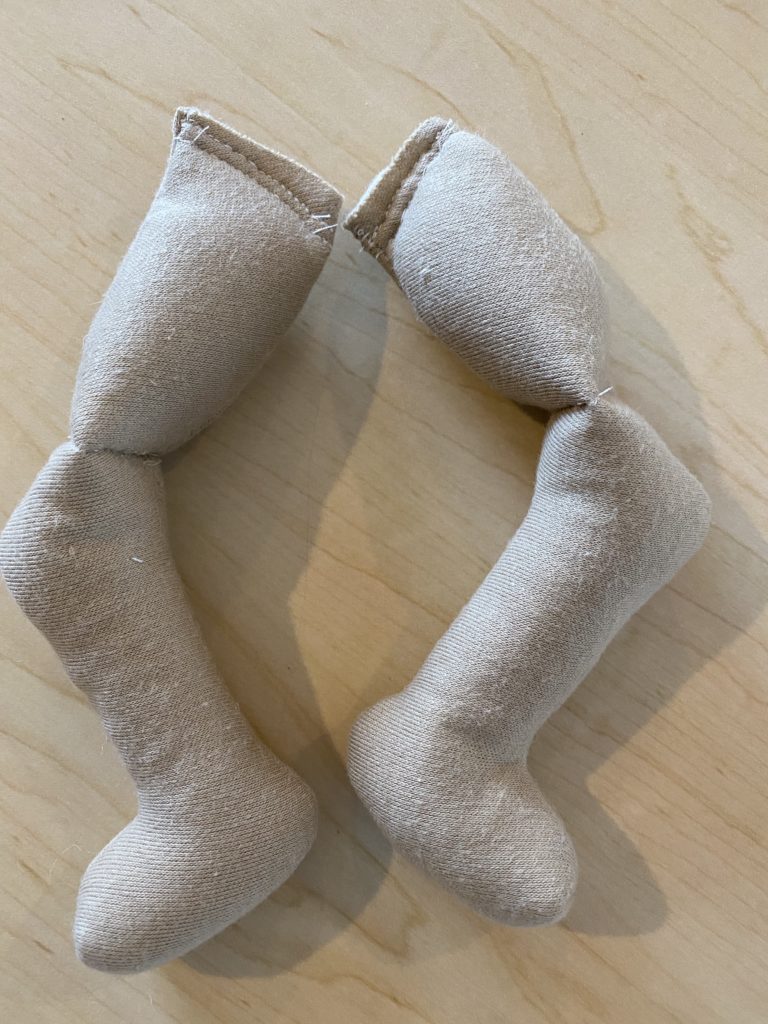
Next, add more glass beads and stuff a bit of wool on the top and sew off, creating 2 lines at the top of the limb. NOTE: that we will be sewing in a different direction on the top- for both of the legs. This is so they will lay the correct way on the doll’s body.
Use the same stuffing method for both of the arms. Pour in a bit of glass and cap off using a bit of wool. Then sew the middle just above the elbow.
Joints
THIS time, when finishing off the top of the arm we are going to sew in the same direction as we did with the elbow.
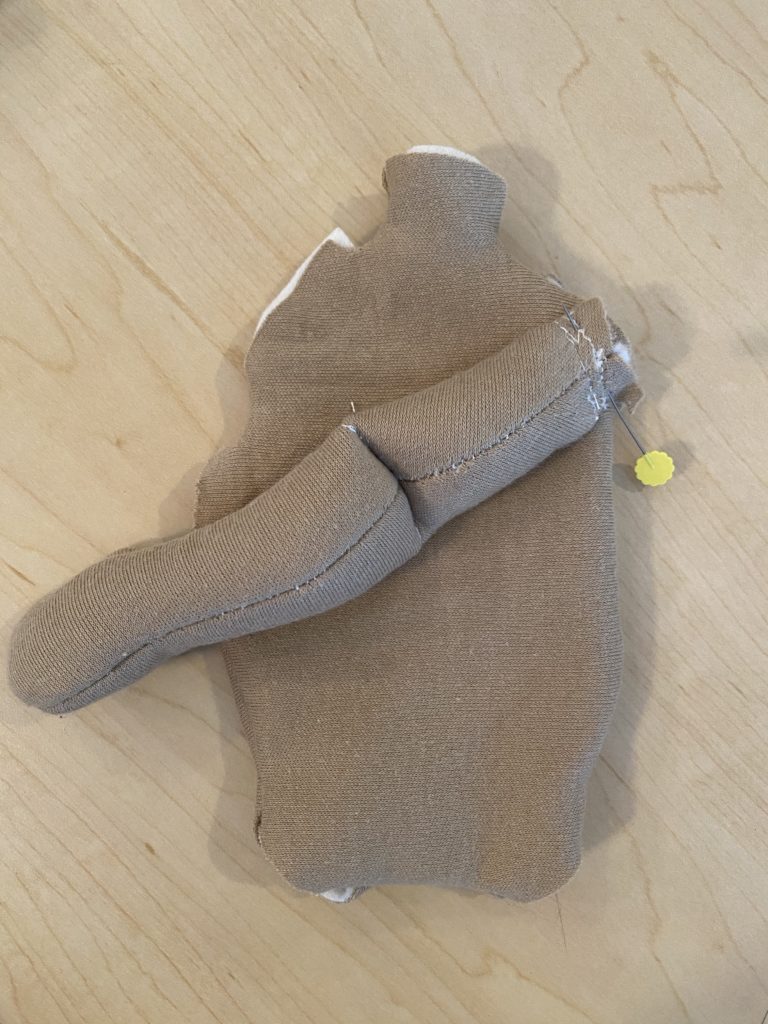
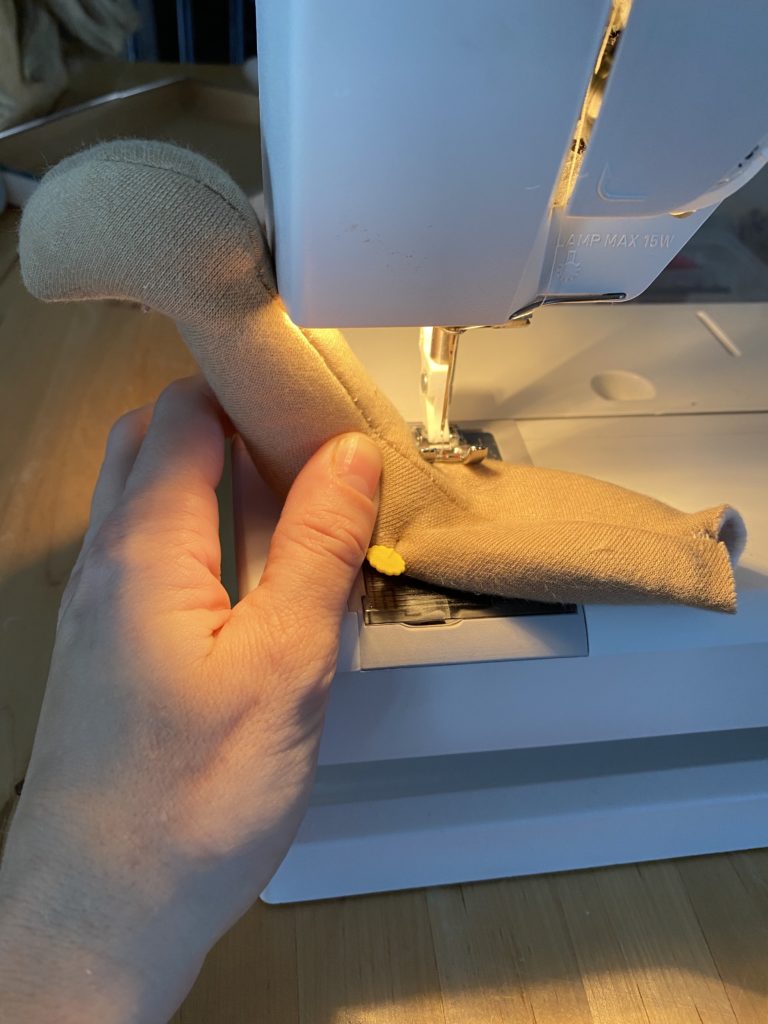
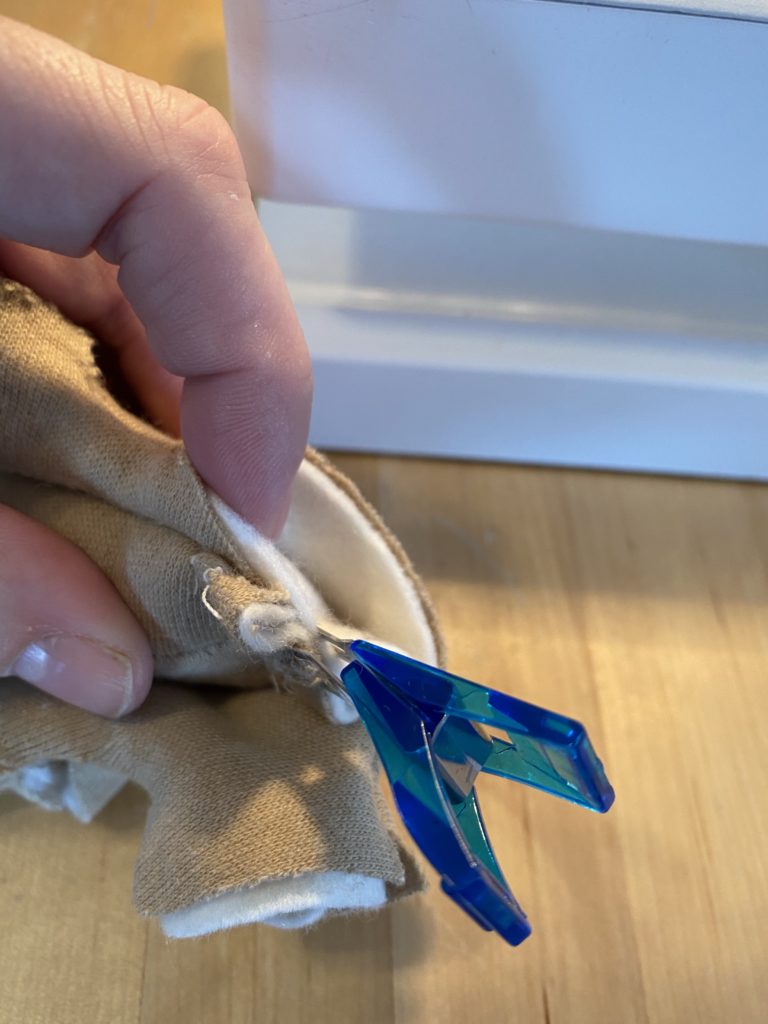
Lay your arm as such and connect only the front part of the body to the arm. We will machine sew the front part of the body to the arm with a triple stitch. This part can be tricky, but I love using these little clips to help me hang on to these tiny pieces as they go through the sewing machine.
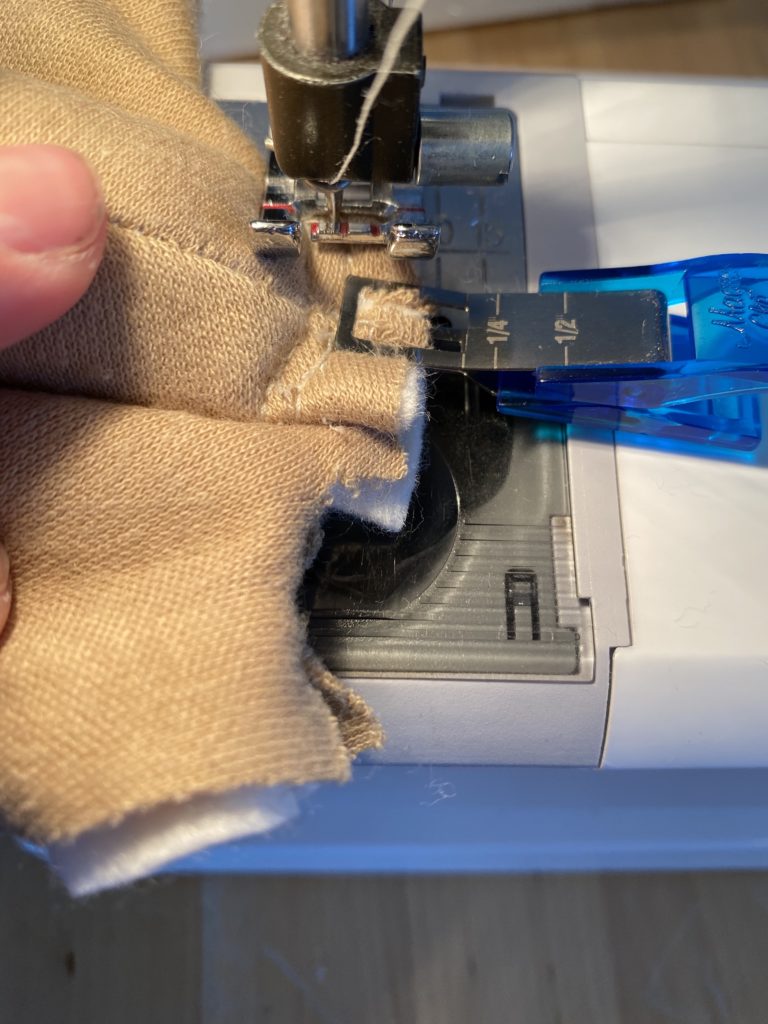
Next, raise the arm up placing the raw edges inside the armhole. Then tuck the backside flap on the body toward the inside and proceed to use your latter stitch 3x. Next, sew all around the armhole, from the front to the back.

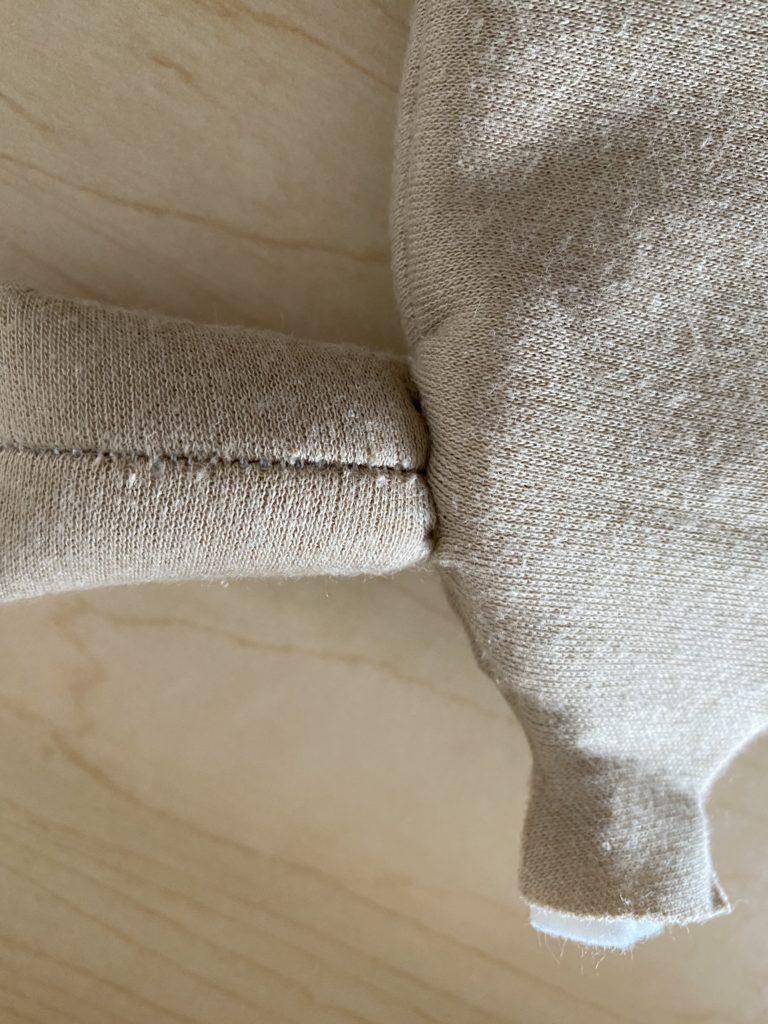
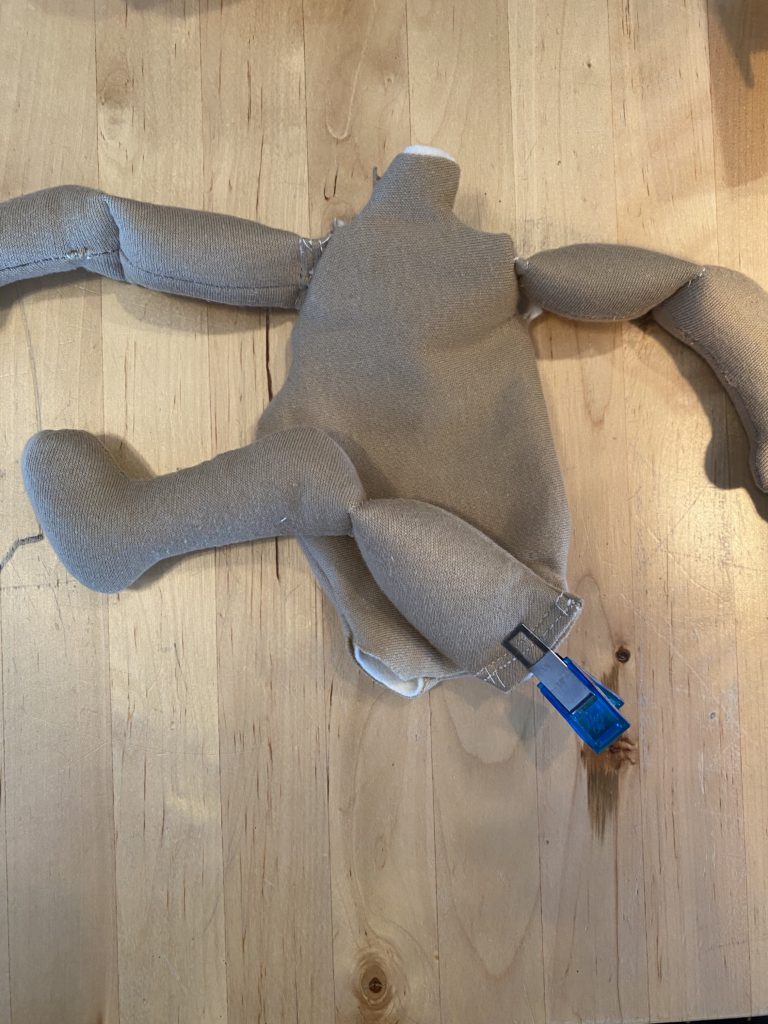
Repeat this method for all 4 limbs.

Connecting the head to the body
Using a hemostat, enter in the side hole of the body and go up through the neck hole to gram the bottom of the head.
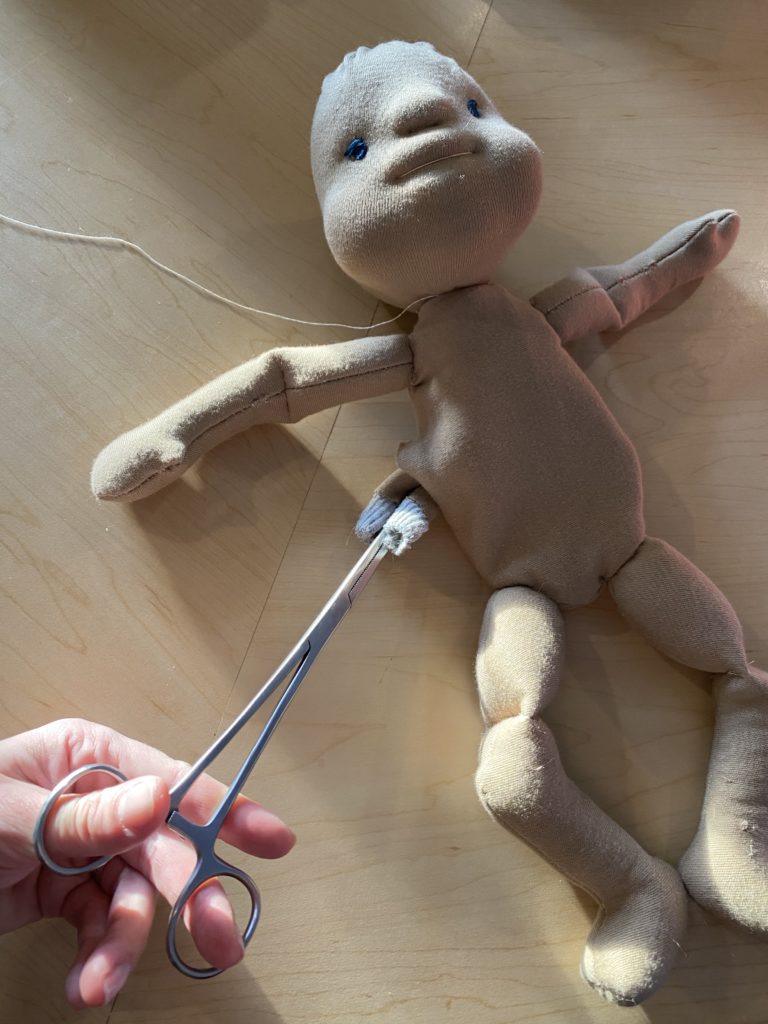
Once the neck of the head is through the neck of the body, then tuck in the body’s raw end of the neck flaps toward the inside. Using your latter stitch, stitch 3x around the neck, securing the head in place.
Stuffing the body
The last step!
The last step is to stuff the body with glass and wool. I like to switch back and forth so the weight is distributed well. I also like to place a large amount of glass on the bottom half of the doll, so that it will sit up nicely. Then, once you’re satisfied with the weight and fullness of your doll, add one more little roll of wool to the opening. Before closing it up, with, yes, you guessed it, 1 more latter stitches 3x.
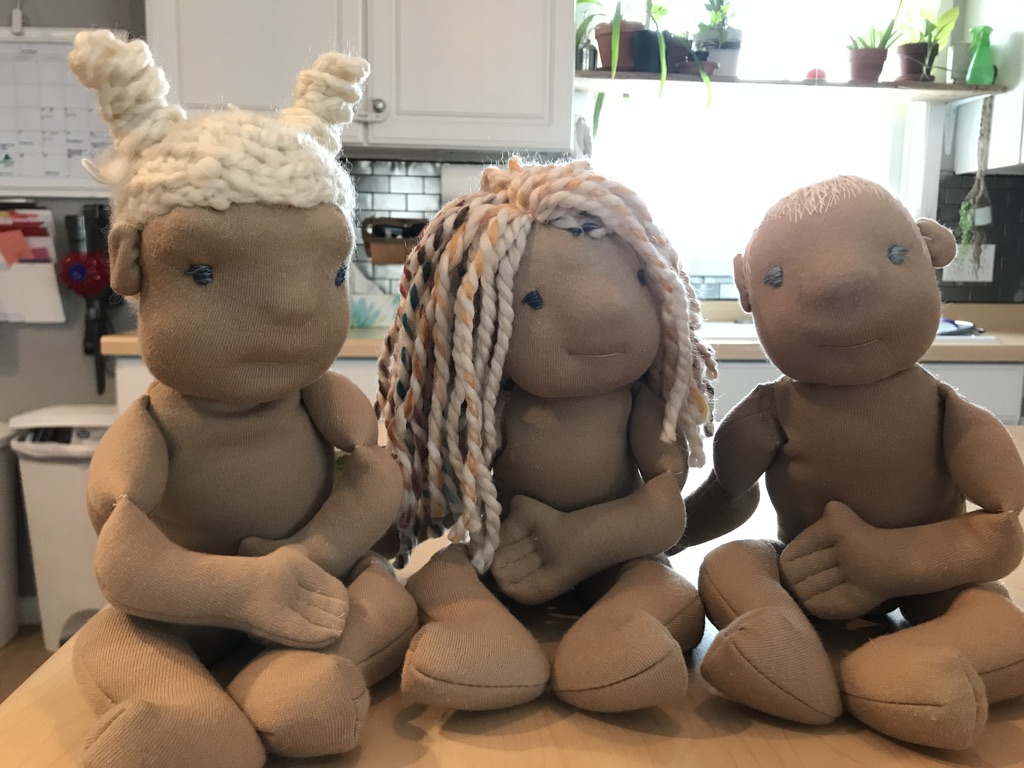
YOU DID IT!
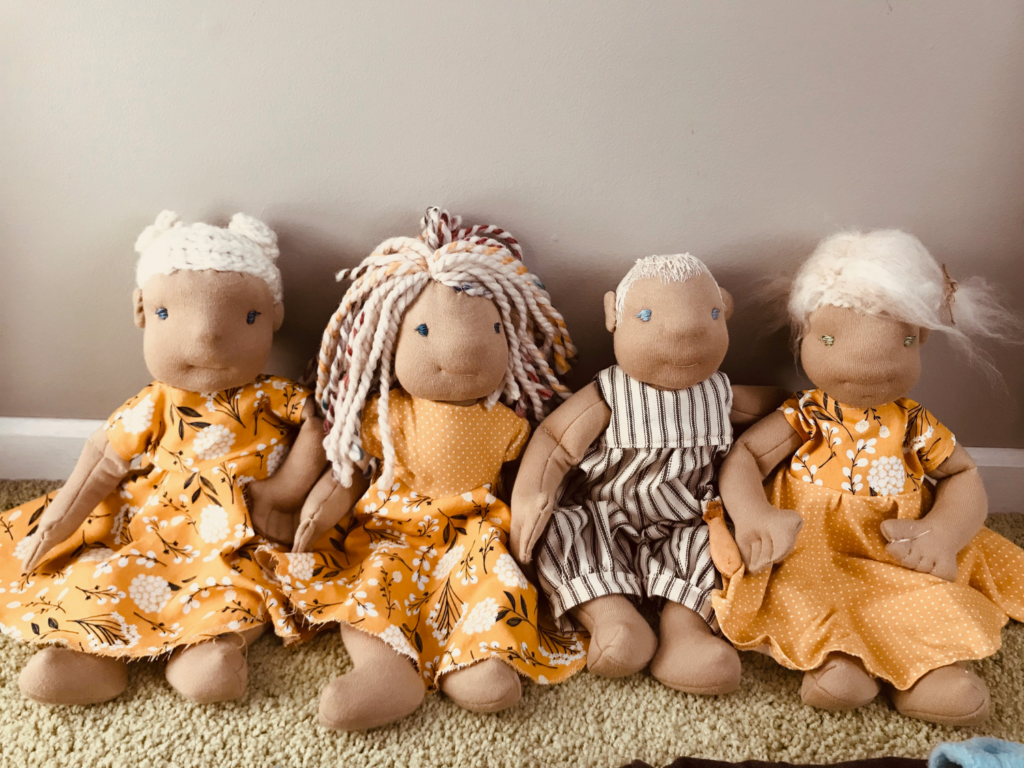
Pat yourself on the back, cheers, you did it! You’re finished with your very own Waldorf Doll!
Video Tutorial for making the body and finishing your Waldorf Doll

MATERIALS I USE FOR MAKING A WALDORF DOLL:
Wool (you’ll need 5-6 of these)
Waldorf Doll body pattern
Doll Footed PJs Pattern: https://www.etsy.com/listing/227125447/doll-footed-pajamas-pattern-for-the-wild?ref=yr. I love making several of these PJs for my children’s doll as it is another protective layer for the doll. These PJ’s also seemed to keep their skin cleaner. They are easier to remove and clean than to spot clean your doll. It also protects their joints from getting directly tugged on. When our kids tend to carry their Waldorf dolls around by their limbs and they seem a bit more protected when they have their jammies on.
This is the Mohair yarn that I used for making the wigs in every different color thinkable!
My extra special sewing scissors that I’ve had for 15 years!
Doll skin fabric
A sewing machine similar to mine
Embroidery needles
Erasable marking pen
Hemostat used for stuffing and positioning
Fleece lining for doll’s body
Crochet hook (you don’t need all of these, but it’s a pretty good deal!)
Beeswax crayon for adding color to cheeks and lips
HOW TO CLEAN YOUR WALDORF DOLL
Here’s our special cleaning recipe that we use on everything from getting slime out of the carpet to cleaning up our Waldorf Dolls! We use this spray to spot clean our dolls. Rinse with a hot rag.

Grab your FREE Waldorf Doll Pattern here.
Other Waldorf Doll Tutorials
How to make a Waldorf Doll | Making a Doll Head
How to make a Waldorf Doll Face | Facial Details
Making a Wig for a Waldorf Doll
Waldorf Doll Video Tutorials
Watch all of my Waldorf Doll Making Tutorial Videos.
QUESTIONS?
If you have any questions, leave them below and I will do my best to answer them!
I WANT TO SEE YOUR DOLLS!
Toss a photo of the doll you are working on to the Hearty Sol Facebook or Instagram page and tag us!
Cheers!

Affiliate Disclosure & Content Disclaimer
This post may contain affiliate links from a paid sponsor, Amazon or other program. When you use these links to make a purchase I earn a small commission at no extra cost to you. This allows me to continue creating the content that you love. The content in this article is created for information only and based on my research and/or opinion.
Emily T.
Leave a Reply


DAILY INSPIRATION ON THE GRAM @hearty.sol
it's hip to be square!
Emily
I LOVE< LOVE< LOVE your dolls.
Please share what type of doll skin fabric you use, the name of your source and how to obtain it. It looks thicker and sturdier than the dewitt fabric I have seen on other dolls.
Thank you