How to Make a Simple Spring Wreath with Willows & Dried Florals
In this tutorial, I will show you how you can make a Simple Spring Wreath with Pussy Willows and Dried Florals, in under 1 hour.

Pussy willows usually spring up as early as February around here and will burst to seed by the end of May. There is a short time when it doesn’t quite feel like spring yet, when they are a their prime for picking.
Going hunting for pussy willows always meant a spring hike up the valley toward the grove of pussy willow trees that we had growing near our farm. We would pick enough to fill up the back of the pickup truck, haul them home and them color the little puffs with colored chalk.
Mom would bundle each one of us up a few and we would carry them on the bus to take to our teachers in the spring. A fall is not fall without pumpkins and spring is not spring without pussy willows!
Last fall I saved a bunch of different flowers from our garden. Status’, eryngium, golden rod, crespedia, and straw flowers all make wonderful dried florals that can be used during the off-flower season.
I was eager to liven things up a bit this spring, so I cut a few branches from our pussy willow tree and added a few yellow sprigs of florals to a grape vine wreath.

Making a Simple Spring Wreath the Video!
Why You’ll Love This Simple Spring Wreath
- Once you learn how to make a simple wreath like this, you can incorporate so many different vines, branches and florals!
- Adding a touch of color and texture can really spruce up your front door, kitchen window or hallway!
- Make one for yourself and make one for a neighbor who would love a bit of cheering up.

Materials you’ll need to make this Simple Spring Wreath
- Wreath form. I like to use the natural looking grape vine ones, but you could also use a wire wreath form.
- Green floral wire + wire cutters
- Few bunches of pussy willows and a few dried florals.
- Branch snipes
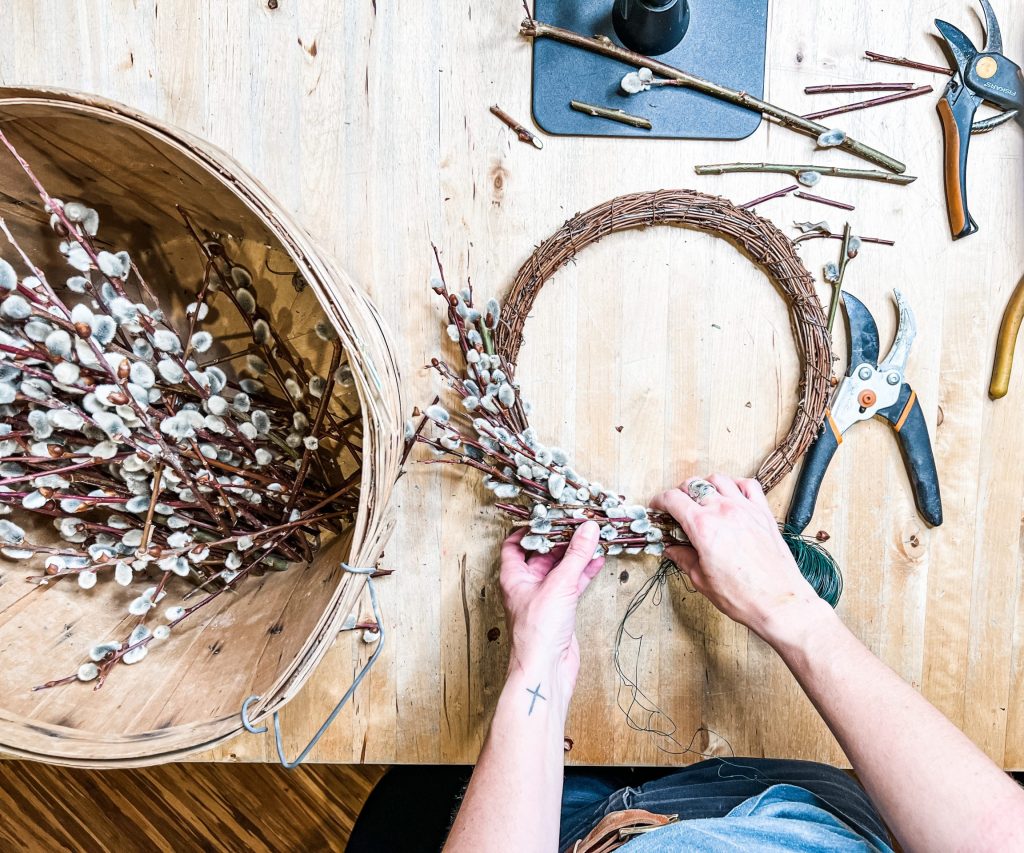
Making a Simple Spring Wreath with Pussy Willows + Dried Florals
- Gather 50-60 Pussy Willow branches.
Where we live these pussy willow trees can be found is swampy areas and can sometimes be hard to get to, but you can also grow your own. We have a few here on the farm.
- Cut Willow branches in equal lengths.
Determine how long you would like your cuttings to be. I make one wreath with shorter 5-6″ stems and one wreath with 7-8″ stems.
- Secure floral wire onto wreath form.
Wrap and twist your floral wire secure onto the wreath form.
- Add 5-6 stems in a bunch.
Gather up stems and wrap them with the floral wire about 3-4 times. Gather another bunch and lay them over top of the previous bunches’ wire, covering it up and wrap the wire around that bunch.
- Continue to repeat.
Bunch, then wrap. Layering the bunches on top of the previous bunches wire.
- Add in some dried florals to the simple spring wreath.
You can either add your dried florals in when you grab your bunch of willows or you can add it in at the end. Just stick it in the existing bunch making sure that it is secured.
- Finishing the wreath.
Once you are to the end of the wreath, wrap your wire around tight and secure. I like to make a little loop at the end to have something to hang it with. You could also add ribbon or a bow if you like too. I just like mine looking woodsy.

Questions People are asking about Simple Spring Wreaths with Willow
We grow them here on the farm, but if you can’t find them, source a local florist and sometimes grocery stores will get them in seasonally, too.
It depends on if you want a larger wreath or a smaller one. I made a couple of different wreathes, one with 4-5″ branches and one with 7-8″ branches and I like them both the same. Just your preference.
Checking with a local florist to see if they are tossing any flowers away that might work well for drying. Many times they use them fresh and when they start to wilt, they toss them. I love being able to use someone else trash for something spectacular!
You can totally grab a wreath bag and save it for as long as possible. A few puffs may fall off every now and again, but I’ve had one of our wreaths for 3 years now and it’s still holding up just fine.

Tips about making a Simple Spring Wreath with Willows
- Using fresh willow branches will allow you to flex and bend them a whole lot easier than if they are dried branches.
- Check out your local florist or Trader Joes in the spring for pussy willow branches.
- Make sure to wrap the floral wire around your wreath nice and tight so that your branches are nice and secure and can’t fall out in the wind.

Other Springy Posts
How to Make your own Carrot Seed Tape
Sewing a Simple Spring Skirt with Pockets
Pin this for later!

- Natural Laundry Whitener | Whiten your Clothes without Bleach
- Busy Farm Season Meals: 10 Easy Dishes We Prep for Fair Week
- The Best Soft Sourdough Sandwich Bread
- The Ultimate Summer Farmhouse Reset | 10 Tips for Success
- The Best Homemade Laundry Soap Recipe

Affiliate Disclosure & Content Disclaimer
This post may contain affiliate links from a paid sponsor, Amazon or other program. When you use these links to make a purchase I earn a small commission at no extra cost to you. This allows me to continue creating the content that you love. The content in this article is created for information only and based on my research and/or opinion.
Emily T.
DAILY INSPIRATION ON THE GRAM @hearty.sol
it's hip to be square!
View comments
+ Leave a comment