

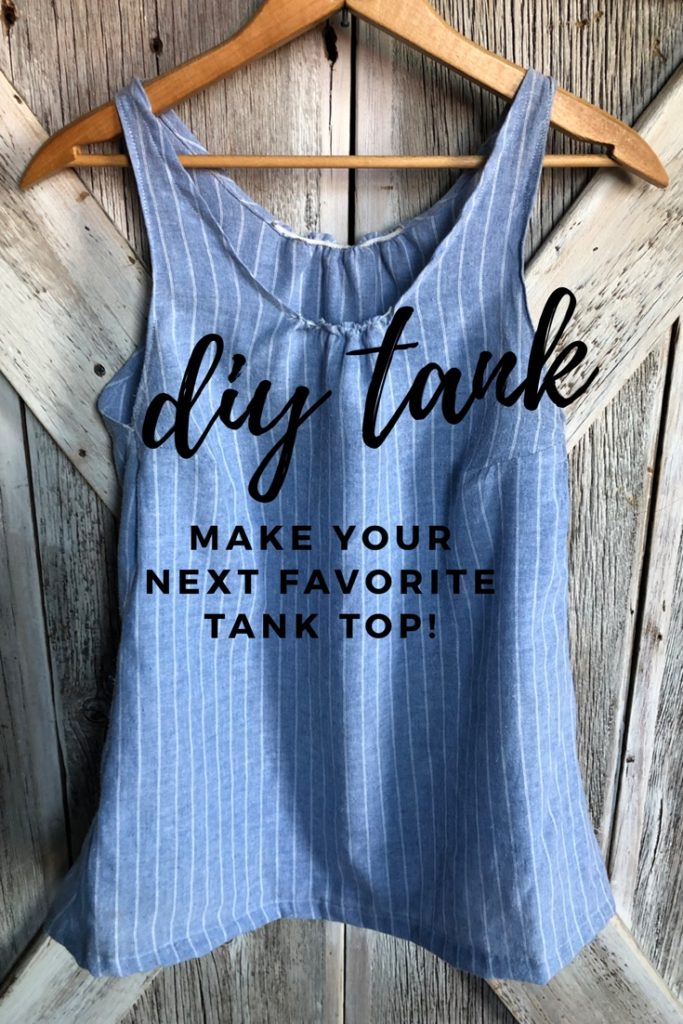
How to make your own Tank Top | Personalized Tank Top in 10 steps!
Make your next favorite tank top! With this technique, you can create a style that suits your body type and something that you can keep making over and over.
I love having control of my wardrobe which makes this DIY tank top a perfect choice – these are truly my best tank tops! Sometimes the clothing in stores just doesn’t fit like your favorite things that you already have in your closet. Plus, with hot weather on the horizon who doesn’t want to spend a summer afternoon in a comfy tank top that actually fits!
Finding a way to make and repeat my favorite tank tops is one of my most favorite things to do. Making your own custom tank top is a great option when it comes to saving time and money in stores. I also prefer this DIY approach over any websites, online tools, or design tools that make custom design tank tops (no delivery dates, business days, or extra emails to worry about!).
The kids love them too! I will have them select a great fitting tank, we’ll replicate it, make a pattern, select a beautiful fabric and voila!
Making your next Favorite Tank Top- the Video!
Why You’ll Love Making Your Own Custom Tank Tops
- You are in charge of how your cloths look, feel and fit when you make your own tank top design!
- This is a simple, beginner sewing project that can make a big impact in your closet.
- Make as many of these favorite tank tops as you like!
Materials you’ll need to make this
- 1 yd of Fabric (Prewash)
- Essential Sewing Items
How to Make your own Favorite Tank Top
Step 1
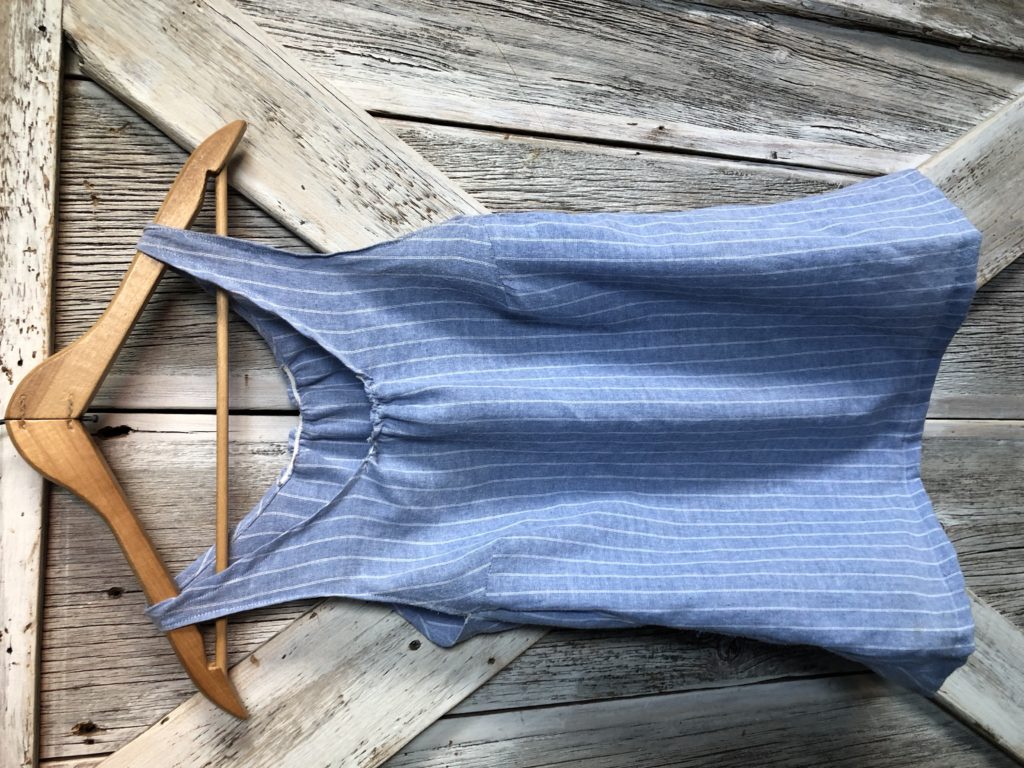
Find your favorite tank top – one you want to replicate. You like how this one fits, etc.
Step 2
Find your favorite fabric & buy about 1-1.5 yards (if it’s your favorite fabric, you won’t mind having a little extra around). Wash it, press it and set it aside.
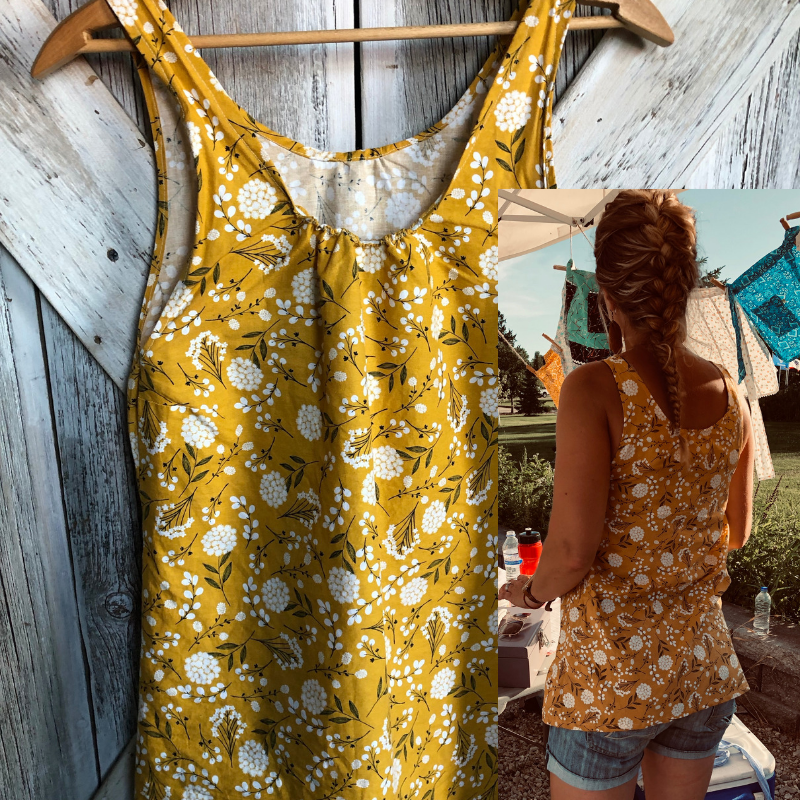
These are a few of my favorites!

Step 3
Plug-in your iron and sewing machine
Find an old sheet or pillowcase (you will use this to cut out an outline of the tank top). Lay your favorite tank top (inside out) on top of the sheet. Cut a little outside the outline of your tank top 1″ or so, so you have enough to create a seam.
This is the time to customize your tank top: longer or shorter, high neck or scoop neck, do you like tighter tanks or flowy tanks? I opted to make mine a little longer, as I am long torso-ed and can never find a nice long tank top.
Make one piece your front and one piece your back. Feel free to mark on this sheet pattern.
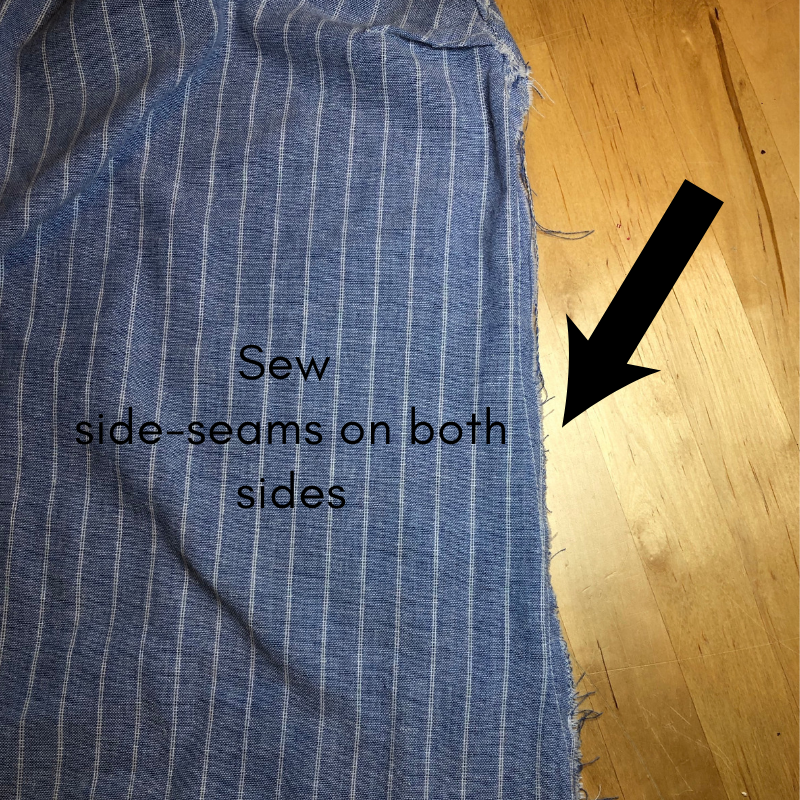
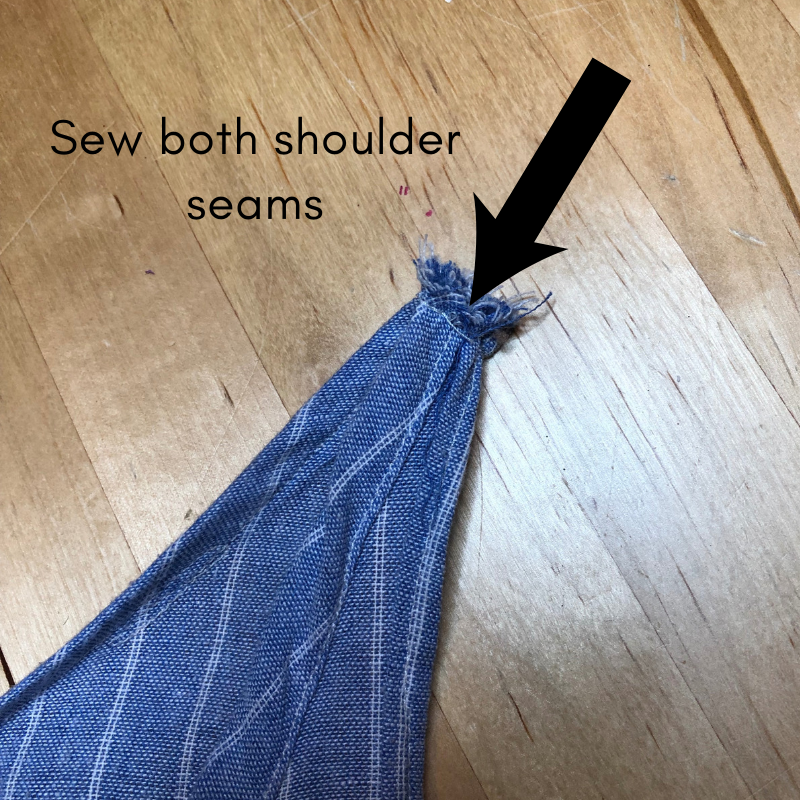
Step 4
Once both front and back are cut out, sew up both side seams and the shoulder seams at the top. No need to finish off the neckline and the armholes at this time.
Step 5
Try on your pattern piece (your test run made out of the pillowcase or sheet) and examine how it fits.
- Is it long enough?
- Does the neckline lay where you like it?
- Are the armholes big/ small enough?
Make adjustments to the pattern and once you’ve got the perfect fit, get out that nice fabric.
Step 6
Make your sample pattern piece into 2 separate pieces again using a seam ripper to separate the two layers. This pattern can now be used to cut out a new front and back on your favorite fabric. You can use this pattern over and over and over again to make as many tank tops as your heart desires!
I got so excited that I had a top that fit my long torso, that I made 3 in one day!

Step 7
After you cut out your good fabric, you can decide to add a gusset if you’d like a little shape to your top. You can make a gusset by placing the right sides together to form a triangle shape.
I placed mine just below the bottom of the armhole about 1″ and angled it downward.
Press this seam from the right side.
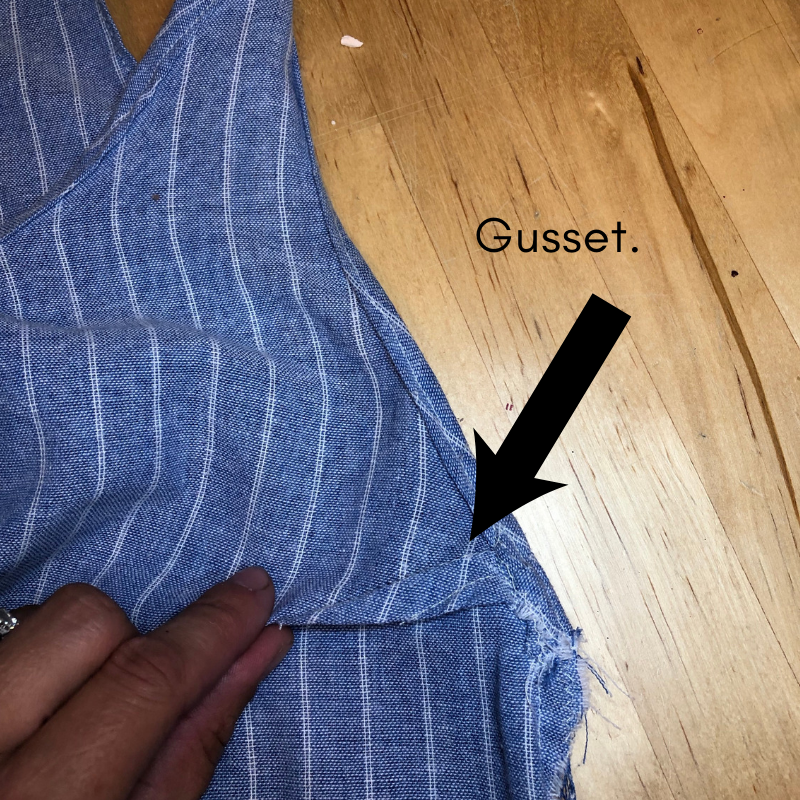
You can see why it’s important to press your gusset seam. I was too excited to try mine on…and did it later. But this photo will give you an idea of where a gusset can fit in and how it can shape a garment.
Step 8
Sew up your side seams and your shoulder seams. If you have a serger, feel free to zip up the edges of all of the seams. I don’t so I just used a zig-zag stick to help with the fraying.
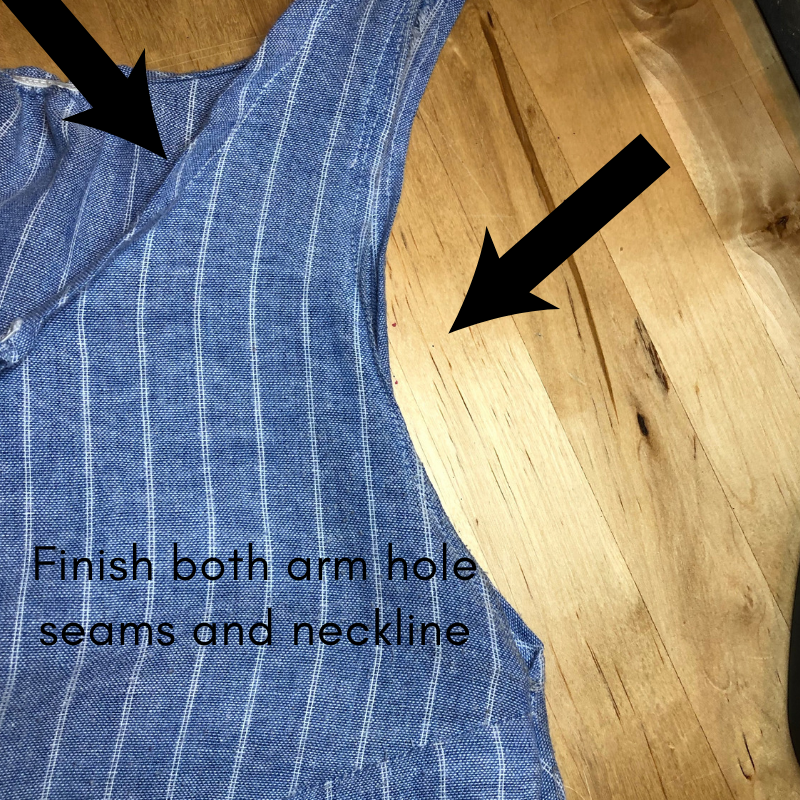
Step 8
Finish the edges of the neckline and the armholes by folding the fabric over once and then once again to keep the raw edges inside the seam.
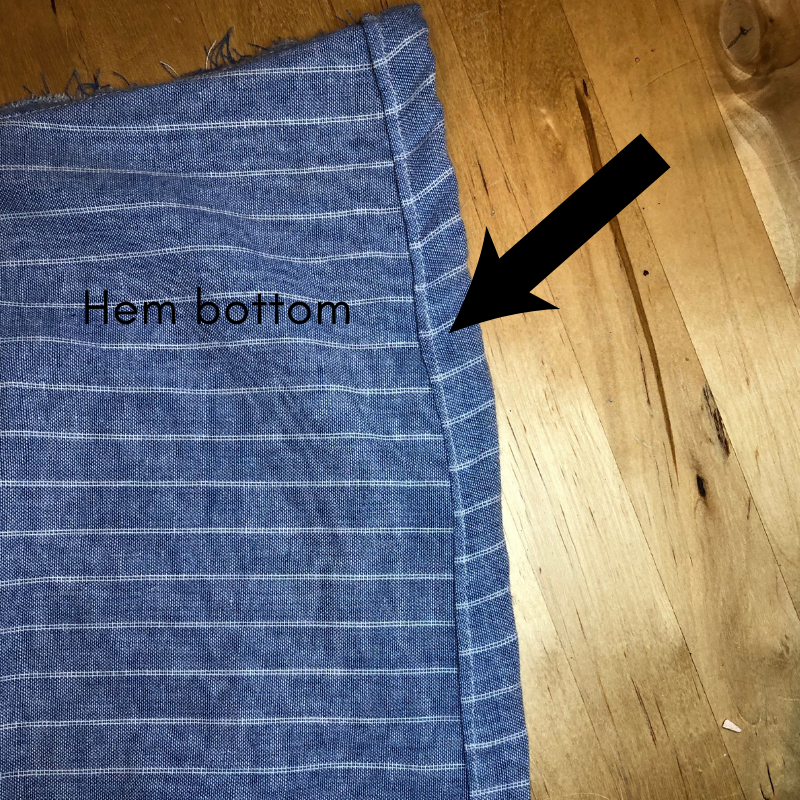
Step 9
Hem the bottom of your tank top. Do this by again rolling the fabric over once and then once again to tuck the raw edges inside the seam. A wider seam at the bottom looks natural.
Step 10 (optional)
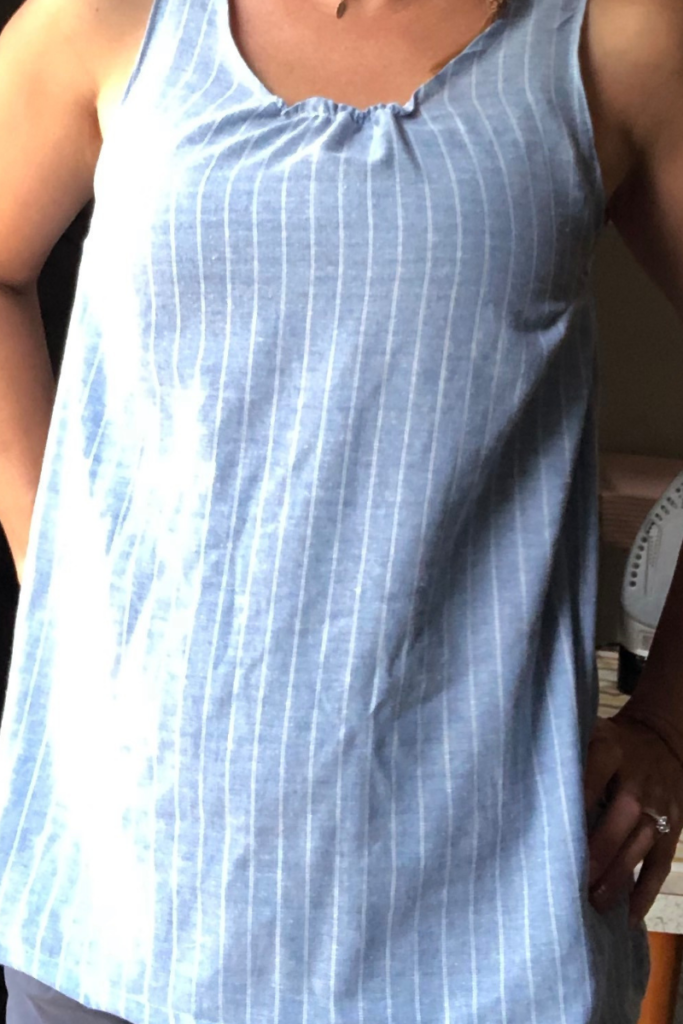
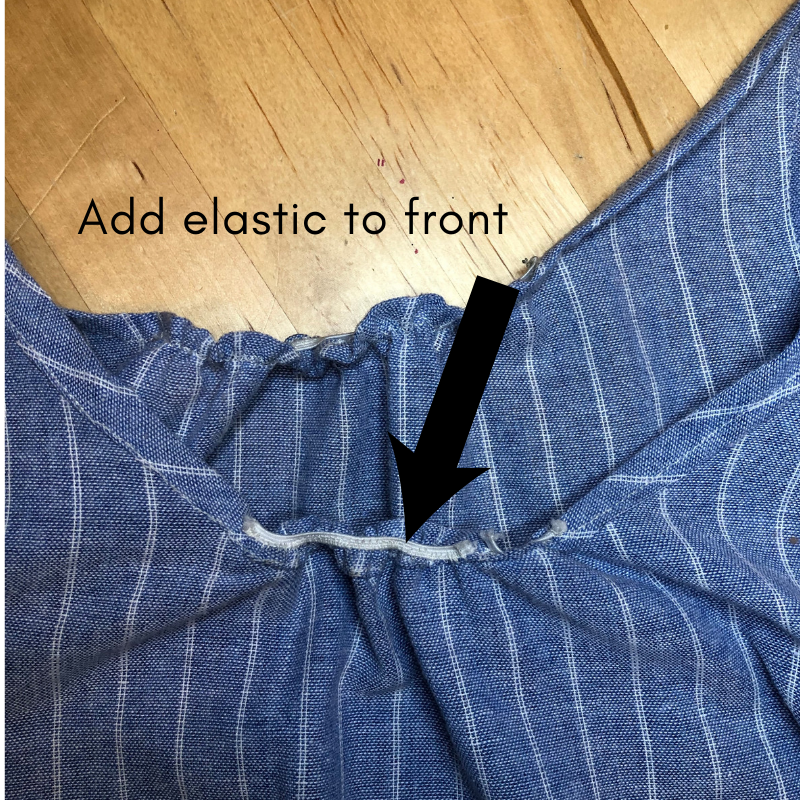
Add elastic to the top of the neckline in the back and front.
My fabric was a bit wide on the top when I tried it on, so I opted to add just a little piece of elastic on the inside of the top seams on both front and back pieces.
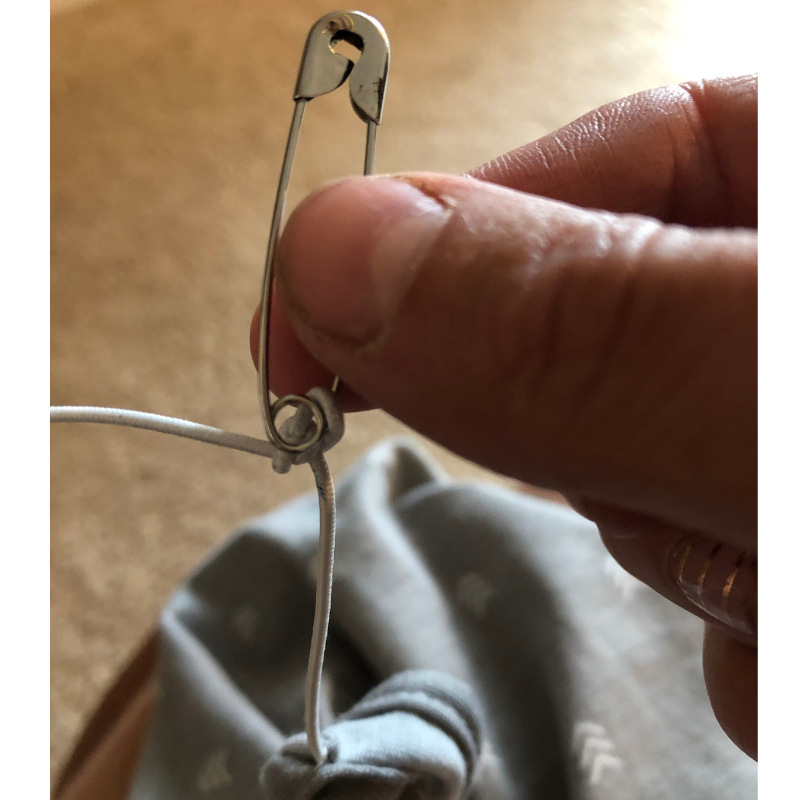
You could also opt to add elastic through-out the entire neckline by threading the elastic through your top seam. I did this with my knit fabric top.
Questions People are asking about making your own Tank Top
| Is this tank top tutorial for a specific size? Nope! And that’s the beauty of drafting your own cloths/ patterns. This tutorial is for all sizes and body shapes. If you have a favorite tank top, you can make this! |
| Can I use this tank top tutorial for my kids? You bet! Again, this can be used for anyone who can find a top to replicate in their drawer or closet! You get to chose how you want this tank to fit! |
| Do you have a pattern for your Favorite Tank Top? I use what I already have. I find my best fitting tank top and replicate that to create a pattern. Then chose a lovely fresh piece of fabric and measure away! |
Off you go! I can’t wait to hear how excited you are about your new tank top! Comment below!
Pin this for later!
Check out these blogs for more creative sewing projects!
How to Sew a Reversible Apron | DIY Sewing Tutorial
Check out another sewing tutorials here!
What other sewing tutorials would you be interested in seeing? Comment Below!
Check out our other Recent Blog Posts!
- Our Hidden Household Pantry: The Hardest-Working Room in Our Home
- A Year in the Life of Our Garlic Patch: From One Clove to A Year’s Worth of Flavor
- Fresh Summer Salad made with Lemon, Orzo, and Arugula
- What We Keep in the Car During Summertime
- Teaching Kids the Art of Talking to People

Affiliate Disclosure & Content Disclaimer
This post may contain affiliate links from a paid sponsor, Amazon or other program. When you use these links to make a purchase I earn a small commission at no extra cost to you. This allows me to continue creating the content that you love. The content in this article is created for information only and based on my research and/or opinion.
Emily T.


DAILY INSPIRATION ON THE GRAM @hearty.sol
it's hip to be square!
View comments
+ Leave a comment