

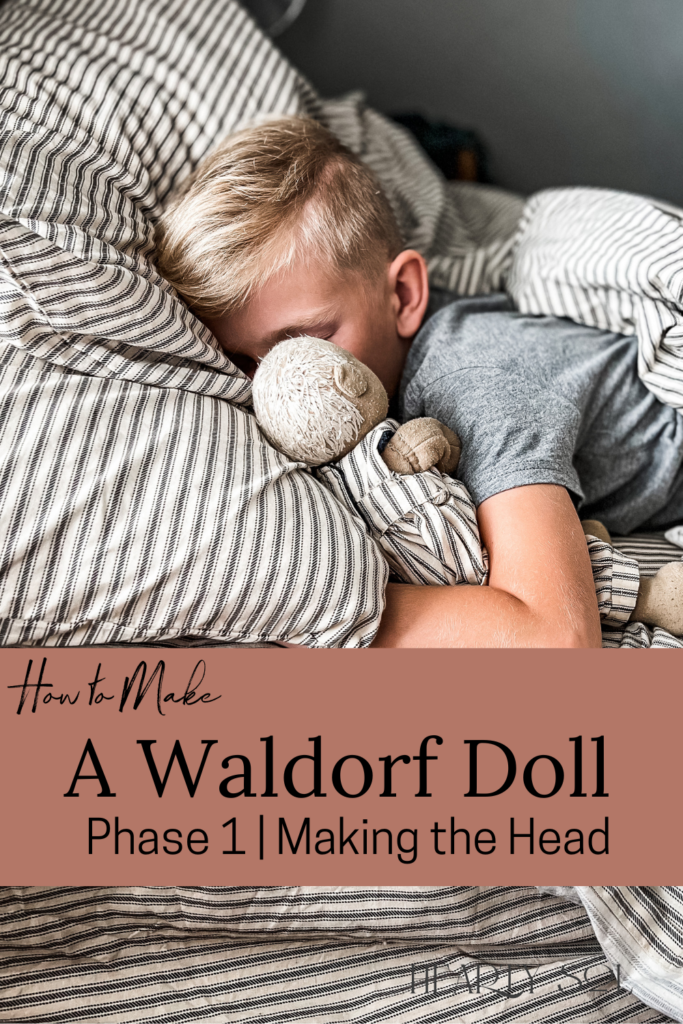
How to make a Waldorf Doll | Making a Doll Head
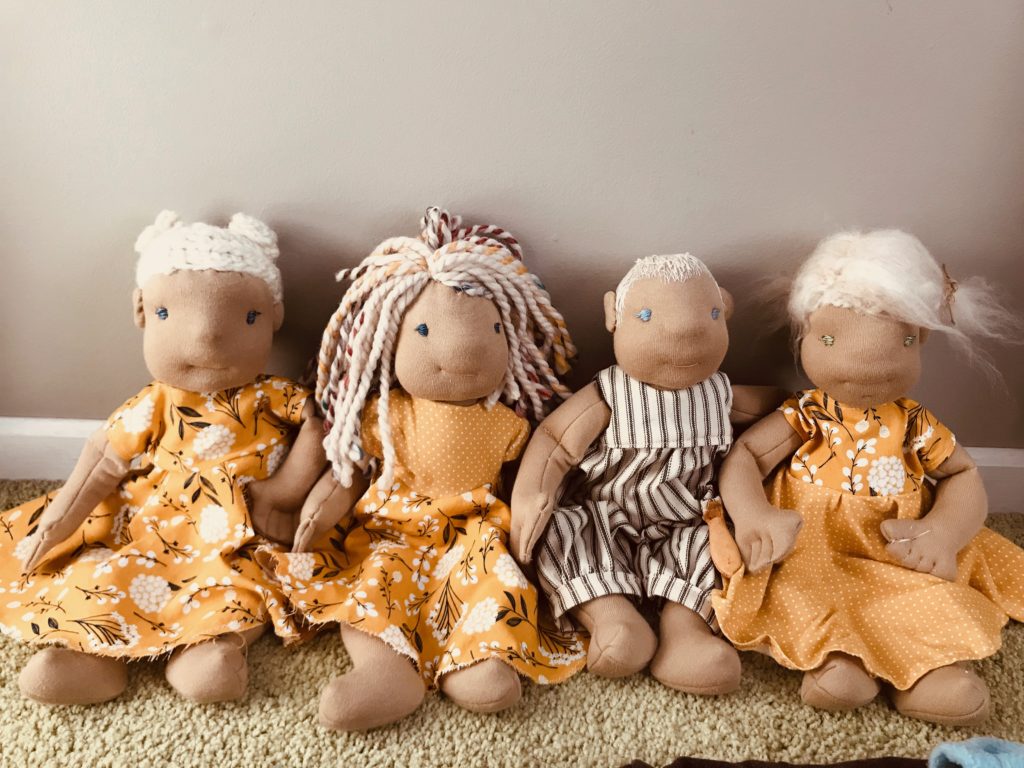
A Waldorf Doll is made of natural fibers—such as wool, cotton, or linen—from their stuffing to their hair to their clothing. Use what you have on hand, to make something special. In this tutorial I will show you how to start your doll by forming and making the head.

What is a Waldorf Doll?
A Waldorf doll (also called Steiner doll) is a form of doll compatible with Waldorf (or Steiner) education philosophies. Dolls are generally made of natural fibers—such as wool, cotton, or linen—from their stuffing to their hair to their clothing. Use what you have on hand, to make something special.
(This post may contain affiliate links which means I make a small commission at no extra cost to you.)
A few years back I was searching for something to make for our kiddos for Christmas. I love making things especially for them.
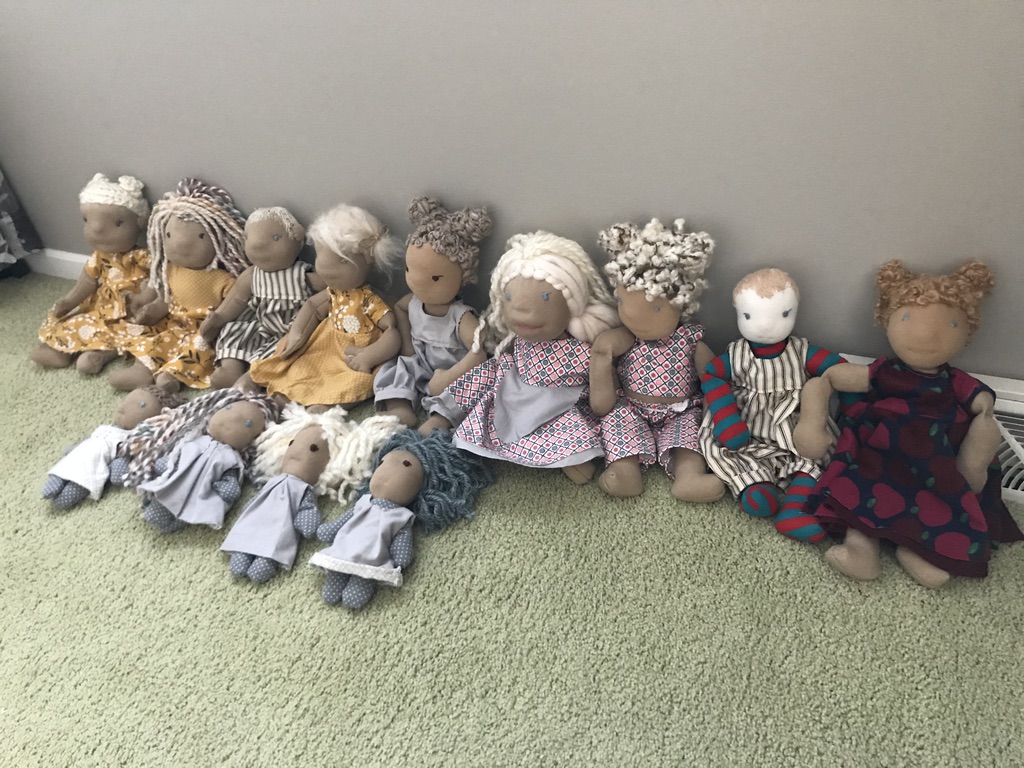
Once I finally figured out the pattern that I like, remodeling an existing design. I started in on my first doll and was hooked! I loved doing it so much that I ended up making 15 dolls in 1 month that year.
Each doll can take anywhere from 25-30 hours to make so the folks receiving these are very special people!
Making a Waldorf Doll
Our kitchen table was covered in doll skin, mohair and yarn! It was bananas. My husband was so glad when Christmas came and I had to put it all away. “Can you stop wefting wigs, please”, he’d say. He picked up on the lingo quick!
You’ll want to start with printing off this free pattern.
By now I’ve now made almost 25 dolls and have just one more to finish up to give to a special little girl in our lives.
Waldorf Doll Tips, Tricks + a Video Tutorial!
There are definitely some tricks and tips when it comes to doll-making and believe me, I never thought I’d be a doll-maker. But these dolls are so irresistibly adorable and can be custom made to look like the child receiving it, I just couldn’t help myself!
I thought I’d put together a little series about how I make these dolls so you can follow along!
When I was making these dolls, in the evenings, in my dim workspace and I really wished that there was step by step video guide to follow vs. reading instructions in the dim light. Some of these steps are so intricate and a video showing just how might just help you too!
Materials Used to form the Waldorf Doll Head
- Wool
- Thread
- An old baby sock or
- Cotton string
- A chopstick and pencil
- Felting needles
Step 1
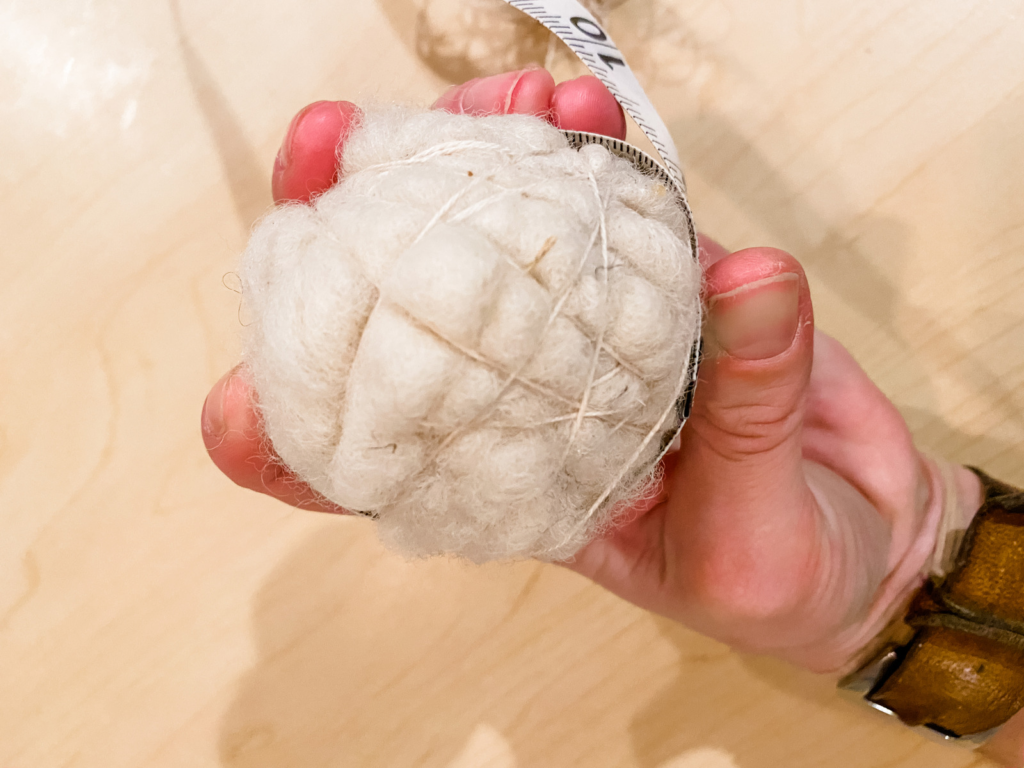
Begin by laying out a few strips of wool batting. I like them to be about 2-3” wide and 2.5’ long, but work with whatever comes off (sometimes it doesn’t like to be neat and tidy!) You will also need your scissors and cotton string.
Roll the wool as tightly as humanly possible. You want to roll the wool into a tight little ball, similar in size – but slightly larger than – a golf ball. What you are forming is the core of the doll head or the brain. It must be firm. Very firm. If it is not firm enough, your head will not turn out.

Once you have rolled one strip, you can rotate the roll and begin rolling a new strip. Tuck the ends inwards in an effort to create a ball (it won’t be a perfect ball, but the goal is as ball-like as possible). I’m not sure if it is visible in the video, but I am REALLY pushing hard as I roll, in an effort to make the ball as firm as I can.
Continue rolling new strips onto your ball, until the ball measures about 7.5” around.
Step 2
Once your ball is the right size, begin wrapping it with string (leaving a tail to tie it off at the end).
Wrap in all directions until the ball is held very tightly and has condensed even further due to the tension of the string. Tie off your string. The measurement after wrapping should be around 7” in circumference.
Step 3
Once you have finished wrapping you will have your core.
This is like the brain of the head. The round, firm, shape will provide structure and the right amount of firmness to the rest of the head. If your core is not very firm, you will have to snip the tie, and redo it.
Once you are happy with your core, you can begin rolling it in more strips of wool to form the head.
Alternate the direction of the roll to try to maintain a round shape.
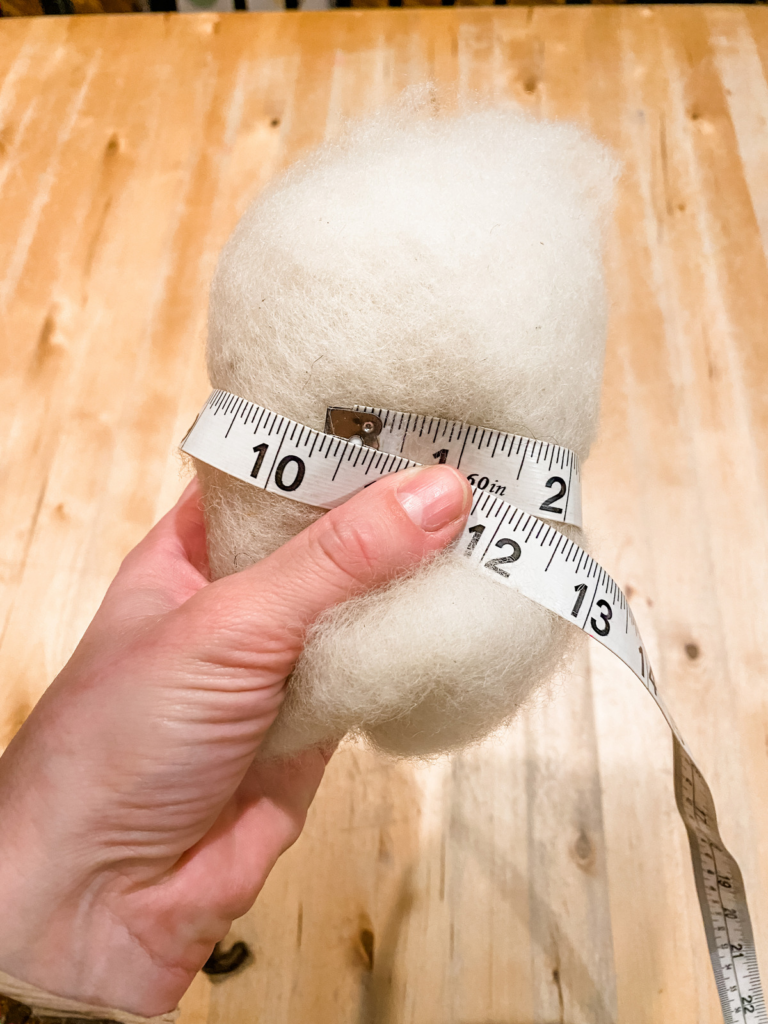
Step 4
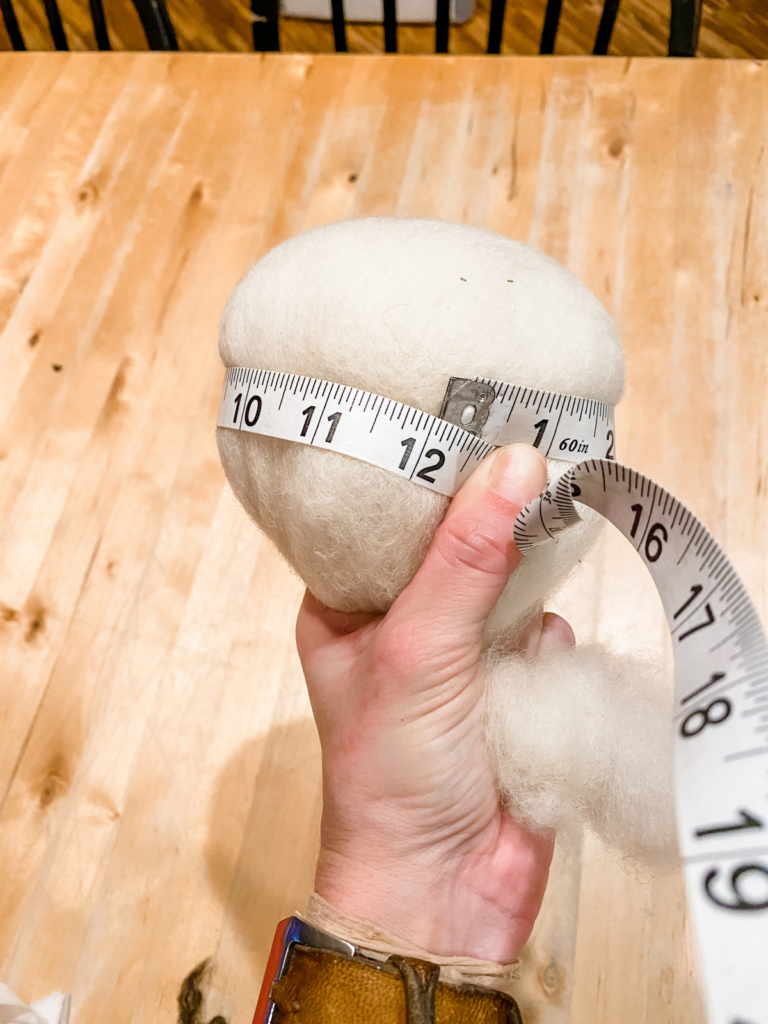
Your head may look more of a square/round shape like mine pictured. This is just fine, once it is in the stockinette or sock, and tied, it will be round.
Once your head measures approximately 12.5-12.75” around, you can stop rolling. Again, you must have a firm head. This will not be as firm as your core, but should be firm. If it is loose, it will not form properly, and you will need to retie it. I like to tie it around it again, at this point before adding a few more layers of loose wool.
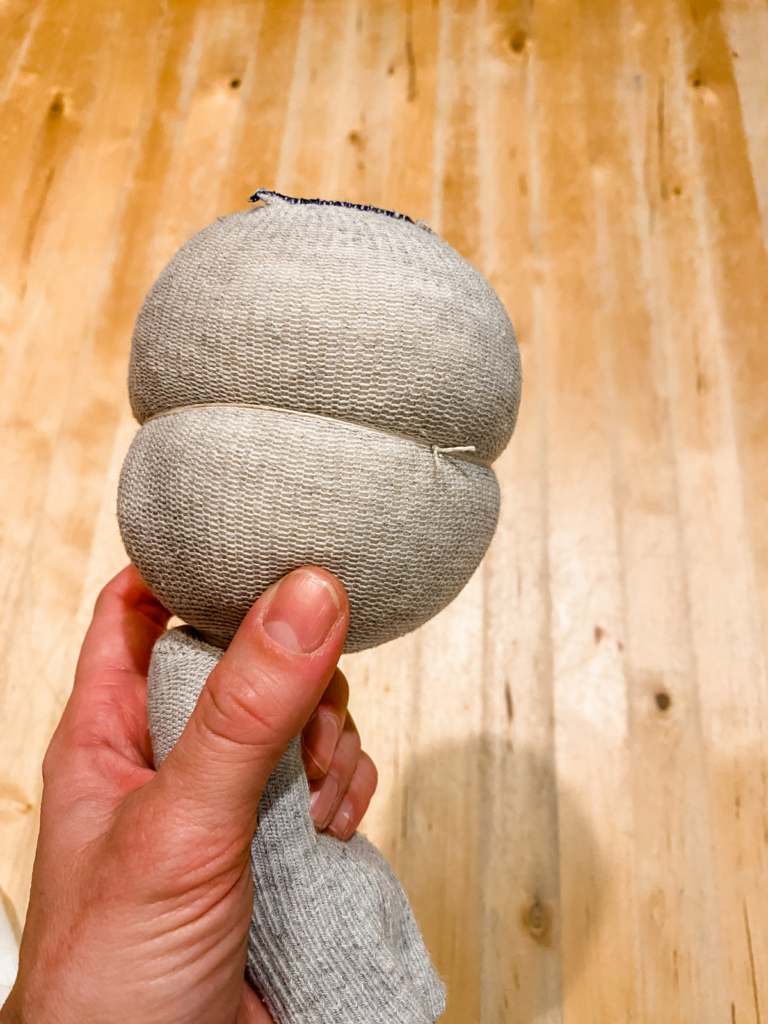
Step 5
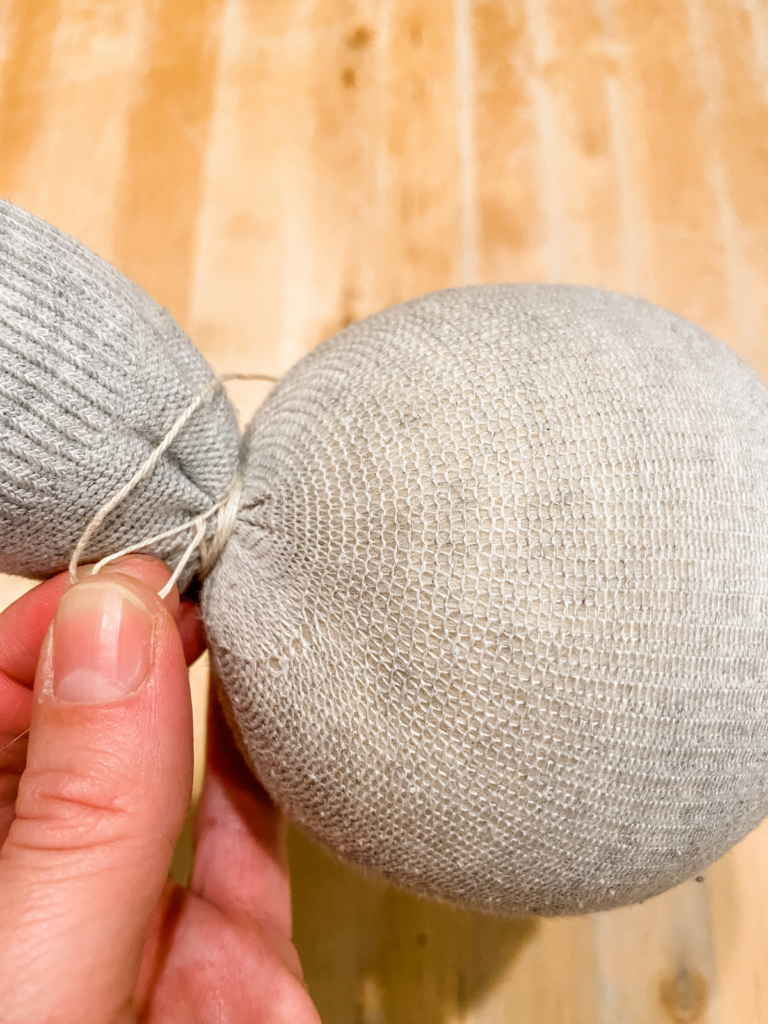
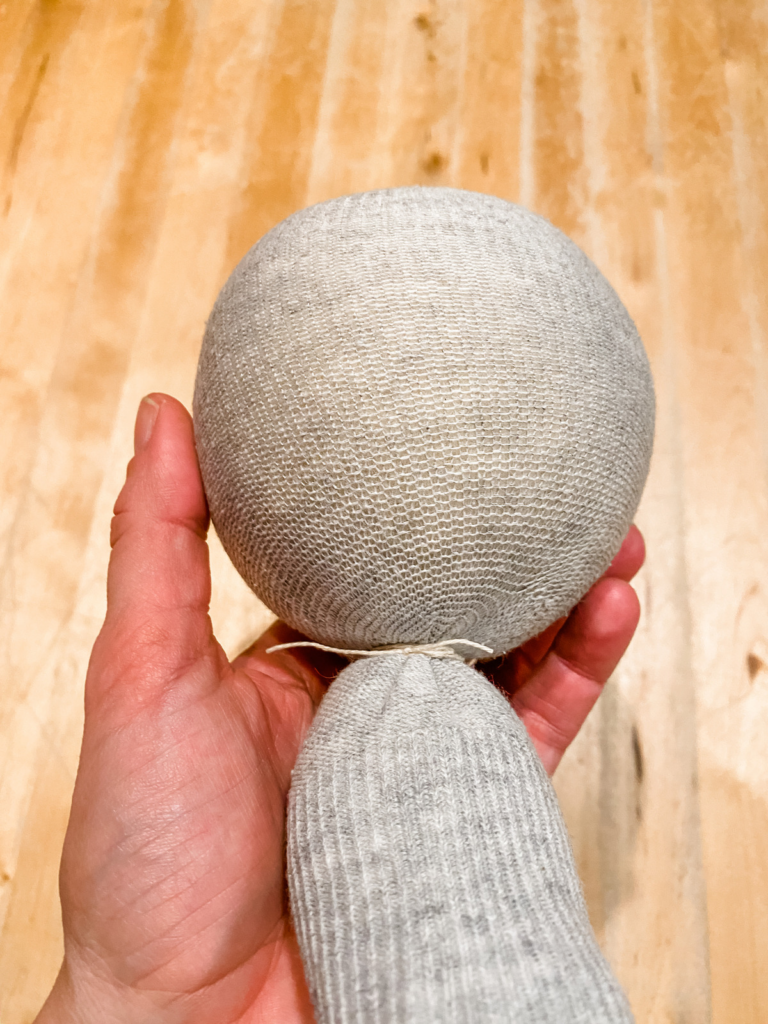
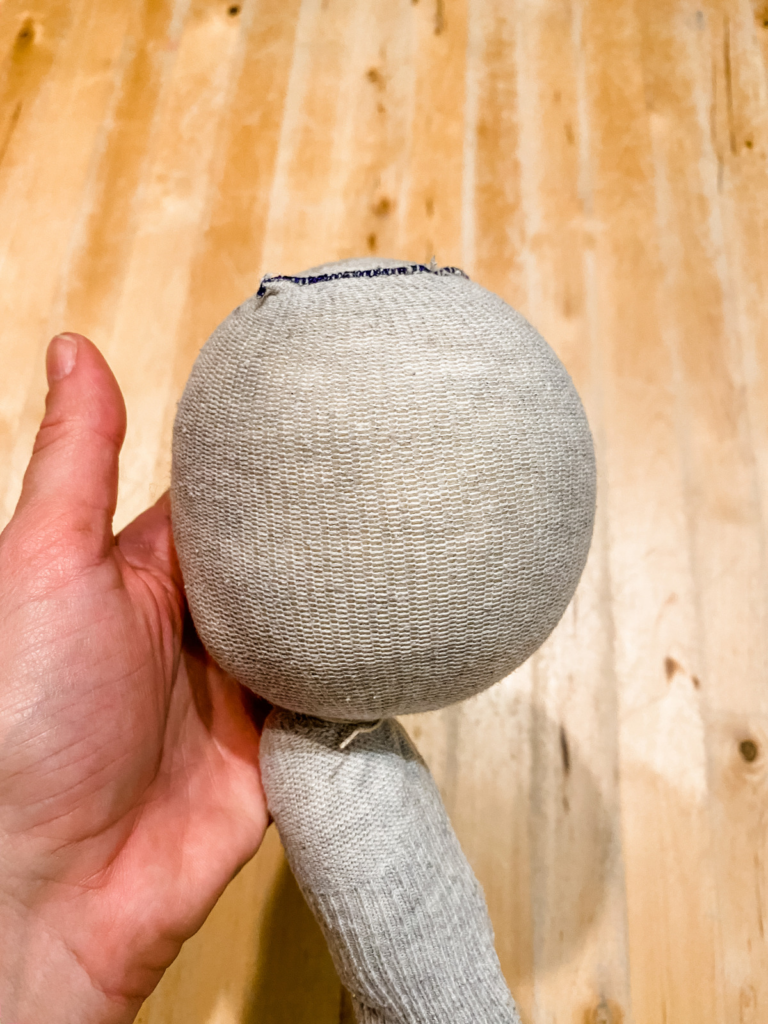
Now comes the tricky part. You will need your small sock (which is my preference) I mean I just have to head to the laundry basket to find a single baby sock, OR a 12” long piece of stockinette tubing that has been sewn shut on one end.
Turn the sock/tube inside out and slip your hand inside. Holding the end of the sock firmly onto the head ball, begin slipping the sock over the head like you are putting a sock on, but from above. * I will sometimes get another person to help me with this part if it is super tight.
Pull the sock/tubing tightly over the head and gather it at the neck.
Using a piece of string, wind around the neck of the sock as tightly as you can 2-3 times and tie off.
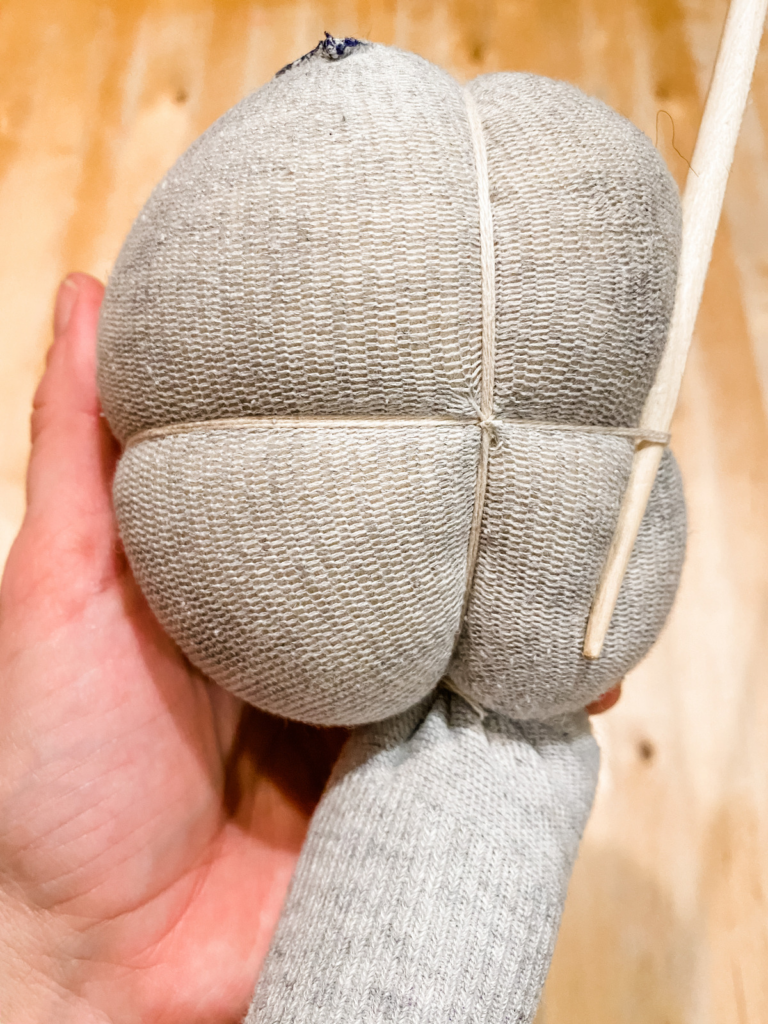
Step 6
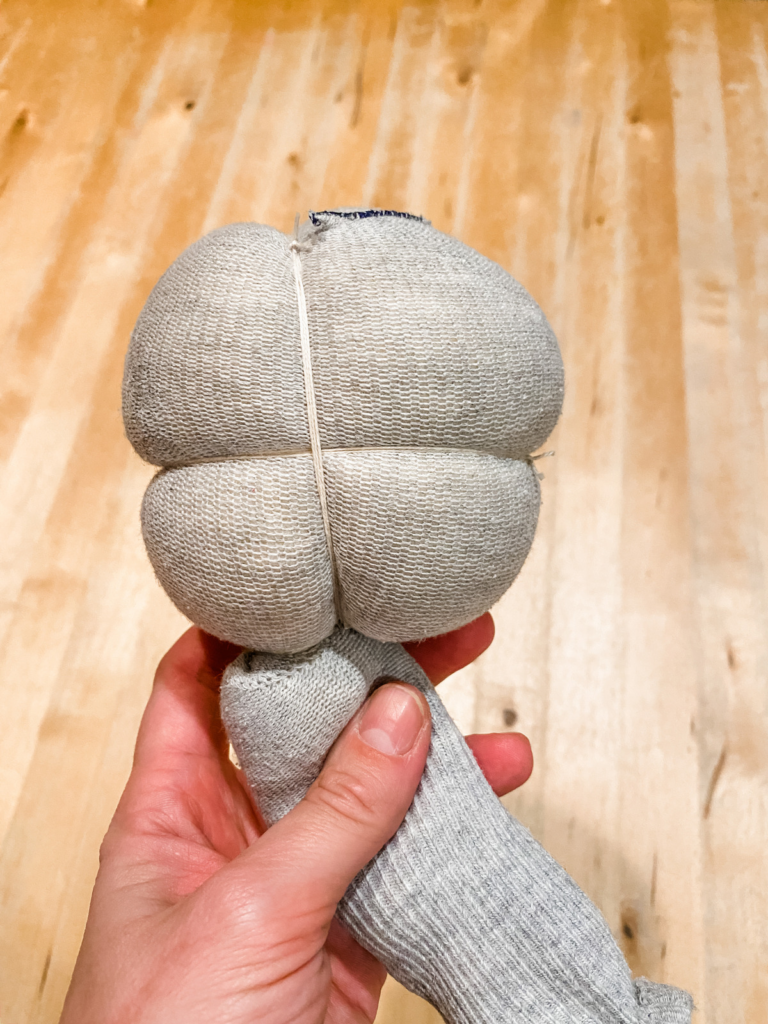
To tie the eye line, you will need a length of doubled thread about as long as your arm. Wrap it around the head a the mid line point, pulling it as tightly as possible. Having your thread double for this part will ensure that it will not break when you are pulling snuggly.
Once you have indented the midline with your thread, know the thread at the back and leave a bit of a tail.
Step 7
You will do the same tying process (double the thread, arms length, wrap tight and tie) with a vertical like going around the cheeks and chine. Your strings will cross with a small X about at the ear location of the head. Tie this thread at the top of the head again leaving a tail.
Step 8
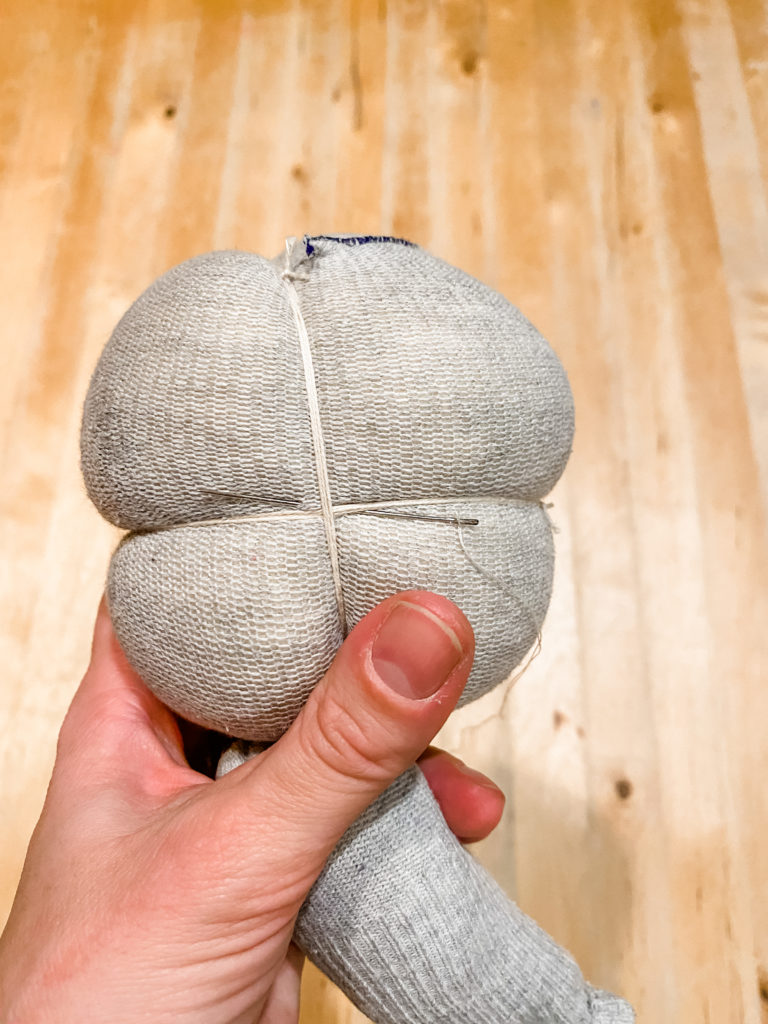
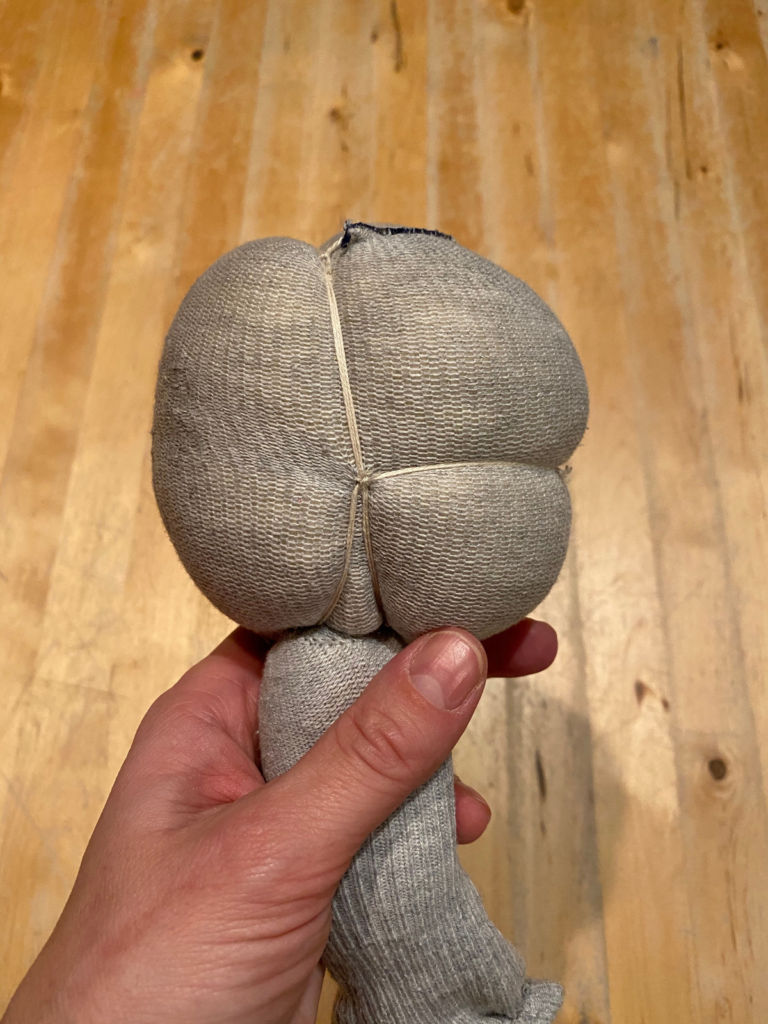
At this point your head should measure around 11.75-12.5″ around.
Next we are going to secure the thread at both of the X spots with a doubled thread.
Step 9
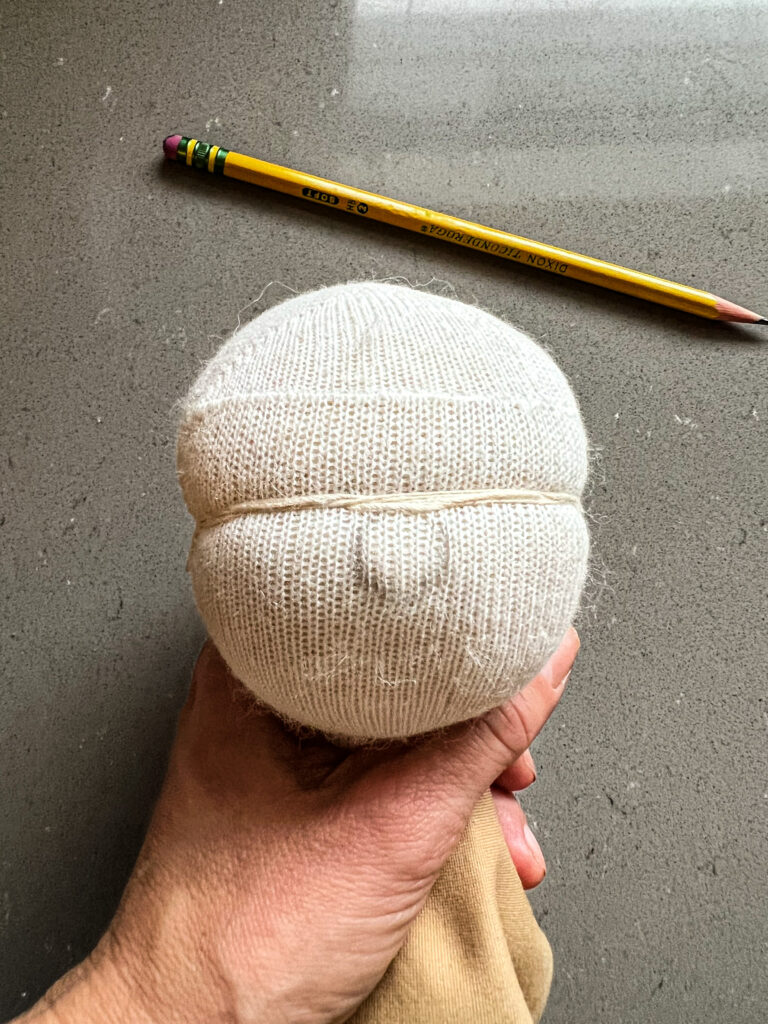
Then using a chop stick sliding it back and forth-we are going to move the back of the head string and lower it to the back of the neck area.
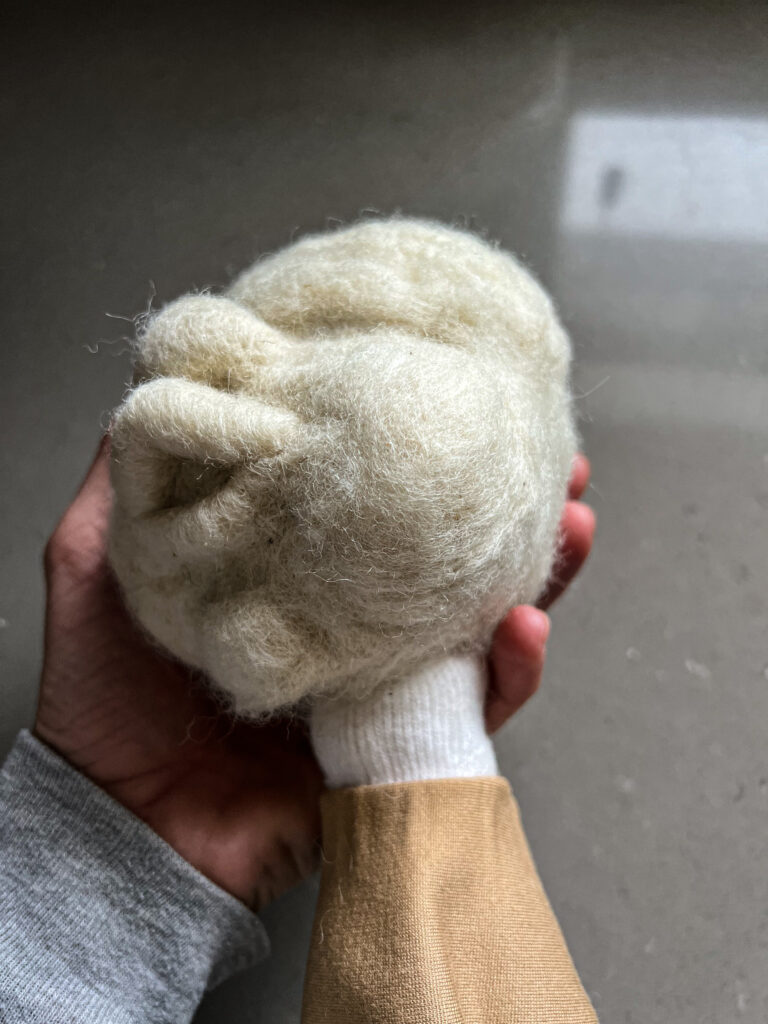
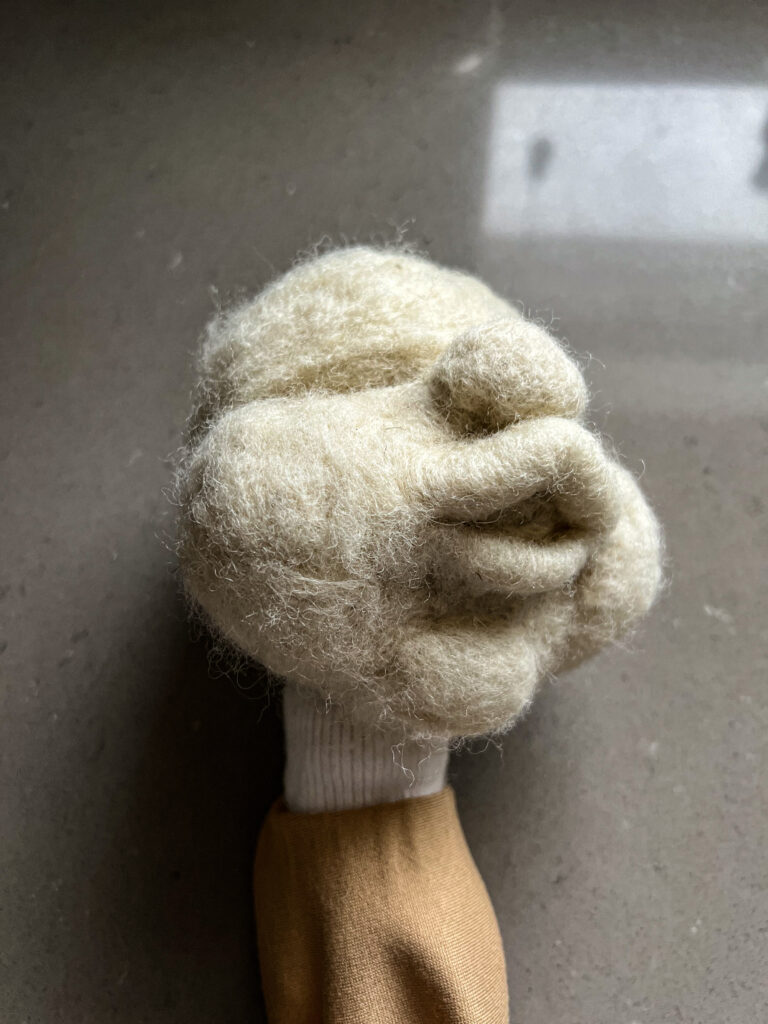
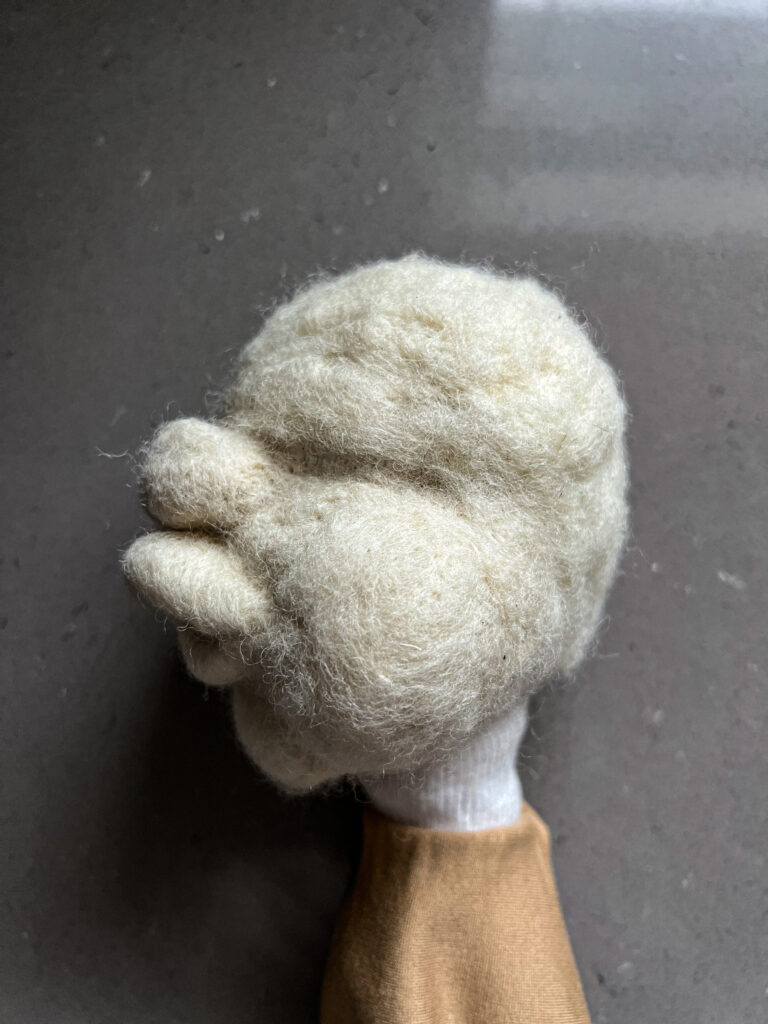
Now is when we will form the nose. Start with a sharpened pencil and lightly draw where you would like the nose to be.
Adding the wool to sculpt the facial features can be the most time consuming but also the most satisfying and rewarding. I would avoid trying to watch a show or be visually distracted during this step as, trust me those felting needles stab hard and your fingers will throb for days. You’ll also want to make sure that you are either using your little leather finger protectors or keeping your fingers out of the needles way.
Step 10
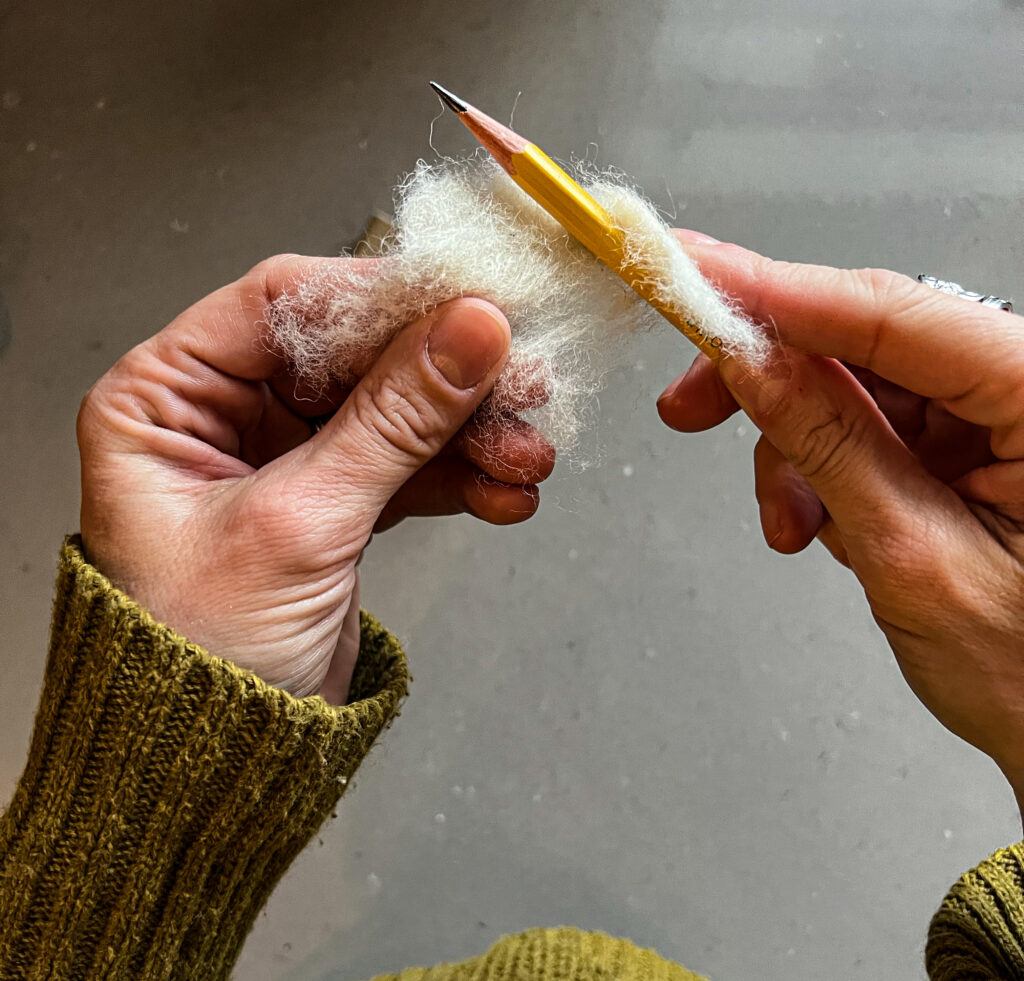
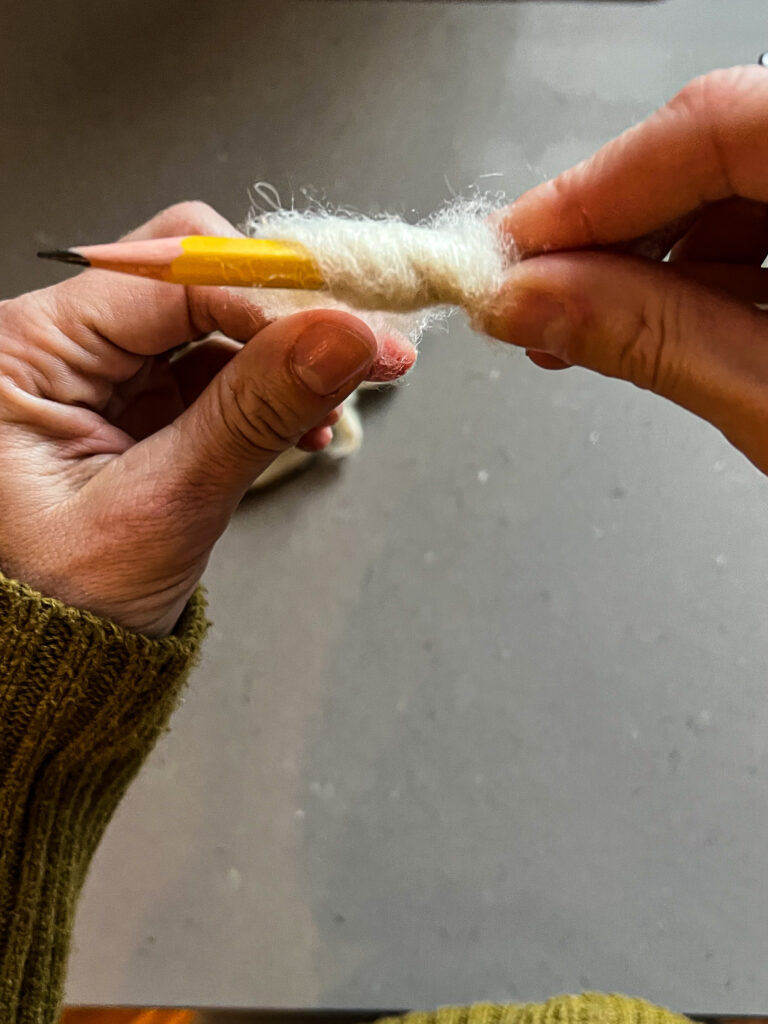

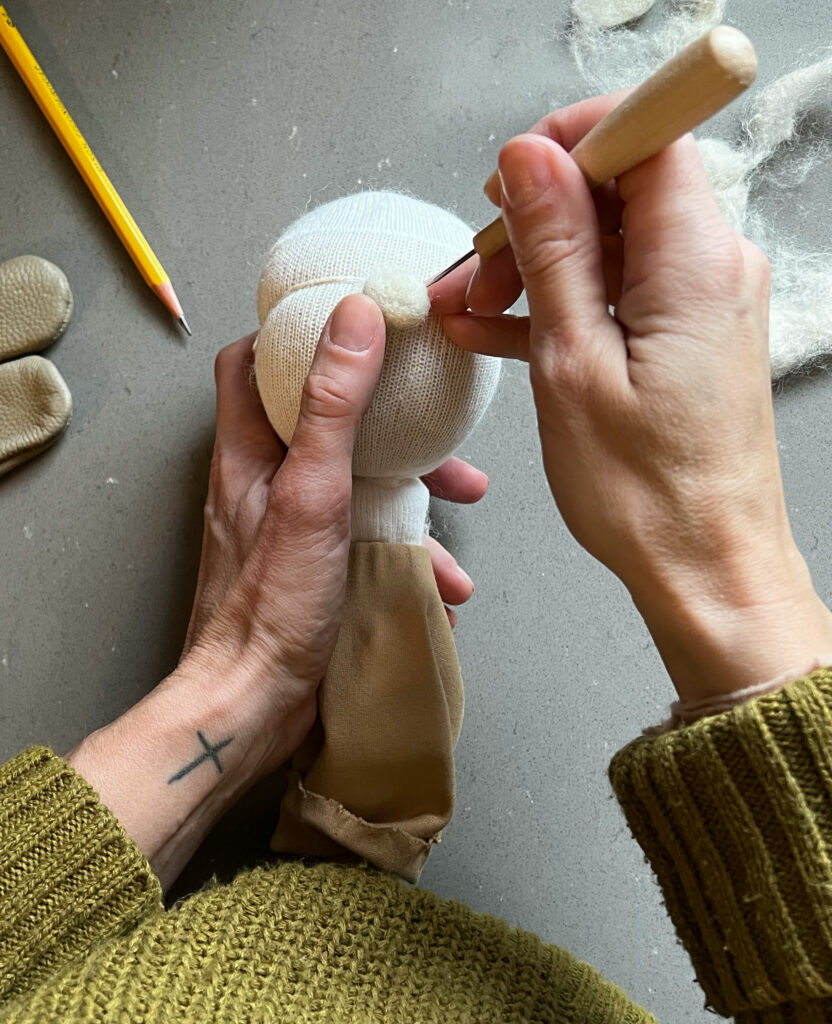
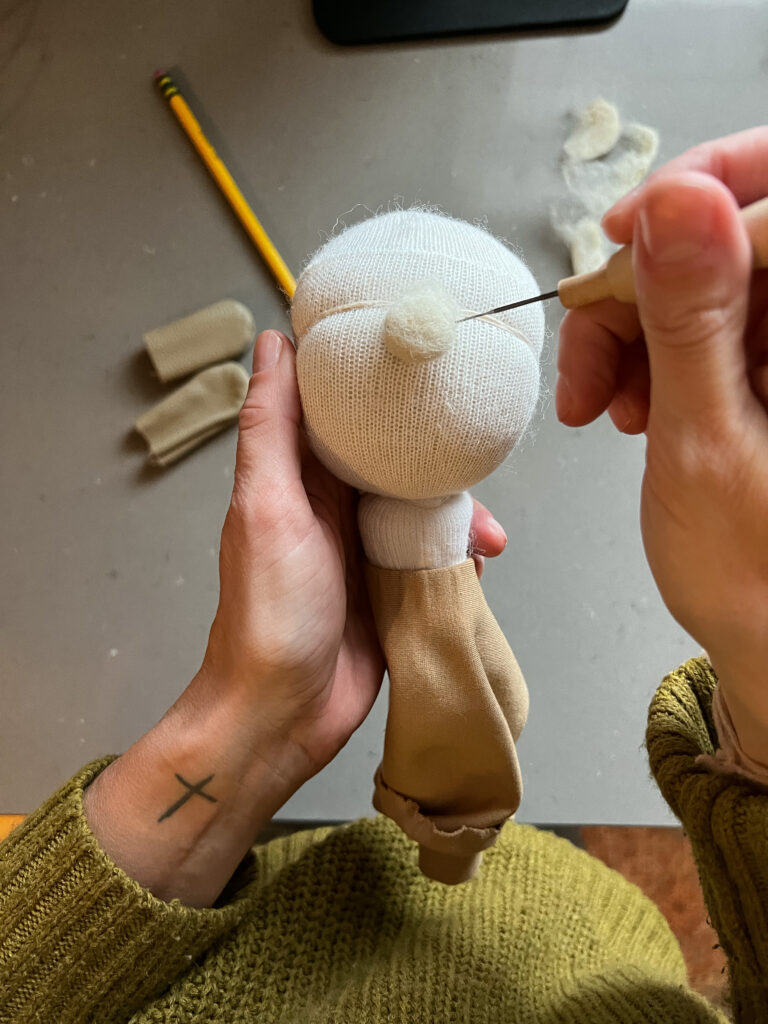
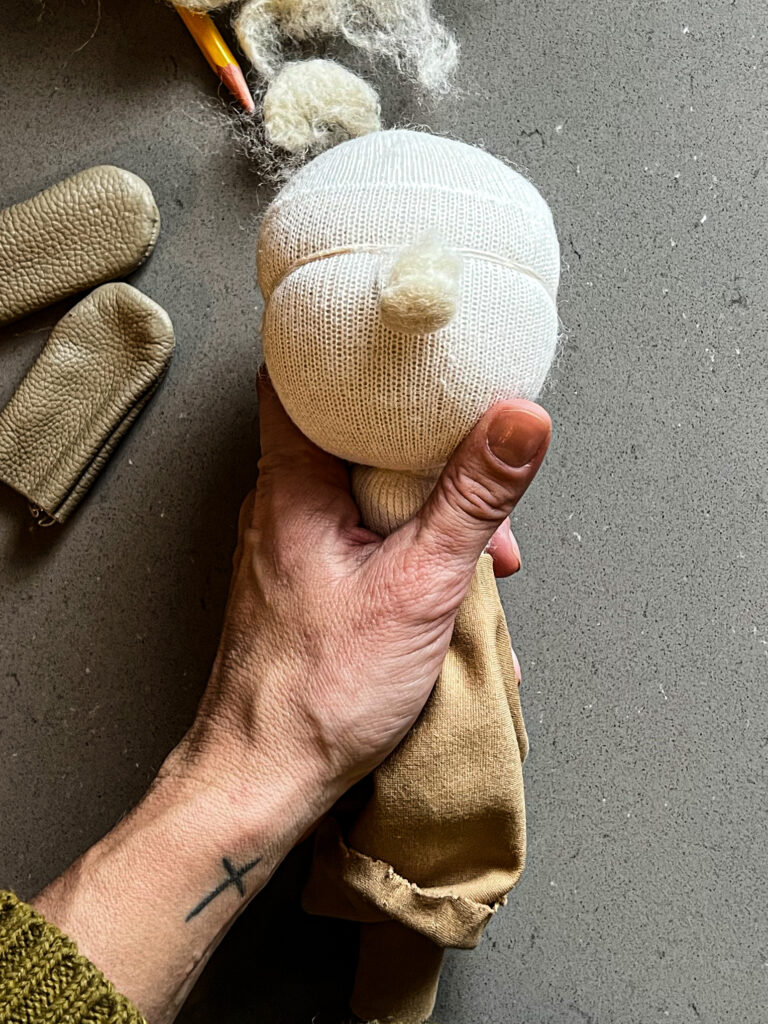
We are going to take pieces of wool and roll them into the shapes of the facial features that we want to add to our dolls face. I prefer rolling a piece of wool around a chopstick or pencil. The cheeks, the nose, the brow, the chin and lips will all be rolled tightly and shaped first, before being added to the face.
When selecting your wool, make sure you are using the same amount for one cheek as you do to make the other cheek or you’ll be going back and forth to make sure they are symmetrical.
You could certainly add layers of wool building these parts up a little at a time, but it will take you literally days to get the affect. Rolling up a tight round nose or rectangle-shaped chin prior to felting it into place will save you many hours.
Once you have your pieces formed, I like to use pins to place them on the head to make sure they are in the perfect spot before I start felting. This will also save from needing to have your fingers in the way of those barbed needles.
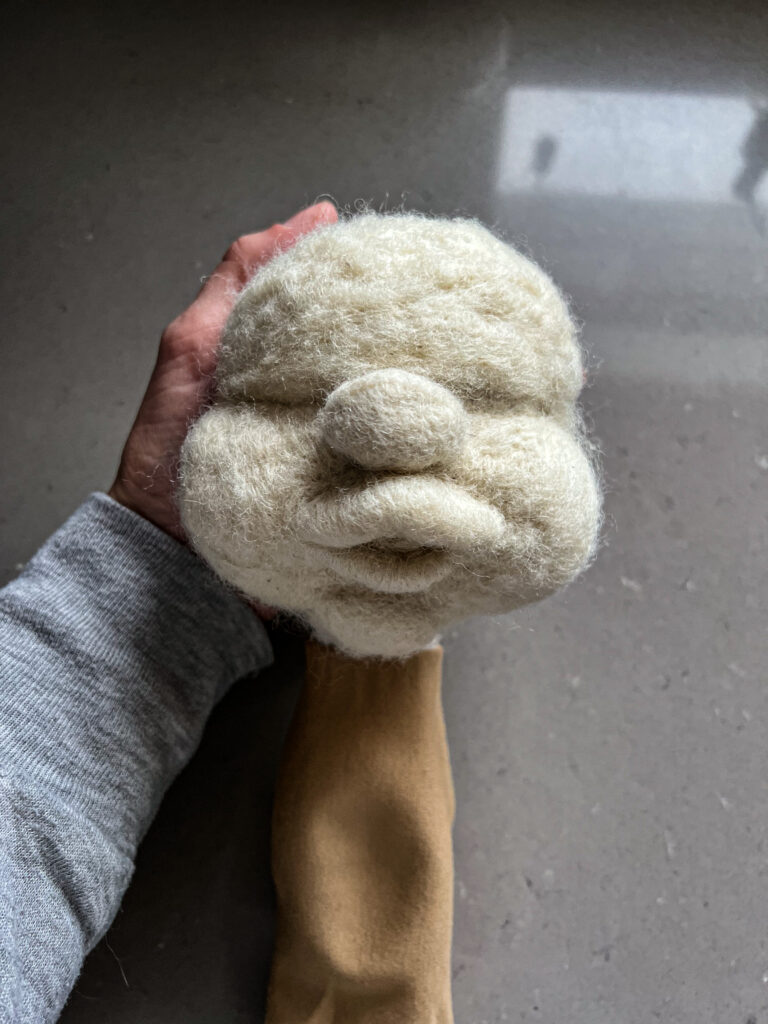
The facial features need to be slightly exaggerated as they will be covered by a piece of doll skin fabric in the end and over the years those pieces will begin to flatten. So it’s important that those pieces be really firm and exaggerated from the start.
For my dolls, I like a more baby look with chubby cheeks, pouty lips and a button nose. This is the part where you can design your doll to look like anything you want. Maybe you even style it after the person/ child you are making the doll for.
Once I fit all of my features in place, felting each piece in with both my single felting pen and my multi needle pen, I like to place a thin covering of wool over all of the pieces to connect things and even them all out.

How to Make the Head for a Waldorf Doll
- Start rolling the brain of the Head
Begin by laying out a few strips of wool batting. I like them to be about 2-3” wide and 2.5’ long, but work with whatever comes off (sometimes it doesn’t like to be neat and tidy!) You will also need your scissors and cotton string.
Roll the wool as tightly as humanly possible. You want to roll the wool into a tight little ball, similar in size – but slightly larger than – a golf ball. What you are forming is the core of the doll head or the brain. It must be firm. Very firm. If it is not firm enough, your head will not turn out.
Once you have rolled one strip, you can rotate the roll and begin rolling a new strip. Tuck the ends inwards in an effort to create a ball (it won’t be a perfect ball, but the goal is as ball-like as possible). I’m not sure if it is visible in the video, but I am REALLY pushing hard as I roll, in an effort to make the ball as firm as I can.
Continue rolling new strips onto your ball, until the ball measures about 7.5” around. - Wrap ball of wool with string
Once your ball is the right size, begin wrapping it with string (leaving a tail to tie it off at the end).
Wrap in all directions until the ball is held very tightly and has condensed even further due to the tension of the string. Tie off your string. The measurement after wrapping should be around 7” in circumference. - Add more strips of wool to your head
Once you have finished wrapping you will have your core.
This is like the brain of the head. The round, firm, shape will provide structure and the right amount of firmness to the rest of the head. If your core is not very firm, you will have to snip the tie, and redo it.
Once you are happy with your core, you can begin rolling it in more strips of wool to form the head.
Alternate the direction of the roll to try to maintain a round shape. - Measure the head
Your head may look more of a square/round shape like mine pictured. This is just fine, once it is in the stockinette or sock, and tied, it will be round.
Once your head measures approximately 12.5-12.75” around, you can stop rolling. Again, you must have a firm head. This will not be as firm as your core, but should be firm. If it is loose, it will not form properly, and you will need to retie it. I like to tie it around it again, at this point before adding a few more layers of loose wool. - Place your wool ball into a small sock
Now comes the tricky part. You will need your small sock (which is my preference) I mean I just have to head to the laundry basket to find a single baby sock, OR a 12” long piece of stockinette tubing that has been sewn shut on one end.
Turn the sock/tube inside out and slip your hand inside. Holding the end of the sock firmly onto the head ball, begin slipping the sock over the head like you are putting a sock on, but from above. * I will sometimes get another person to help me with this part if it is super tight.
Pull the sock/tubing tightly over the head and gather it at the neck.
Using a piece of string, wind around the neck of the sock as tightly as you can 2-3 times and tie off. - Tying the eye line
To tie the eye line, you will need a length of doubled thread about as long as your arm. Wrap it around the head a the mid line point, pulling it as tightly as possible. Having your thread double for this part will ensure that it will not break when you are pulling snuggly.
Once you have indented the midline with your thread, know the thread at the back and leave a bit of a tail. - Tying the jaw line/ chin area
You will do the same tying process (double the thread, arms length, wrap tight and tie) with a vertical like going around the cheeks and chine. Your strings will cross with a small X about at the ear location of the head. Tie this thread at the top of the head again leaving a tail.
- Secure the thread X on each side of the head
At this point your head should measure around 11.75-12.5″ around.
Next we are going to secure the thread at both of the X spots with a doubled thread. - Creating a rounder back-of-the-head + identify the nose area
Then using a chop stick sliding it back and forth-we are going to move the back of the head string and lower it to the back of the neck area.
Now is when we will form the nose. Start with a sharpened pencil and lightly draw where you would like the nose to be. - Felt and sculpt the facial features
We are going to take pieces of wool and roll them into the shapes of the facial features that we want to add to our dolls face. I prefer rolling a piece of wool around a chopstick or pencil. The cheeks, the nose, the brow, the chin and lips will all be rolled tightly and shaped first, before being added to the face.
When selecting your wool, make sure you are using the same amount for one cheek as you do to make the other cheek or you’ll be going back and forth to make sure they are symmetrical.
Pin your pieces in place, then using your felting needles, felt all of the featured pieces onto the face.
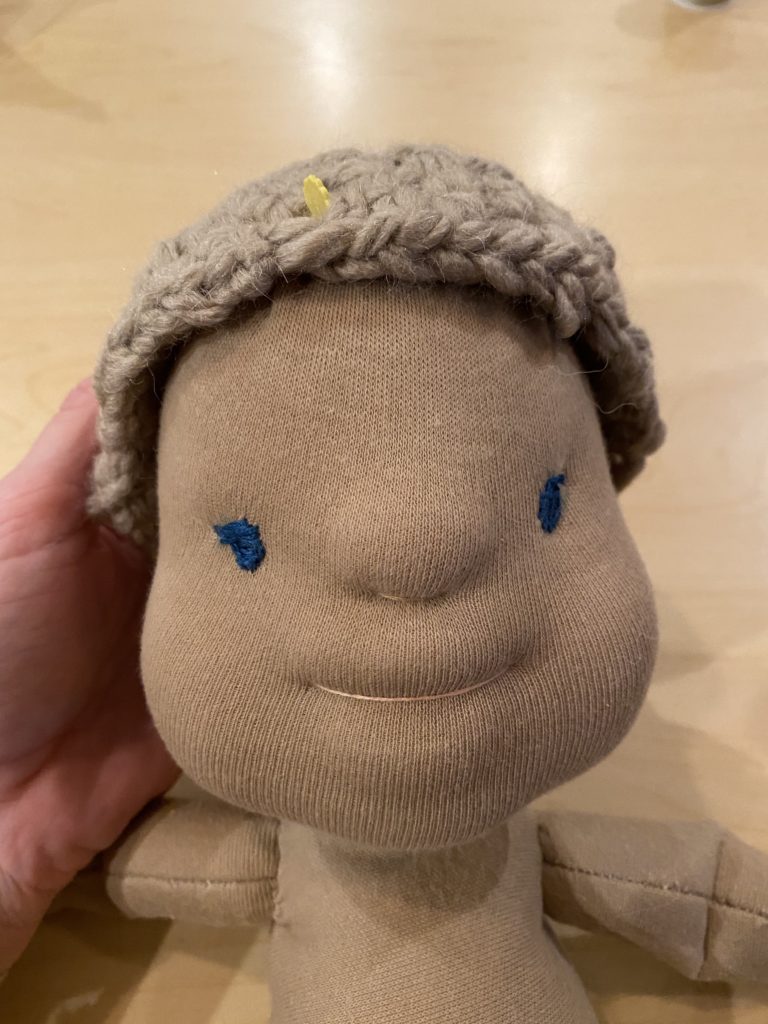
Adding the doll skin, embroidered details and adding the head to the body can be found in the next tutorial.
Materials I use for making a Waldorf Doll:
Wool (you’ll need 5-6 of these)
Waldorf Doll body pattern
Doll Footed PJs Pattern: https://www.etsy.com/listing/227125447/doll-footed-pajamas-pattern-for-the-wild?ref=yr. I love making several of these PJs for my children’s doll as it is another protective layer for the doll. These PJ’s also seemed to keep their skin cleaner. They are easier to remove and clean than to spot clean your doll. It also protects their joints from getting directly tugged on. Our kids tend to carry their Waldorf dolls around by their limbs and it seems they are a bit more protected when they have their jammies on.
This is the Mohair yarn that I used for making the wigs in every different color thinkable!
My extra special sewing scissors that I’ve had for 15 years!
Doll skin fabric
A sewing machine similar to mine
Embroidery needles
Fleece lining for doll’s body
Crochet hook (you don’t need all of these, but it’s a pretty good deal!)
Beeswax crayon for adding color to cheeks and lips
How to Clean your Waldorf Doll
Here’s our special cleaning recipe that we use on everything from getting slime out of the carpet to cleaning up our Waldorf Dolls!
Grab your FREE Waldorf Doll Pattern HERE!
Other Waldorf Doll Tutorials:
Make a Waldorf Doll Face | Facial Details
Making a Wig for a Waldorf Doll
How to Make a Waldorf Doll | the Body
The Waldorf Doll Video Series
Watch all of the Waldorf Doll Tutorial Videos.

Affiliate Disclosure & Content Disclaimer
This post may contain affiliate links from a paid sponsor, Amazon or other program. When you use these links to make a purchase I earn a small commission at no extra cost to you. This allows me to continue creating the content that you love. The content in this article is created for information only and based on my research and/or opinion.
Emily T.
Leave a Reply


DAILY INSPIRATION ON THE GRAM @hearty.sol
it's hip to be square!
Cool! I have never heard of these dolls. Isn’t it great learning something new that takes over your life (creatively, I mean)?
Ditto on Jenny’s comment. I have never heard of these dolls. I get like this when I make my primitive dolls ????
This looks like something that I could totally become obsessed with!
It totally happened to me! I found something so incredibly unique and was like, I need to make one for every little girl I love! The cool part is that no one doll is the same.
We love Waldorf dolls but I have never thought to make my own! Thanks for sharing!
They consume time, but are so so so worth the effort!
I read and watched the video the other day I also pinned, but didn’t have time to comment!! Great job on your video and so fun to make handmade dolls for your girls!