Welcome to Hearty Sol where I share recipes, DIY projects and our farm family story with the world!
I love sewing, working with leather and wood, creating simple hearty recipes, fun projects and keeping up with our menagerie of children, gardens and animals around here.
You can follow the journey on our blog, by signing up for our newsletter, and social media channels!
get on our list!
Thank you!
You have successfully joined our subscriber list. Watch for the next email to arrive. This will confirm your subscription. Don't forget to click that confirm button or my special updates will never make it to you!
Join our Hearty family!
Want to keep up with the latest happenings at Heart Sol. Get emails full of our farm favorite recipes, projects and information about special events. It's easy, just sign up with your name and email and you are all set!
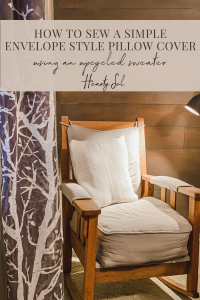
How to Sew a Pillow Cover | How to Sew | Lesson #5
Rate this post
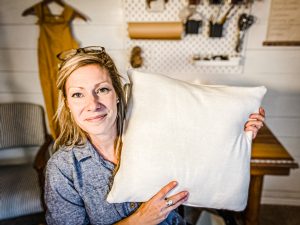
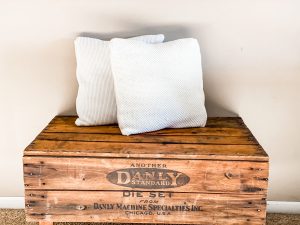
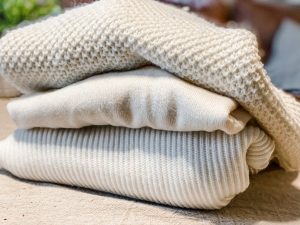
Learn how to make a basic envelope-style pillow cover by up-cycling a sweater!
AN ENVELOPE STYLE BACK
Whether I am making a rectangular or square pillow cover, I usually make all my pillow covers the same way with an envelope style back. In this sewing lesson, I am going to show you how to sew a pillow cover from scratch with an envelope style back. We are going to combine what we learned from previous lessons and combine them into one sewing tutorial for practice such as threading a sewing machine, changing the stitch, sewing a seam, and sewing a hem.
This post may contain affiliate links, which means I make a small commission at no extra cost to you.
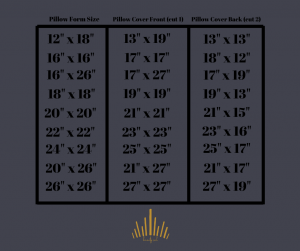
First off, what size pillow cover you need usually depends on what size pillow insert you have.
I searched around on Amazon and found some pretty good pillow inserts in various sizes. Here are some pretty common pillow insert sizes 12″ X 18″,16″ X 16″,16″ X 26″, 18″ X 18″,20″ X 20″, 22″ X 22″,24″ X 24″, and 26″ X 26″. Once you have a pillow insert, you can then figure out what size pillow cover to make.
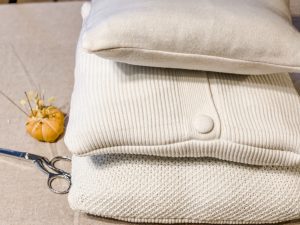
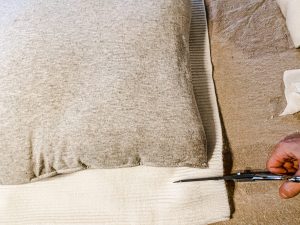
For a pillow cover, you are only going to need three cuts of fabric. The first cut is the main piece and it is a quarter-inch longer on all four sides than the pillow insert, so about a total of half an inch longer than the pillow insert on the vertical and horizontal sides of the main pillow cover fabric cut.
The two backs of the pillow cover are going to be the same size and they are going to overlap. I also created a chart to help you figure out how wide the backs need to be for your pillow cover backs to overlap at least a few inches.
HOW TO SEW A PILLOW COVER VIDEO
HOW TO SEW A 16″ PILLOW COVER INSTRUCTIONS
CUT LIST FOR A 16″ PILLOW COVER
1- 17″ x 17″ piece square fabric of your choice
2- 18″ x 12″ rectangle pieces of fabric the same as the square piece
HEMMING THE RECTANGLE BACK PIECES
First, take the long sides, one of the 18″ x 12″ pieces, and press it over 1/2″.
Next, press it over another 1/2″ so that the raw edge is hidden inside.
Sew in place with a 3/8″ inch seam.
Repeat with the other back piece.
These will be the back pieces for the pillow cover.
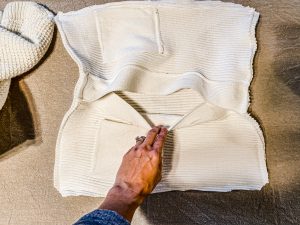
PINNING THE BACKS
Next, line up the 18″ x 12″ back fabric piece edges with the 17″ edges of the front square piece, with right sides together.
If working with stripes, it is really important that you line stripes up pretty precisely. You can do so by pinning around the edges of the fabric the way we learned in this sewing lesson.
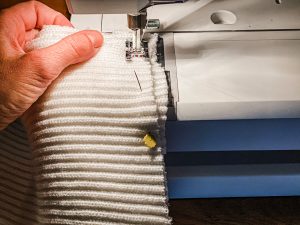
SEW A SEAM
Next, sew down the edge of the hem. I like to take this step slowly. I like to line up the stripes, and then sew a little ways, and then stop to check that they are still lined up, then sew a little more.
After both the sides are sewn down, overlap the two sides, and then pin the top and bottom seam, being sure that you catch all the layers.
Around the middle there will be three layers overlapping, both back pieces and the front piece.
Sew the top and bottom pieces in place with a 3/8″ seam.
This post may contain affiliate links from a paid sponsor, Amazon or other program. When you use these links to make a purchase I earn a small commission at no extra cost to you. This allows me to continue creating the content that you love. The content in this article is created for information only and based on my research and/or opinion.


View comments
+ Leave a comment