

Sewing a Children’s Vest | Simple Vest Tutorial
This little vest pattern is perfect for a special occasion or just dress up!

Our kids love dressing up. Whether for play or for church. I have used this pattern in lots of different ways.
One year I made everyone adventurer vests for Easter. They love them- even my pre-teen! They will all put on their adventurer vests and spend the day outside making up adventures, filling their pockets, and come in tuckered from all their outdoor fun that day.
During the holidays, I have always made the 3 girls either coordinated skirts or dresses. For our son, I always made a coordinated bow tie or vest to go with their dresses! He is always tickled to be able to be included in on all the matching apparel!
This pattern could also be perfect for use at a wedding or any other special occasion!
This pattern includes a 1/2” Seam allowance.
Fabric Recommendations
Flannel, wool, outerwear, suiting fabrics. The lining should be cotton.
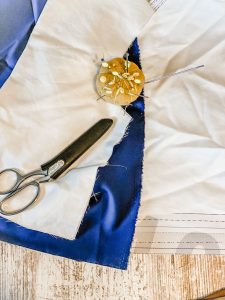
Supplies Needed
Exterior Fabric
Lining Fabric
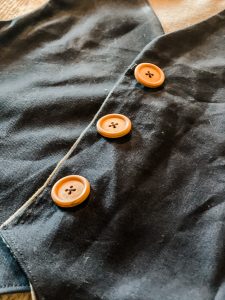
3-4 Buttons

Measuring Guide
Measure around the chest to identify which size will fit best.
Chest Measurements/ Size-Age
19″- 12 Months
21″- 2T
21.5″- 3T
22″- 4T
23.5″- 5T
25″- 6
25.5″- 7
26″- 8
26.5″- 9
27″- 10
Tips for sewing this pattern
Wash and dry (as per fabric specifications) before sewing
Read through entire pattern instructions before you begin to sew
Trace your pattern pieces onto tracing or freezer paper to minimize printing
Printing and Piecing Instructions
All pages should be printed on standard paper. Using adobe reader is recommended, but not necessary.
Make sure to print in ‘actual size’ not ‘scaling’.
Make sure you’re printing the right size pattern by measuring the test square. It sure measures 2”x2”.
To connect the pattern pieces, trim to the grey border, (do not cut the grey border off). Match up the numbers on each page with the pattern image diagram below.
Tape the pages together.
Once the whole pattern is printed and taped, you can either cut along with the size of lines according to the size chart or you can trace the correct size onto tracing paper and then cut that out.
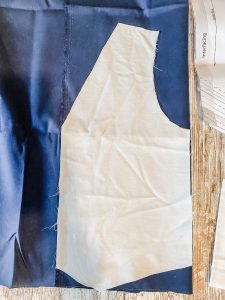
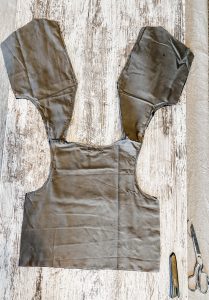
Cut out all Pattern Pieces from fabric as indicated.
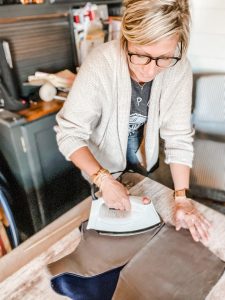
Iron On Interfacing
1. Following your interfacing instructions, iron on the interfacing to the wrong side of each lining piece.
Instructions
- Cut out pattern pieces from fabric as indicated
- Iron on the interfacing to the wrong side of each lining piece.
Optional: Sewing in a Pocket
Transfer the markings correctly on welt pockets is to cut out the actual welt pocket from the paper pattern piece.
Lay the paper pattern on top of your exterior front vest, and simply trace inside the rectangle cut out. Do this for both exterior front pattern pieces.
Place your pocket right sides together on top of your welt pocket marking. The pocket should extend beyond the marking 1” above, and 1⁄2” on the sides.
Place your paper pattern piece on top of the pocket, and transfer the pocket rectangle markings again onto the top of the pocket.
Pin the pocket to the vest, and sew around your rectangle marked pocket opening.
Take a pair of scissors, and cut down the middle of your sewn rectangle, V‘ing out at the sides towards the rectangle points.
Cut as close to the corner as you can, without cutting the stitches.
Repeat for both Front Exterior vests.
Turn the pocket to the inside of the vest, and press, press, press.
Take the bottom of the pocket and press it up towards the top.
Leave the pocket so that it mostly covers the welt pocket opening, and fold the rest back down, pressing firmly in place.
Sew around the welt pocket to secure the pocket fold.
Fold the bottom of the pocket up to meet the very top and pin around the top and side edges. Sew around to finish the pocket.
(Sew only the pocket, not the front of the vest too).
Repeat for both sides of vest.
You should have something like this when done on the wrong side of your vest.
Sewing the Vest together
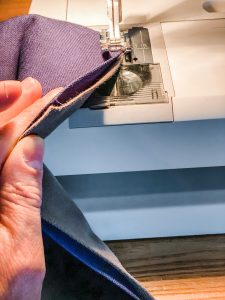
Place vest front and back pieces together, matching up the shoulder and side seams.
Pin ONLY the shoulder seams and sew, then press the seam open. Repeat for the lining.
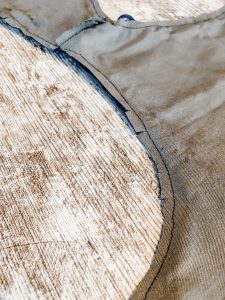
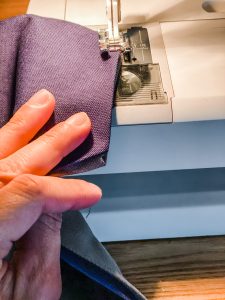
Place exterior and lining pieces right sides together. Pin and sew around the arms as well as the front center and neckline of the vest.
(Do not sew hem or side seams).
Carefully clip curved seams
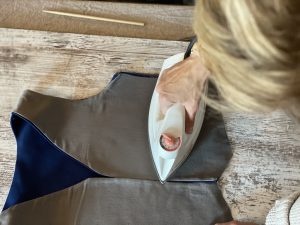
Turn vest right side out by pulling the front of the vest through the shoulder seams.
Press, press, press.
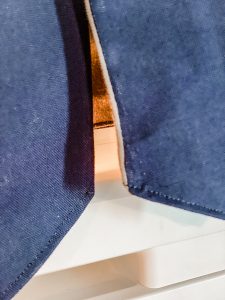
Sewing the side seams
Fold the vest together properly, with the right sides out, matching up the side seams.
Pin together side seams, with the lining right sides together. You will need to lift up the exterior front and back over the arm seams to be able to pin them.
Press
Hem
- To hem the vest, turn the bottom front angle towards the wrong side 1/4” and press.
- Turn again 1/4”, enclosing the raw edge, and press. Pin and sew
- Repeat for both vest angles.
- Turn the remainder of the hem in towards the wrong side 1/4” and press. Turn 1/4” and press again. Sew
Sewing on the Buttons
- It’s up to you if you want to use 3 or 4 buttons. (I love being able to use the old buttons from the jar that my grandma gave me as a wedding gift!)
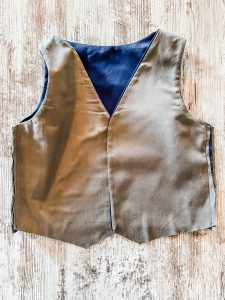
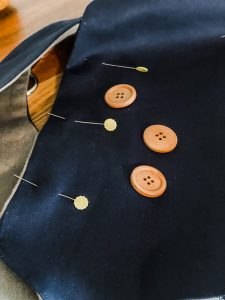
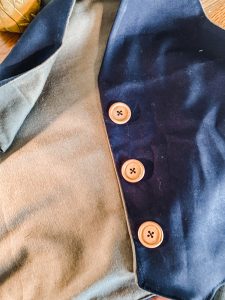
- Lay your vest flat and line up the front sides to make the fabric patterns line up.
- Using a felt marker, pen or pin where you want your buttons/buttonholes to go.
- Using your sewing machine settings, sew on the buttonholes and buttons accordingly.

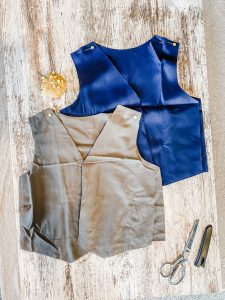
And you are finished!!
Are you thinking, this post is all fine and well, but lady you are crazy because I don’t even know how to sew!?
I got you! I’ve been there. I started sewing when I was a kid, but I realize so many people out there are wanting to get started sewing but have no idea about where to start.

My simple sewing series will take you through all the things you need to know in order to get started in this new sewing hobby of yours- in an easy-to-understand way! From how to thread your machine all the way up to a few simple projects video tutorials to gain confidence in your new skill!
Pin this for later!

Find My Other Hearty Sewing Tutorials Here!!
Making your own Favorite Tank Top
Making a Waldorf Doll | Start to Finish instructions with Videos
Sewing a Simple Skirt with Pockets
Making a Flat-Bottom Zipper Pouch
WHAT OTHER PROJECTS DO YOU WANT TO LEARN TO MAKE?
COMMENT BELOW!
HEARTY BUILDS
Building a Flipping Work Bench with FREE PLANS
LIFE ON THE FARM
How We Stay Organized | Living with Less | Purposeful Living
Learn to Sew! Free Simply Sewing Series
Farmhouse Bedroom Makeover | Spring Farm Prep
DELICIOUS RECIPES FROM HEARTY SOL
Making Sourdough | Everything You Need to Get Started
Making Banana Bread and Banana Bars
Our Family’s favorite Hot Cocoa Mix
Honey, Lemon, Ginger Tea and the Benefits
How to make your own Mozzarella Cheese

Affiliate Disclosure & Content Disclaimer
This post may contain affiliate links from a paid sponsor, Amazon or other program. When you use these links to make a purchase I earn a small commission at no extra cost to you. This allows me to continue creating the content that you love. The content in this article is created for information only and based on my research and/or opinion.
Emily T.


DAILY INSPIRATION ON THE GRAM @hearty.sol
it's hip to be square!
View comments
+ Leave a comment