

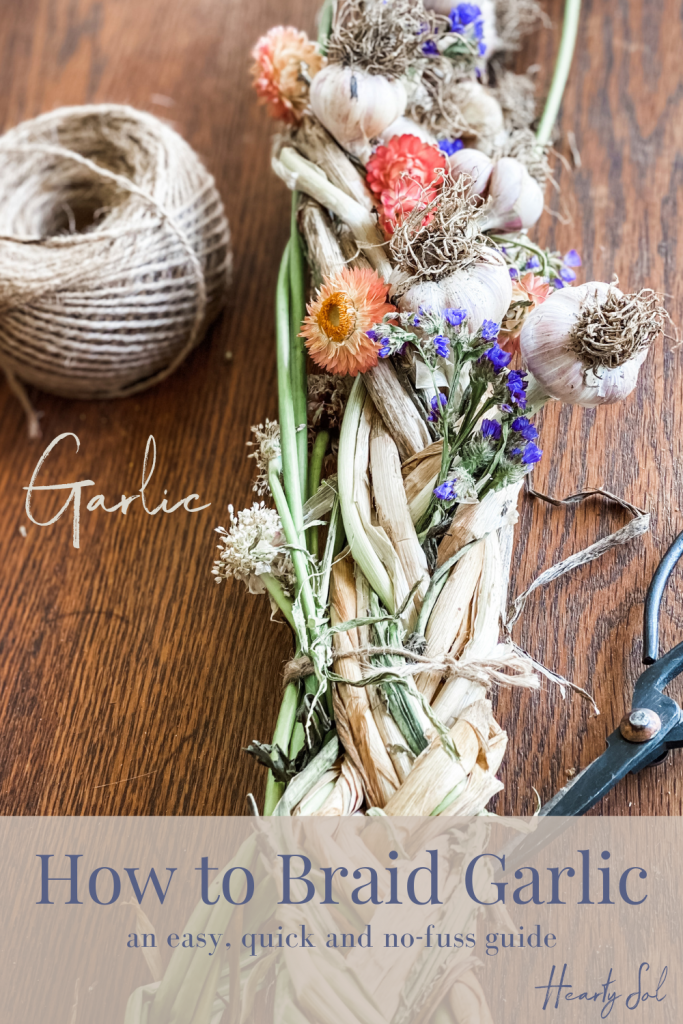
How to Braid Garlic for Storage
Braiding garlic can be both pretty and functional. If you properly harvest, dry, cure and store your garlic, they have the potential to last up to 6 months!
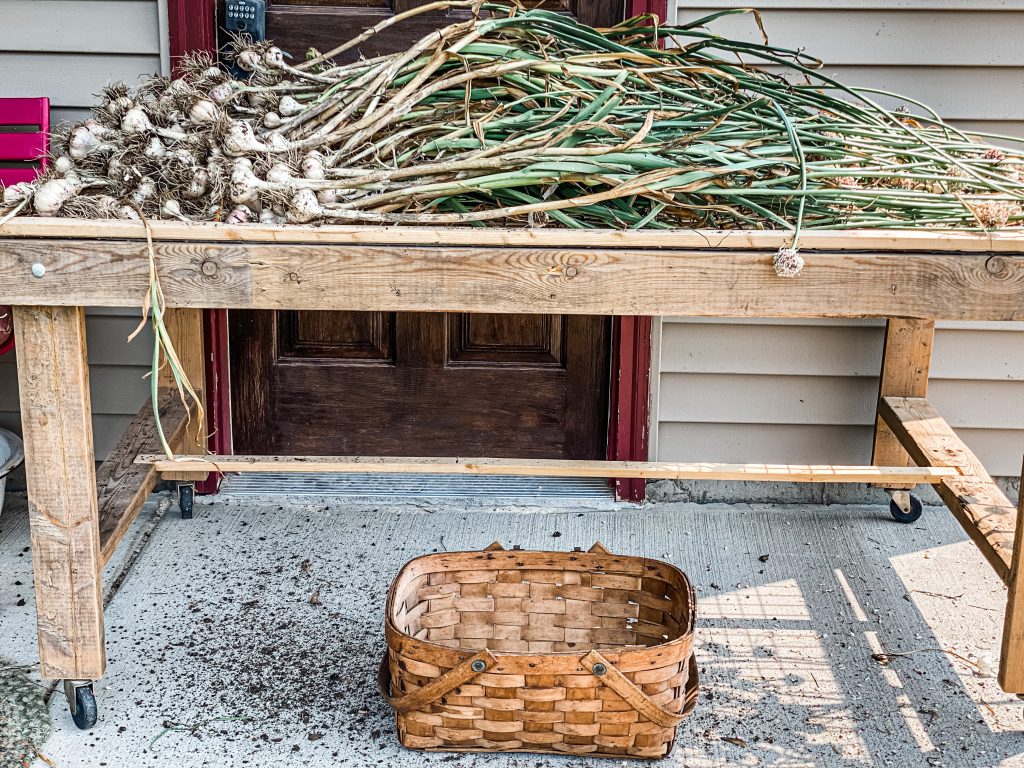
This year we harvested lots of garlic out of our raised beds. It’s always a treat to harvest something that was planted way back in the fall. Growing up, my aunt always braided garlic in the fall and I just love something fresh that we can bring into the house, enjoy it’s beauty, use up and not have to store away.
These garlic braids always go over super well at our farmer’s market – they are beautiful addition to your kitchen and provide easy access to fresh garlic bulbs. When you are ready to cook with garlic, you can just reach over and snip off a clove or a whole head!
This Post May Contain Affiliate Links. Please Read Our Disclosure Policy.
Why You’ll love having Braided Garlic
- Braiding garlic means you’ll get to enjoy your beautiful braid in your kitchen all winter long
- These can be a two-in-one gift! Both for practical and decorative purposes
- Nothing motivates us to use our garlic than having it right in our eyesight everyday!
- This is a fun way to store garlic and allows you to have immediate use of your garlic heads
How to Braid Garlic for Storage
A bumper crop of garlic can be stored a few different ways and this method can also be used for onions. This method of braiding works best with softneck garlic varieties compared to hardneck garlic varieties.
*Make sure to also scroll down to our garlic braiding video where I take you through all of these steps!
Material Needed:
Cured Soft-neck Garlic- stems intact
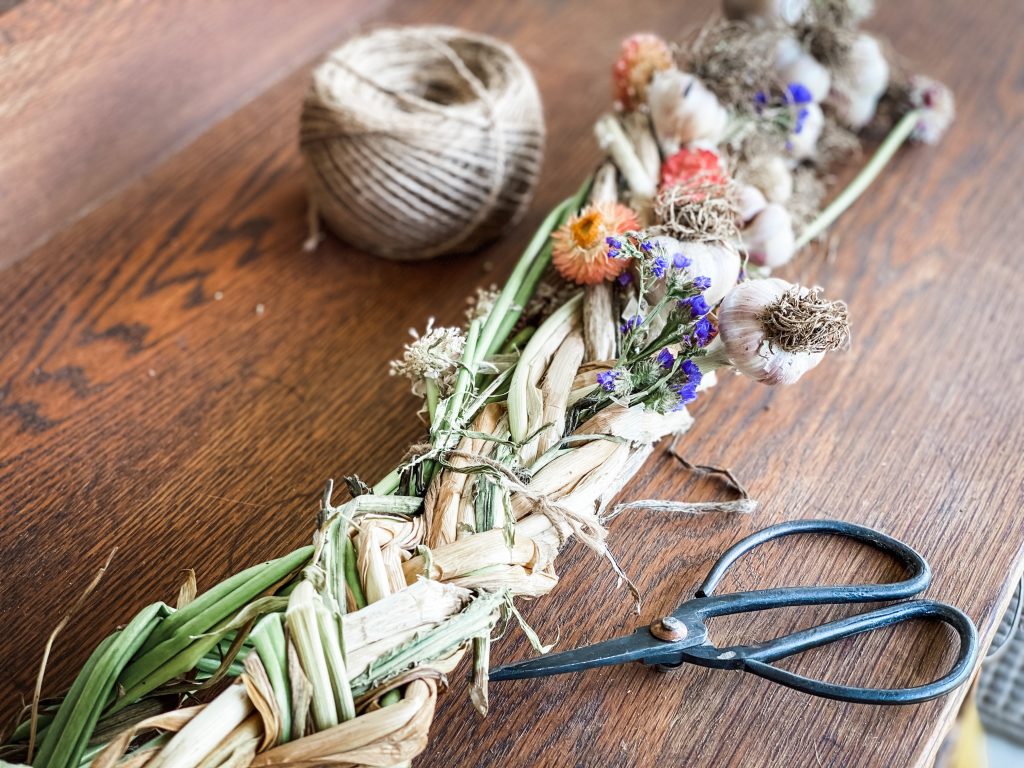
Optional: Dried Cut Flowers. I love incorporating some of my dried cut flowers into the mix of my garlic braids. Not only does this allow me to use up some of my shorter stems from the garden, but it adds a delicate hint of what summer was like, right here in our kitchen.

Step 1: Drying and Curing Garlic
“Do you cure garlic before braiding?” Yes! However, when braiding the garlic, I don’t allow the garlic to completely cure – I only leave them out for a couple of days so the stems don’t become too brittle and break off while braiding
After I harvest my garlic, I pick out the largest bulbs (aka garlic head) to keep for planting. Then, for the drying process, I place them on my drying rack under our shady front porch for a few days – this spot also ensures good air circulation. Curing works best in a cool dark place, like a shed, garage or basement. Just be sure to keep them out of direct sunlight as this can change the way the garlic tastes.
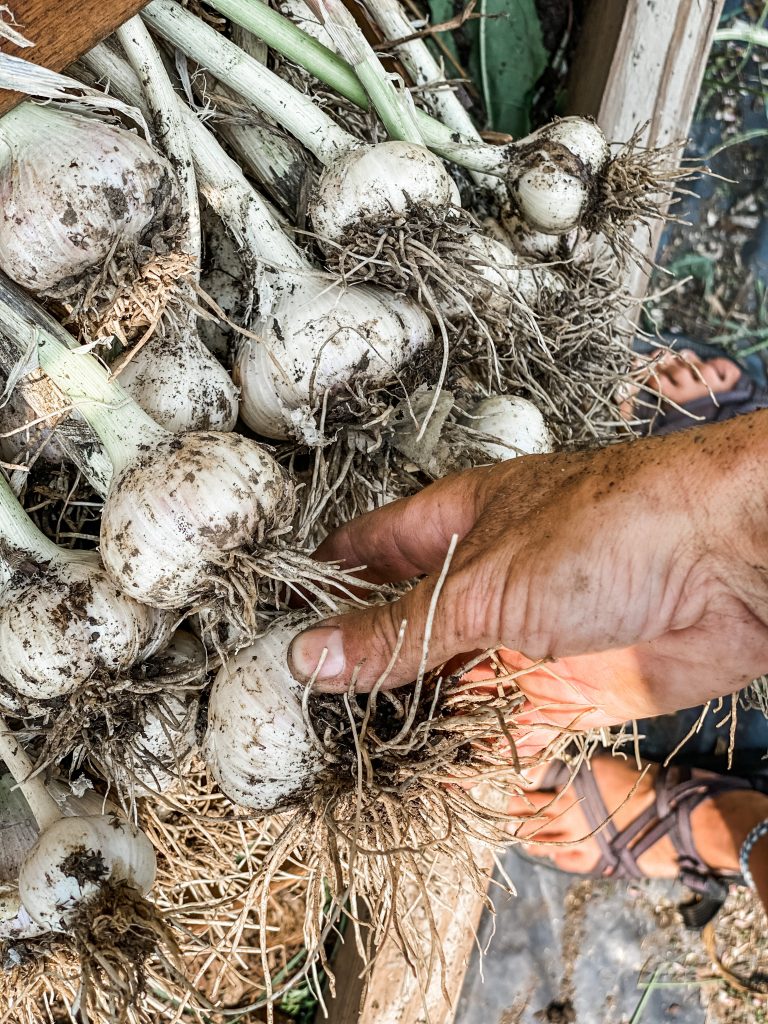
Insider Tip: Remove the loose dirt and clumps of dirt, but be careful not to remove or disturb the papery outside as this may reduce the amount of time that the garlic can be stored for. If there is a damaged bulb, I just make sure to either keep it for seed or use it up right away.
Step 2: Cleaning the Bulbs
Just before I add one garlic bulb to the braid, I brush the dirt off and trim their roots a bit.
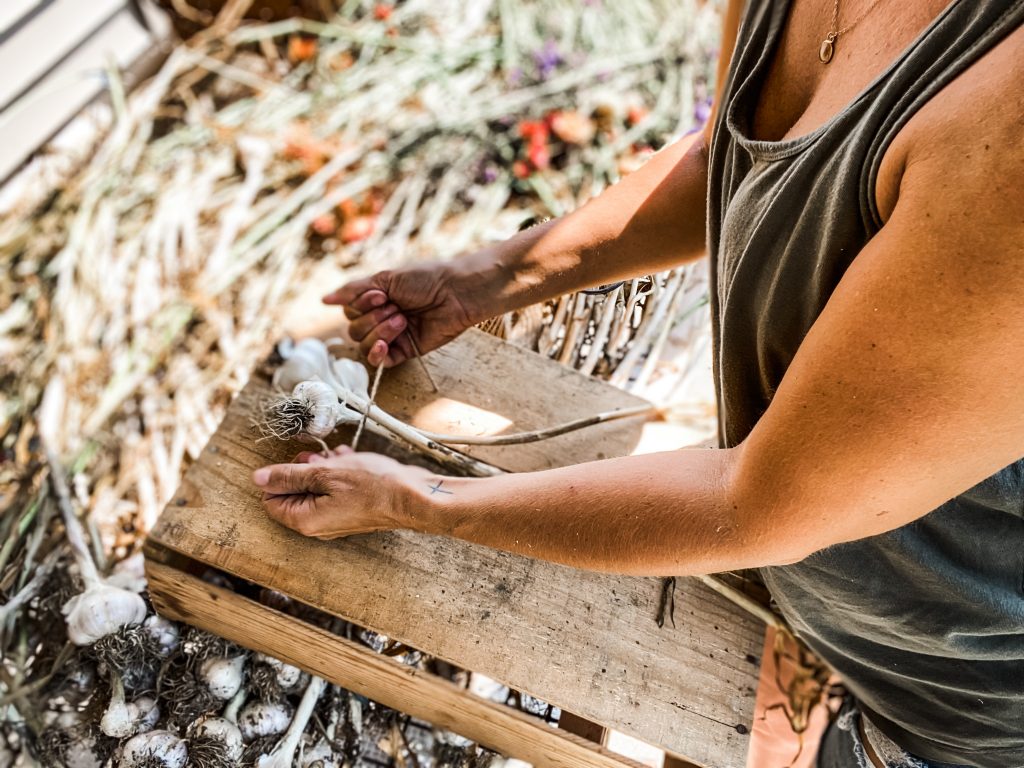
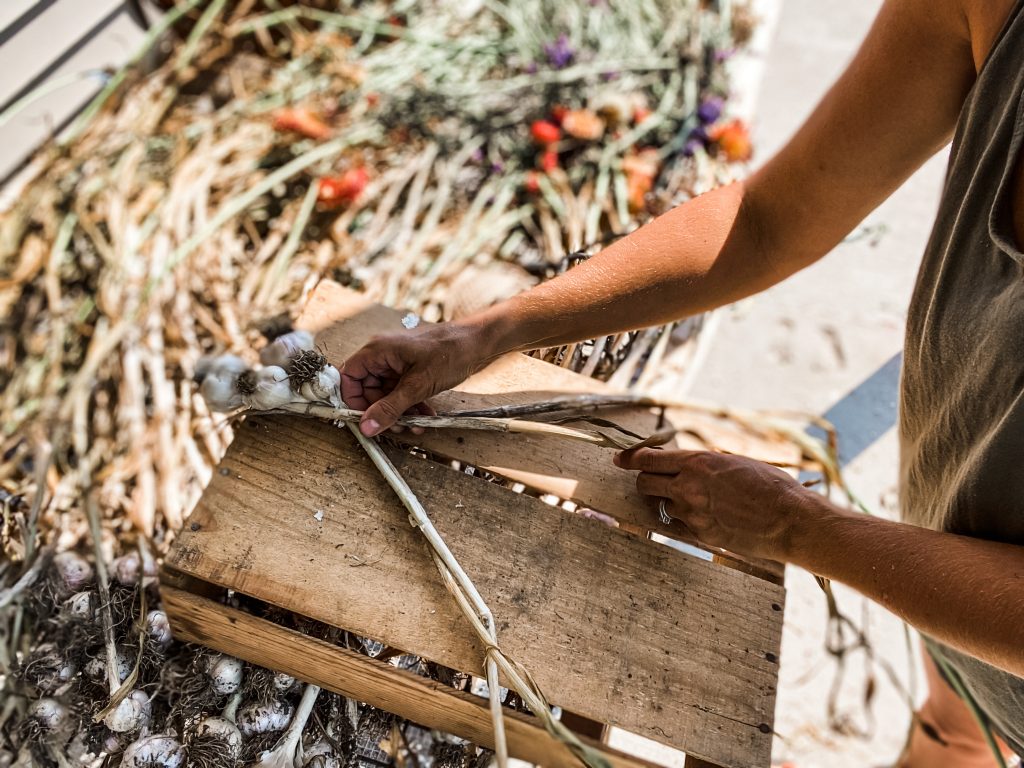
Step 3: Preparing the braid
For the top of the braid, I start with three garlic bulbs at the top with the stems closest to me. Tie a piece of twine tightly around the three bulbs. This twine can also be used to form a loop for hanging your garlic braid up when you’re finished. The easiest way to complete a braid is on a hard surface, I used a wood surface.
Step 4: Add a fourth bulb
Add a fourth bulb in the middle – placing the stems over top of the center stem and begin to braid. Take the outside stem and braid toward the middle, replacing the middle.
Step 5: Add the fifth bulb
Continue braiding as you would, say Rapunzel’s hair – think of it like a fancy French Braid! Because the garlic has been cured a bit, the stems may be thick and require a bit of muscle to manipulate them. It is also a good idea to not over cure them, because you don’t want them to be so brittle and dry that the stems crack and break as you braid.
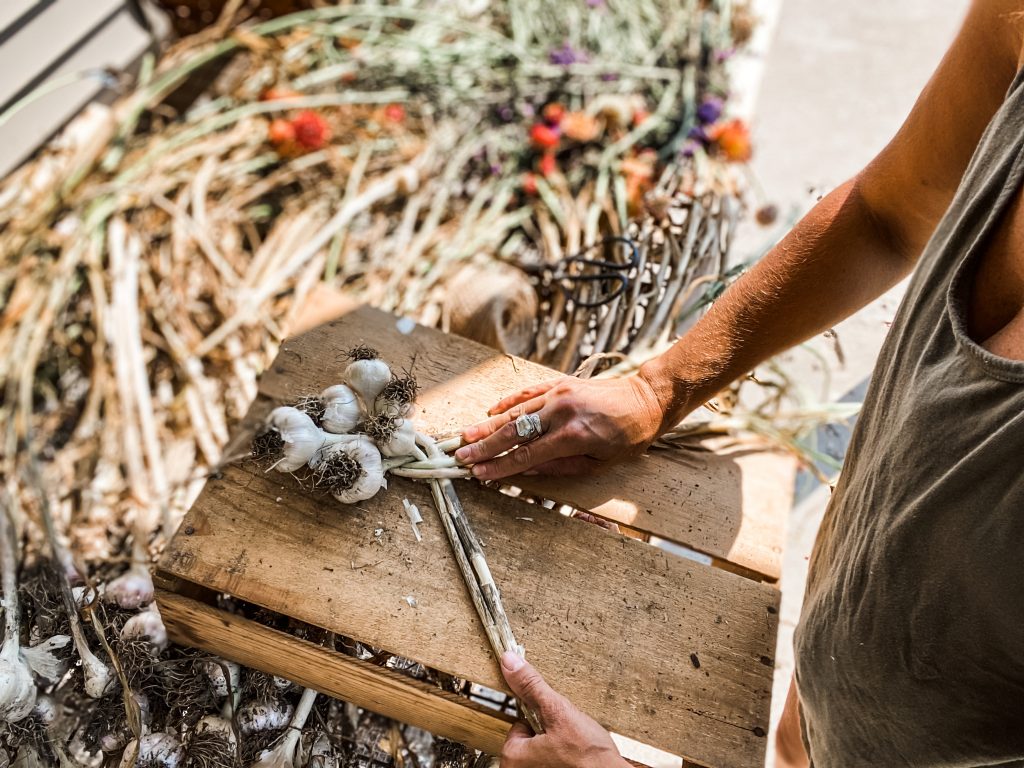
Step 6: Add more bulbs
Grab your next bulb and continue this method of adding garlic bulbs, always placing the new stems in the center, then taking the stems from the outside of the braid and bringing them toward the middle, making them the new center stems.
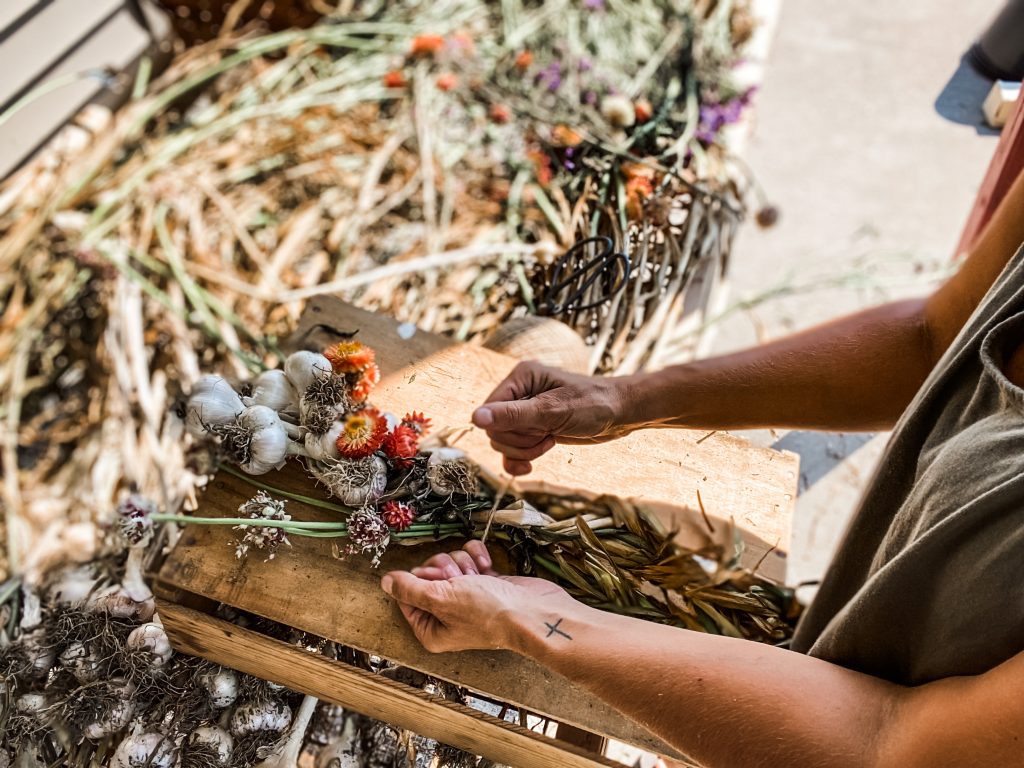
Dry Flowers in Garlic Braid
Once you become proficient in braiding the garlic, you can add in some dried stems of flowers. My favorite flowers to use for braiding garlic are status, strawflower, and nigella.
I had just brought in a bunch of fresh status from the garden that broke off at the wrong length, making them the perfect fit for this garlic braid.
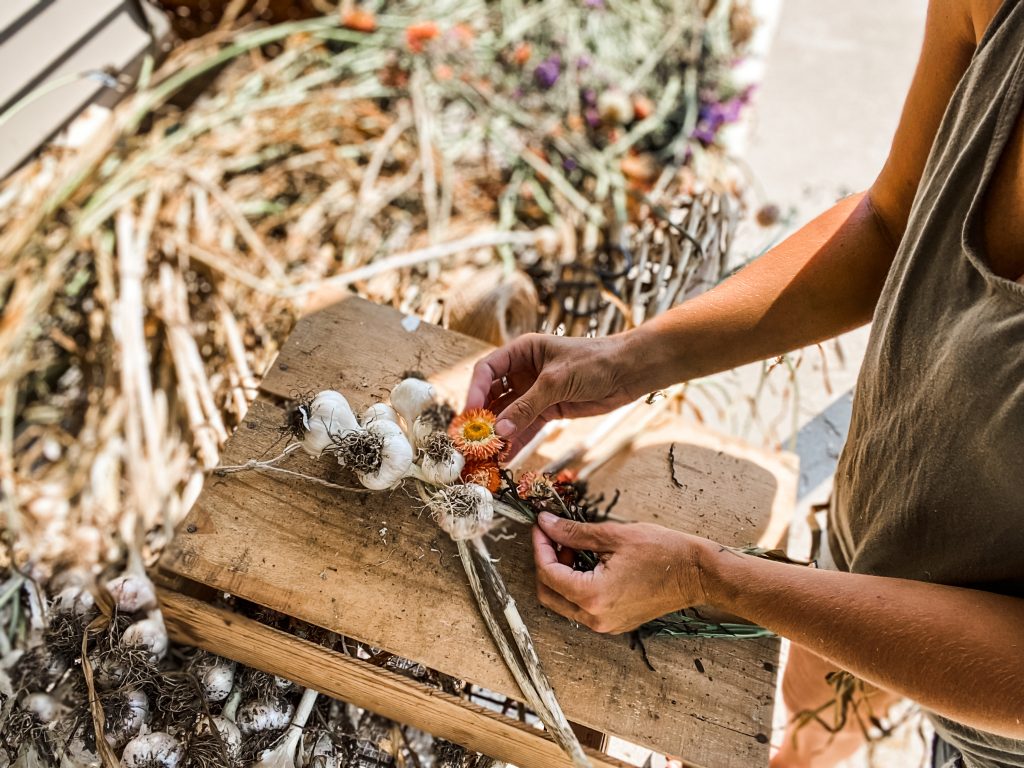
Adding in Dried Flowers to the Garlic Braid
Add a stem of flowers on top of the new center garlic bulb and continue to braid in. You can add as many flowers as you like. Sometimes I wanted to space the flowers out a bit and sometimes I added many. You decide how you want your garlic braid to look.
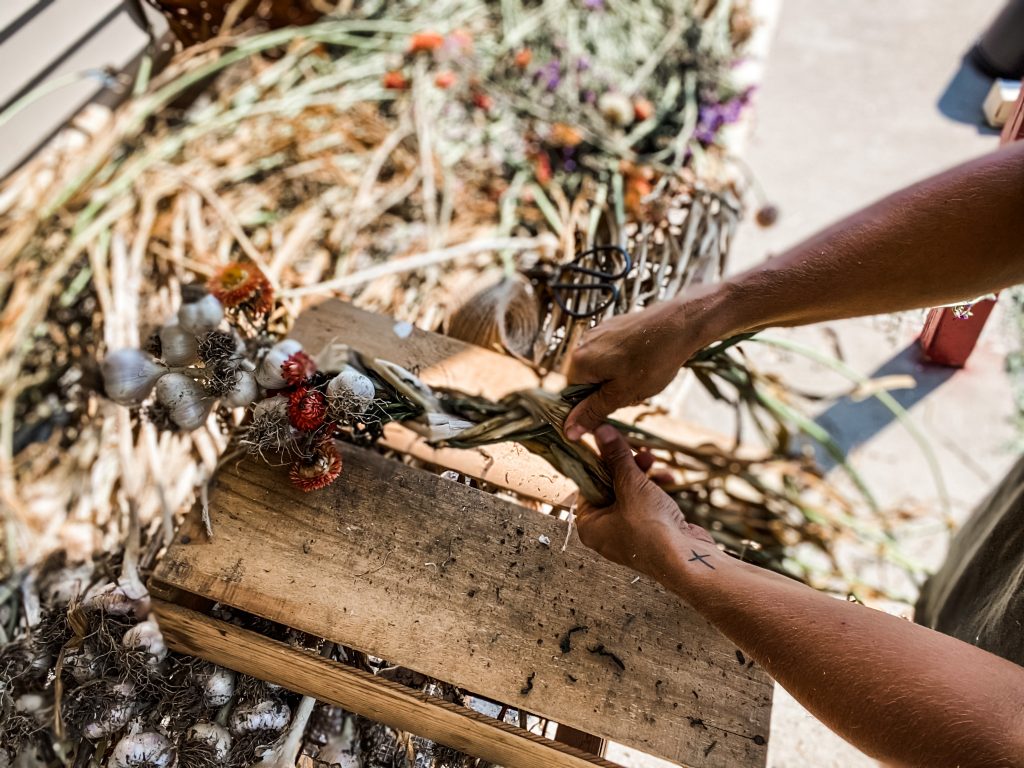
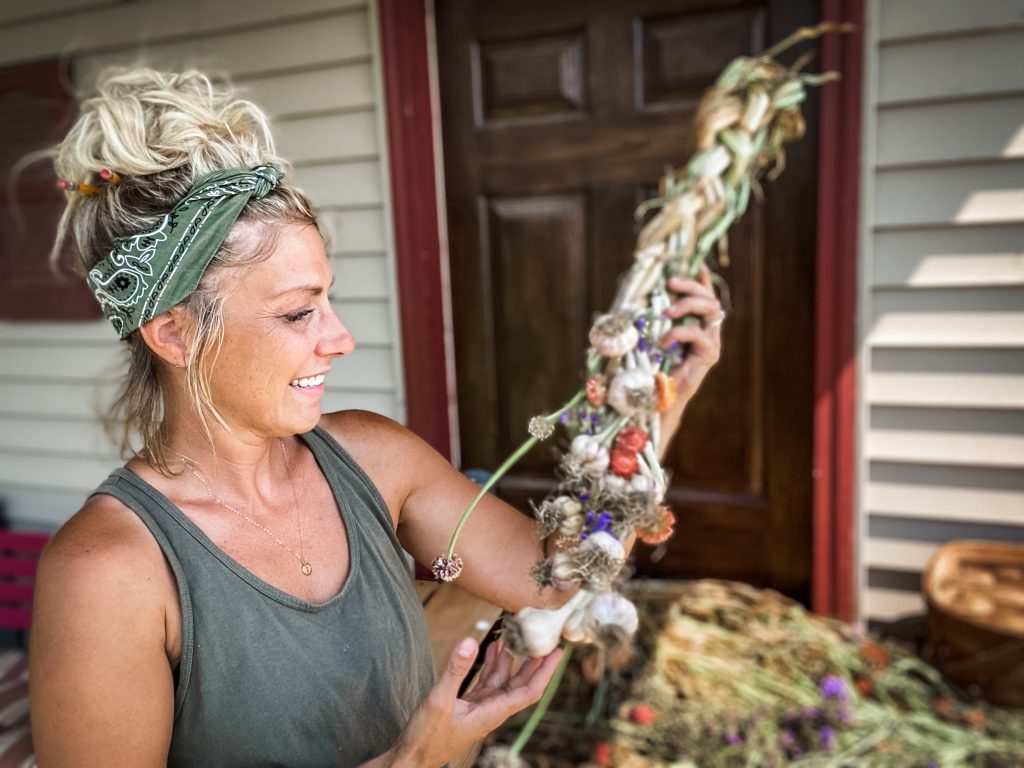
Braid Stems and Hang to Dry
After I add about eleven bulbs of garlic, I finished off the braid securing the bottom of the braid with another piece of twine. I chose to keep the flower heads of the garlic intact, but later on the seeds made a bit of a mess, so I decided to remove them before bringing them into the house.
Finishing your Garlic Braid
This year I bent the stems back behind the bulbs and secured my twine toward the center of the braid. Feel free to play around with how you like to display your garlic braid. There is really no right or wrong way.
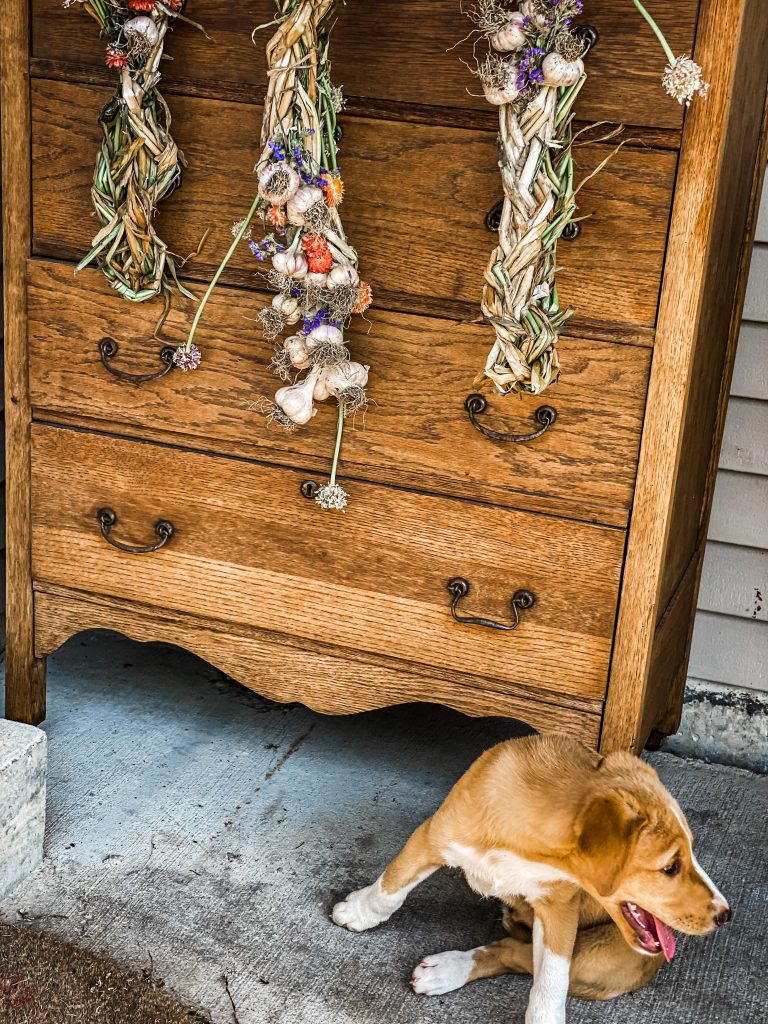
How to Display your Garlic Braid
I loved taking these to our farmer’s market this fall. I did have to do some explaining to folks who’ve never seen them before, but then they really took off. Garlic braids also make lovely house warming, hostess, holiday or wedding gifts. Personally we like just taking them to friends and family’s homes when we get invited over.
How to use Your Garlic Braid
We love using our fresh homegrown garlic and pulling a few cloves off the braid at a time as we need them through out the fall and winter. Adding them to our favorite fall dishes like Chicken Harvest Casserole , my Homemade Spaghetti Sauce or to our from scratch Bone Broth. Buy mid to late winter we have generally used up the braid of garlic and can just toss away the remaining stems and dried flowers.
How to Braid Garlic | The Video Tutorial
Questions People are asking about Braided Garlic
| How long to dry garlic before braiding? As mentioned above, it’s important to let your garlic dry but not for too long so the stems don’t get too brittle. I let our garlic sit out on our shady porch for a few days before braiding. |
| Why should I braid my garlic? The alternative to braiding garlic is storing them in breathable, mesh bags in your cupboard or somewhere cool and dry. Although you don’t have to braid your garlic, these beautiful braids are a wonderful for decorative uses and also motivate us to use our garlic! |
| How long does a garlic braid last? A garlic braid sets you up for long-term storage of garlic! We braid with soft-neck garlic which has a longer shelf life than hard-neck garlic and can be stored for about six to eight months. Check out our How to Harvest and Store Garlic blog for more information! |
More Garlic Posts!
Harvesting Garlic | An Essential Guide to Know When to Harvest Your Garlic
How to make Garlic Scape Compound Butter
Stay tuned for more from Hearty Sol, Right Here! Because social media is sneaky….
MORE HEARTY GARDENING POSTS!
Adding Drip Irrigation to my Raised Beds
No Weeds in My Garden | How I Lazy Garden
HEARTY BUILDS
Building a Flipping Work Bench with FREE PLANS
LIFE ON THE FARM
How We Stay Organized | Living with Less | Purposeful Living
Learn to Sew! Free Simply Sewing Series
Farmhouse Bedroom Makeover | Spring Farm Prep
DELICIOUS RECIPES FROM HEARTY SOL
Making Sourdough | Everything You Need to Get Started
Making Banana Bread and Banana Bars
Our Family’s favorite Hot Cocoa Mix
Honey, Lemon, Ginger Tea and the Benefits
How to make your own Mozzarella Cheese
Pin this Post for Later

Affiliate Disclosure & Content Disclaimer
This post may contain affiliate links from a paid sponsor, Amazon or other program. When you use these links to make a purchase I earn a small commission at no extra cost to you. This allows me to continue creating the content that you love. The content in this article is created for information only and based on my research and/or opinion.
Emily T.
Leave a Reply


DAILY INSPIRATION ON THE GRAM @hearty.sol
it's hip to be square!
[…] How to Braid Garlic for Storage […]