

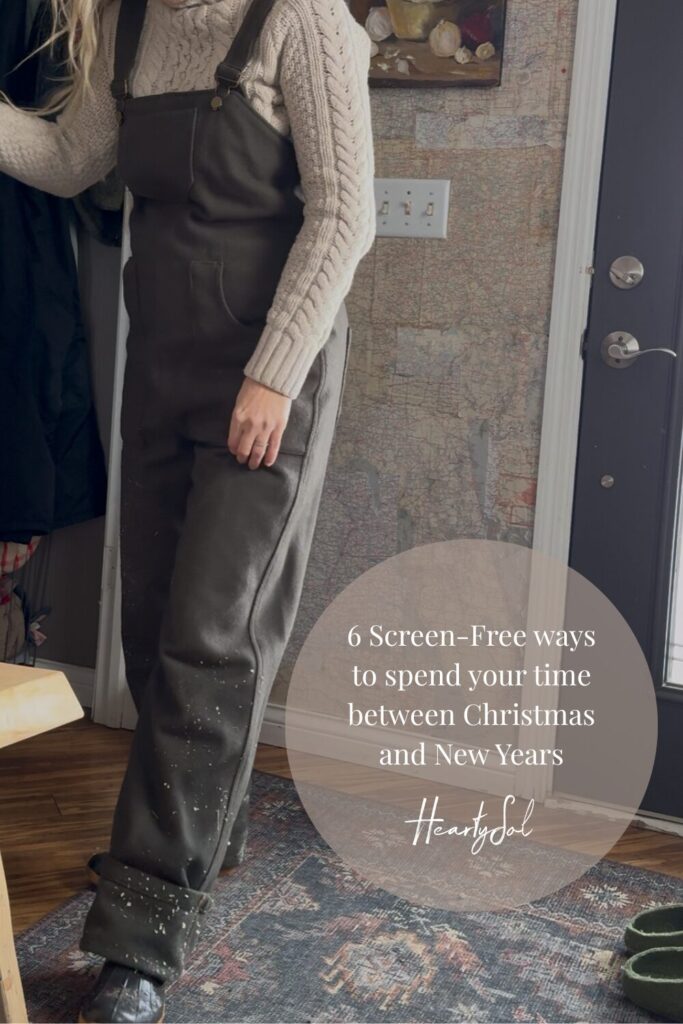
Screen-Free Ideas for the “Week of Nothing” between Christmas and New Years
6 tech-free ways to maximize the well-deserved rest between Christmas and New Years

Making the most of these lazy days
Week of Boredom, Lazy Week, Week of Nothing, whatever you call it, there’s no denying that between Christmas and New Year’s Eve we just want to do… well…nothing! No one keeps track of dates or time, and it all feels like a Twilight Zone.
Hearts full from seeing family and friends and bodies groggy from all of the holiday food, it can feel like all you want to do is park yourself in front of the TV. Now, I’m not saying don’t turn on that movie you finally have the time to watch, but real rest comes from letting your brain rest, too. This means getting off of your screen, if only for a couple hours at a time, and embracing the peace of these quiet, slow days. I’ve compiled 6 tech-free ideas for you and your family to enjoy this unique time of year!
- Paper Stars
- Sewing
- Washable Window Art
- The Art of Snow Cleaning
- Homemade Winter Scented Play Dough
- Homemade Winter Bath Salt

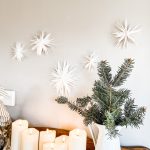
1. Paper Stars
I’ve been experimenting with different ways of making paper stars for a while now. Parchment paper, paper bags, and my newest addition – wrapping paper. These stars can be found hanging all around the house come December! They are simple enough for the whole family to make but look intricate enough to beautifully decorate your home throughout the winter! I like choosing neutral-themed paper so that these stars can stay up during all of the cold months, adding a bit more brightness and cheer to our home!
If snowflakes are more your style check out my Paper Snowflakes with Copy Paper
Parchment Paper Stars
Using parchment paper creates delicate, unique-looking stars that curl at the end. Plus, it’s great to use regular household items! These steps create a more whimsical-looking star that pairs well with any decor. Check out the blog here for a video tutorial!
How to Make Paper Stars Using Parchment Paper
Equipment
- Sharp Scissors
- Glue Stick
- Ruler
- Pencil
Ingredients
- White or Unbleached Parchment paper
- Filament or Fishing line
Instructions
- Cut out the rectangles. The more we made the less we were concerned about the actual measurements- just as long as there were 5-6 pieces that were the same, it works. Here are the dimensions that we worked with:3×4", 4×7", 6×10", 9×16"
- Fold the rectangles in half and stack them together
- Cut triangles out of the edge. Once the rectangles are all folded and stacked up, cut triangles out of the non-folded edge of the rectangles. I really like the more narrow, thin triangles and it really made the edges curl.
- Separate the rectangles and unfold
- Accordion fold each piece, then fold in half and glue the inside of the fold
- Glue together. Once all 5-6 pieces are glued- glue them all together in a stack.
- Fan out. Glue the ends and fan out to create the star shape. Hold the glued ends for a bit to make sure they stay.
- Hang Up. If you are using these to hang up, use a needle or a tiny hole punch to make a hole at the place where the end pieces came together, then use fish line to string up.
Notes
Paper Bag Stars
These large, blooming stars are so classic! I’m reminded of my own crafting as a kid, making these in school and bringing them home to display proudly. There is no missing these large, textured stars once they are hanging up around your house! Find the full blog with picture instructions here

Paper Bag Stars
Equipment
- Sharp Scissors
- Glue Gun and Sticks or a Large Glue Stick
- Hole punch
Ingredients
Instructions
- Count out the Paper Bags. For standard-sized lunch bags, you'll need to use 7-9 bags. The sweet spot for ours has been 8 or 9, so to make sure they can meet at the end without stressing the glue on the other bags. For smaller bags you will use 12-14 bags.
- Add Glue to the back of each bag, along the bottom and up the center.
- Stack and Repeat. Stack another bag on top of your glue, facing the same directions, pressing it in place. Add glue to the top of this bag, just as you did with the first and repeat until you've use up all the bags you counted out.
- Cut as desired. Once you have all your bags glued together, cut the top corners off, forming a point and get creative to make whatever shape you want. You may find a bit of cutting fatigue as you go along, so making 2 stacks of glued bags, cutting them out the same, then gluing them together can help with this.
- Glue the last bag. Open the bags up to make sure they meet at the end, if it seems tight, add 1-2 more bags so not to break the glue seams. Hold the ends together for a good minute to make sure the seams will stay.
- String up. Punch a hold in the the last 2 bags that you glued together and add string to hang.
Notes
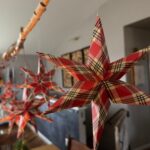
Wrapping Paper Stars
My newest addition to the paper star decor lineup! The kids and I have had fun testing out these 3D paper stars and decided on a red and green plaid wrapping paper
Wrapping Paper Stars
Equipment
- Scissors
- Hot Glue
Ingredients
- Wrapping paper (I like to choose a pattern that allows us to keep the stars up through the winter!)
- Twine or Fishing Line
Instructions
- Cut your wrapping paper into 5 – 7 squares. The size and number depend on how large you want your star. For square size I go for about 4×4 inches.
- Lay your paper flat and rotate it so it looks like a diamond. Take the right corner and fold it over to meet the left corner. This diagonal fold will make a triangle
- Open the paper back up and lay it flat and rotate it so it looks like a diamond again. Grab the right corner and fold it into the middle line so it makes a small triangle shape. Repeat with the left corner. The two triangles will not reach the bottom of the paper, this is correct.
- Now direct your attention to the paper that has not been folded over yet at the bottom and fold it up into the triangle. Repeat step 3 but with this smaller part of the paper (fold the right and left top corners into the center line). Glue these smaller flaps down
- Repeat with the other squares
- Take all of your star points and press them down horizontally so that the smaller flaps become flat, not folded in.
- Take one star point and add hot glue to the top near the flat edge and continue to glue the points on top of each other – just by the flat top, not the entire point
- Unfold your star like an accordion and press it together. You can either glue these last pieces together or staple them – stapeling allows you to fold them up easier for storage
Notes


2. Sewing
I love the peace of winter on the farm, the season where, instead of spending my days running around outside, I can enjoy watching the Minnesota snow fall from the comfort of my living room. These quiet moments are where I feel most refreshed, and I use this to fuel my creativity. I utilize these cold winter days to focus on smaller handmade projects, specifically sewing I need to catch up on. Even if it means just sewing up my husband’s snow pants, the sewing kit finds its way upstairs after Christmas!
One of the most meaningful sewing projects I’ve embarked on is making Waldorf Dolls. I stumbled upon these natural-fiber-made dolls years back when my kids were younger and I was searching for a Christmas present to make for them. They were created as a part of the Waldorf education system in Germany and they aim to spark creativity in the kids who play with them. Because of their simple look (originally made with no faces), kids have the opportunity to imprint their own imagination on their doll.
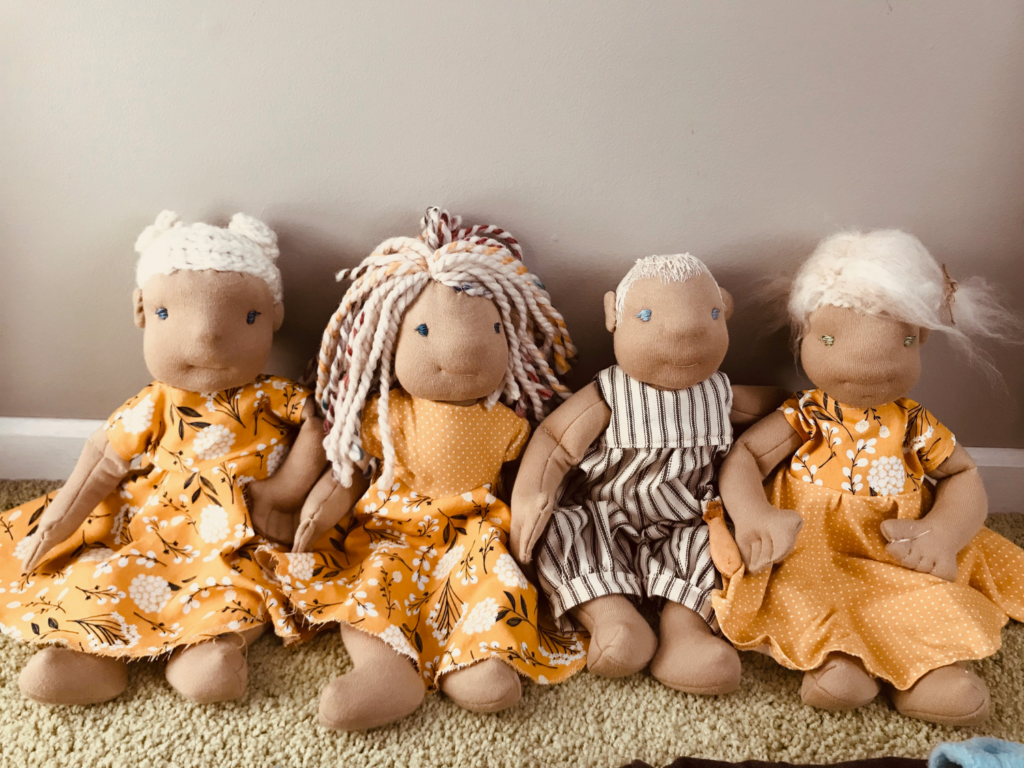
This may seem like an intimidating feat but trust me, the hardest part is always starting, you’ll be amazed what you can accomplish if you commit to learning a new skill! The process of making these simplistic looking dolls is chunked into doable steps and you can have the satisfaction of making clothes for them that embody the style of your children!


Sewing Series
There’s no time like the present to learn a new skill or sharpen skills you haven’t practiced in a while, especially this next week when you know you’ll have a couple days to put towards sewing. I have heard so many times how people wish they could sew or the projects they want to start if they only had the basics down. Well, friends, this is exactly what my sewing series is about – equipping you with foundational sewing knowledge. Each blog below focuses on specific sewing projects and skills that you can use for just about anything!
- Sewing Essentials
- Threading a Sewing Machine
- How to Sew a Seam
- How to Sew a Hem
- How to Sew a Pillow Cover
- How to Sew on a Patch
- Make Basic Curtains
Handmade Items you can work on for the new year
Maybe you have a loved one’s birthday coming up, or you have some fabric ready to sew into a beautiful top. Whatever motivation you have, with a solid sewing foundation, you can start crafting your own thoughtful handmade items for those in your life or yourself!
- Reversible Apron
- Bow Tie
- Pattern Draft a clothing item
- Cozy Winter Dress
- Children’s Vest
- Tank Top
- Flat Bottomed Zipper Pouch
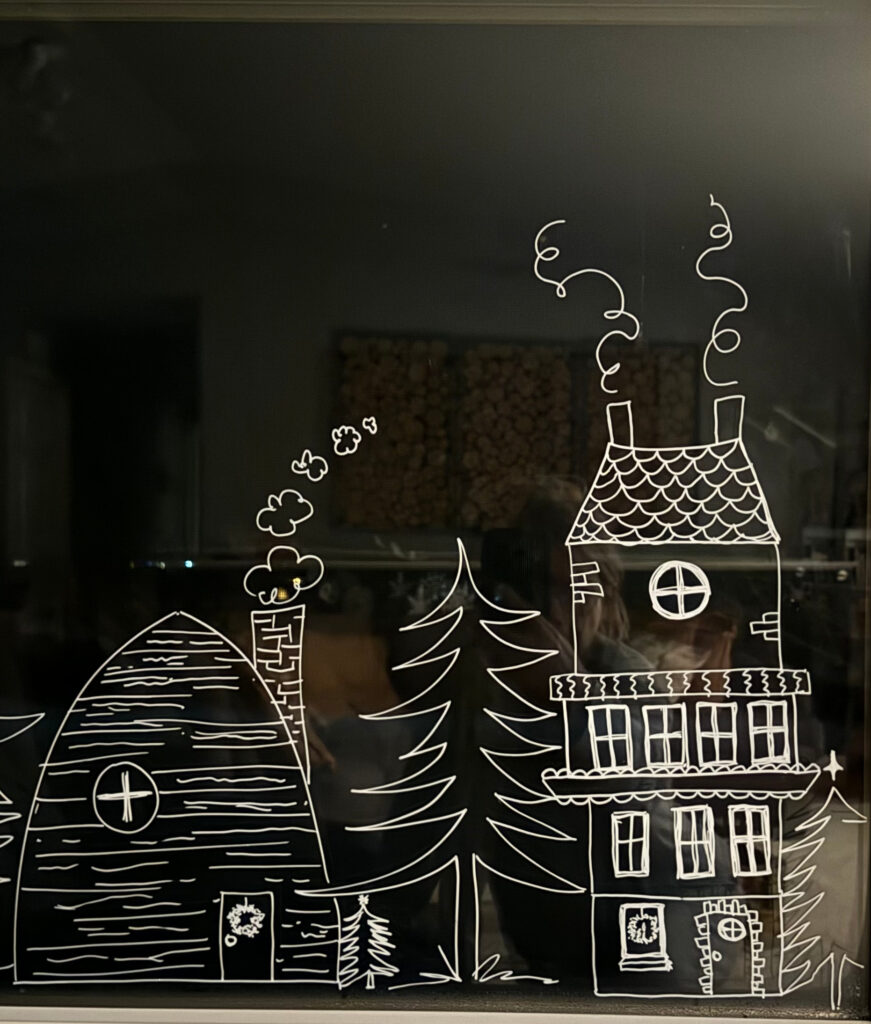
3. Washable Window Art
There’s nothing better than Gluggaveður, a Swedish word meaning “window weather,” weather that leaves you in awe, watching out your window as nature dances before you. In the absence of daylight, it sure is nice to admire a bright white winter scene looking back at us from the window! Window Chalk Art has been one of our favorite activities the past couple of winters and my kids love this unique medium for drawing!
You’ll need…
- Washable chalk markers (white and colored options)
- A damp cloth or window cleaner for corrections
- Printout or template for design inspiration
- Tape (for securing templates to the window)
and a whole lot of creativity! Whether it’s a tic tac toe board or a hand-drawn winter market, chalk window art is an easy and satisfying way to get the whole family’s creativity flowing!
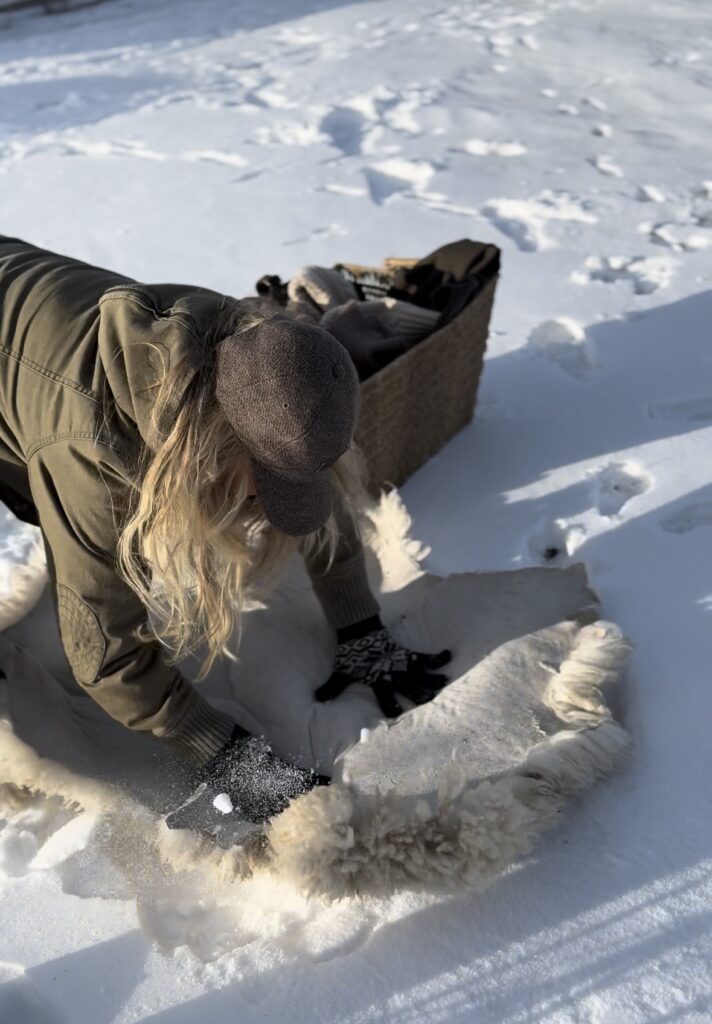
4. Learn the Art of Snow Washing
There’s no better way to wake up your senses and your mind than getting some fresh winter air, something you might find yourself craving on these lazy days. Besides cracking our windows for 5-10 minutes each day, I also take part in Snötvätt, the Nordic tradition of snow washing. When there is a good amount of snow, I will take our wool hides off the beds and benches and lay them in fresh snow.
If there isn’t enough snow in your area right now, save this trick for later this winter! The snow removes dirt, lanolin excess, and debris. I let them air dry for a bit but then bring them inside to finish so the UV doesn’t toy with the whiteness of the wool. This process lifts impurities and helps restore your wool hides with a bit of winter freshness! A great excuse to get outside!
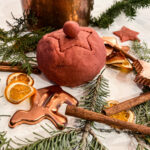
5. Homemade Playdough with a Winter Twist!
Calling all those with younger kiddos or anyone who loves the nostalgia of Play-Doh! This has become a traditional “after Christmas activity,” for my family – it’s simple, winter-scented, and so, so satisfying. This is an activity that gets the whole family off the couch, because let’s be honest, you’re never too old to get excited over Play-Doh!
This recipe has a specific winter twist that we add in when making it this time of year. For the water I will take a strained 2 1/2 cups from our winter simmer pot! The only thing better than play dough is play dough scented with staple winter aromas of orange, cedar, cranberry, cinnamon, cloves, and balsam!
Homemade Play Dough with a Winter Twist
Ingredients
Dough
- 2.5 cups Water
- 1 1/4 cup Salt
- 1 1/2 tbsp Cream of Tartar
- 2 1/2 cups Flour
- 5 tbsp Coconut or Vegetable Oil
Winter Scent – Simmer Pot
- Dried Oranges
- Cedar Bits
- Cranberries
- Cinnamon Sticks
- Cloves
- Balsam
Instructions
- Stir all of the dry ingredients together in a large bowl.
- Boil 2 1/2 cups of water (option to add strained water from winter potpourri) and then add 5 Tbsp. of oil to the pan.
- Pour the hot water with oil into the bowl containing the dry ingredients and mix. Add food coloring if desired.
- Allow this to cool a bit before kneading with little hands.
- Knead until the desired consistency is acquired.
- Store in an airtight container, baggie or jar
Notes
Get a more in-depth rundown of this family favorite activity here


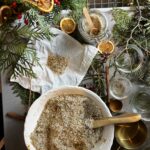
6. Winter Bath Salt
This winter-time bath salt brings all of the best holiday and winter scents right to your bathtub. This time of year I begin my hunt for products and recipes that bring natural winter scents into my home. This is a fun activity with a mix of cinnamon, balsam, cedar, rosemary, orange, and vanilla that presents you with a wide variety of nourishing benefits for your muscles and skin.
I use my coffee grinder to grind up my ingredients and then tie this beautifully scented salt mixture into muslin fabric before putting it in the tub. Then it’s time to relax!
How to make Wintertime Bath Salt
Equipment
- Jar to store
Ingredients
- 3 cups Epsom Salt
- 1 tbsp Cinnamon
- Handful Balsam ground
- Handful Cedar ground
- Handful Rosemary ground
- 5 – 8 Dried Oranges ground
- A few drops Vanilla
- Drizzle Olive Oil
Instructions
- Simply mix all of the ingredients together until evenly combined.
- Add to a large jar or split into small jars to gift. I found these little jars with wooden spoons on Amazon to finish off this perfectly cute and homemade gift!
Notes
Closing Thoughts
As much as we joke about this “lazy week,” well-deserved rest is not a laughing matter! However you are winding down as the year comes to an end I hope you can use this time to refuel your brain and body, connect with your family through communal activities, and take a deep breath knowing you are ready for the new year ahead. Blessings to you and your family!
Pin for Later!

Affiliate Disclosure & Content Disclaimer
This post may contain affiliate links from a paid sponsor, Amazon or other program. When you use these links to make a purchase I earn a small commission at no extra cost to you. This allows me to continue creating the content that you love. The content in this article is created for information only and based on my research and/or opinion.
Emily T.


DAILY INSPIRATION ON THE GRAM @hearty.sol
it's hip to be square!
View comments
+ Leave a comment